Transferring the steam library to another drive. How to transfer Steam games without installing them again
The Steam gaming service offers a convenient way to move games between HDDs (SDDs) without the risk of data corruption or loss
Previously, to transfer a game on Steam from one disk to another, you needed to use third-party programs. For example, Steam Tool Library Manager, which, using links in the NTFS file system, moved games while maintaining full functionality.
Today, Steam offers a built-in function for this. It's as simple as choosing a new installation location. By default, applications are installed in the C:Program FilesSteam (x86)SteamAppsCommon folder. However, you can choose another path.
First, you will need to create a new Steam folder on the disk where you plan to move the games. The service does not recommend using an external hard drive, as this may cause performance problems.
Creating a Steam Library Folder
First of all, to make changes to the Steam Library folder, you need to pause any downloads.
After that, click on “Steam” in the upper right corner of the screen, find “Settings” - “Downloads” - “Steam Library Folders”.
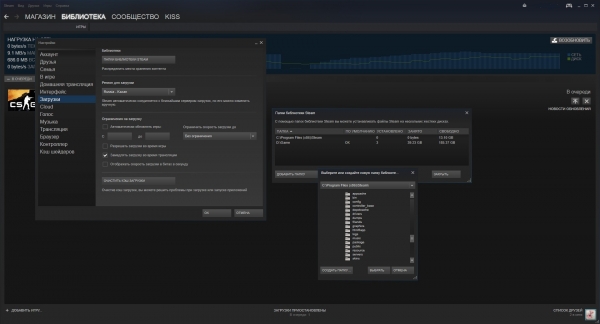
In the window that opens, click “Add Library” and proceed to selecting the disk on which the new library will be created. Click “New Folder” and give it a name. Recommended name SteamGames to make it easier to find.
Having decided on the name, click OK – “Select”. This will select the newly created folder.
The selected location should appear in the Libraries Folders folder list. If everything is visible, click “Close” and exit the settings.
Moving games to a new library
We have a second Steam library on a different drive where we can move games without worrying about losing game data.
We find the game we want to transfer from our library. Right-click on it and find “Properties” – “Local files” – “Change installation folder”. A pop-up window will then open asking you to select your new Steam library and click “Move Folder” which will begin the moving process. When the indicator reaches the end, the Steam game will be transferred to another drive.

That's all. The process can be repeated as many times as necessary. Also, when installing games, you can now specify the location where you want to download games in the future.
Manual movement
You can also completely transfer your Steam library manually. To do this, we close the service. Cut out the SteamApps folder from its original location and move it to a new location. After that, launch Steam, log into your account and check the integrity of the game files. But don't forget to make a backup, if something goes wrong, all your data may be lost. That's why we recommend using the built-in game transfer feature, which is safe and secure.
There will come a time when, thanks to Steam games, you won't have any space left on your hard drive. Then you will need to either delete unnecessary ones, or simply transfer them to another HDD. But how to do this if they are tied to the created library? There are ways, including those offered by the service itself.
As you know, after you download Steam, it creates a library where all the toys are downloaded. This is quite convenient from a systematization point of view. However, it is then difficult for users to transfer the game to Steam to another drive: they have to delete it and download it again. After all, if you simply transfer the folder with the program to another location, the service will throw an error when starting. Let's look at three methods that will allow you to avoid this error.
Powered by Steam
The service recently added an option that allows you to automatically transfer games to another directory or to another HDD. It is not performed automatically, but nevertheless almost always fails. You must first create another library, and then transfer it to a new section through the game properties.
- Click on the Steam button, which is located in the upper left corner.
- Select “Settings” from the drop-down menu.

- In the settings window we find the “Downloads” section.
- Under the “Libraries” item there is a link “Steam Library Folders”. Click on it.

- In the list that opens, you can see a list of all directories and see how much space they take up. Click on the “Add Folder” button.

"Add Folder" on Steam
- Select the hard drive and its partition in which the new library will be located.

- Exit the settings and go to the list of installed games.
- Right-click on the toy that you want to send to another location and select “Properties”.
- Open the “Local Files” tab.
- Click on the Move install folder button. By the way, it was not previously in the service.

"Move install folder" on Steam
- In the library selection window, select a new location for our game.
- Click Move folder.

"Move folder" on Steam
- The transfer process will start. If the game is large and the HDD or SSD is connected via USB, this may take some time.

- At the end they will tell us where we moved the game and how many files were transferred.
The main thing is not to turn off the computer while copying files. Otherwise, the transfer of games may be disrupted, and its data may be damaged.
The method appeared not so long ago, so some users may have difficulties with it. Plus, perhaps you haven’t updated Steam for a long time and for some reason you don’t want to do it. Then there are two more for you alternative methods, one of which will be slightly faster.
Steam Tool Library Manager
This is a special utility that automates the process of creating a library and sending selected programs to it. Quite convenient, it takes up very little space and does everything relatively quickly. If you need to transfer many toys at once, it is better to use Tool Library Manager.

That's all, as you can see, here it happens even faster. Games then, as a rule, launch without any complaints.
It is the most popular gaming service. With its help you can conveniently purchase, download and install many computer games. And the prices of this service, especially during periods of sales and promotions, are so attractive that you will very quickly have several dozen games on your disk. The only trouble is that modern games take up so much disk space that disk space begins to rapidly disappear. There is only one way out - move the games from the default folder to another location.
You won't be able to simply move the game folder, as this will most likely make the game inoperable. Therefore, to solve this problem there is a special utility called. In its work, the program uses the link creation function, available for file system NTFS, so your drives should use it. In principle, everything can be done manually, but using the utility is much easier and more convenient.

Actually, the mechanism of operation is simple and completely clear from the screenshot. After launch, the utility automatically finds your installed games and displays a list of them in the left panel. You select a new location for the game folders on the right and press the button Move to Storage. After some time, the data is moved to a new location while games remain fully functional, and you enjoy the free space on the disk.

Works in operating systems Windows 7/Vista and weighs 380 kb. You can download it.
Solid State Drives (SSD) capacities are constantly increasing, but so are the size of games. Modern projects AAA storage typically takes up to 20 GB, and many can exceed 60 GB, especially after factoring in downloadable content.
It may be ironic, but it is large games that load better on fast media, which surprisingly quickly becomes full, especially if you are dealing with a small SSD, for example, 250 GB. This disc can hold 4 games, comparable in size to GTA V.
Luckily, Steam has made it easier to move games. You will no longer need to open the Windows Command Prompt or download third-party utilities, although we will also cover these methods as they still work.
This procedure is not necessary, but is a good precaution. The most convenient way is to simply copy the Steam or SteamApps folder (which contains the games) to a backup folder through Windows Explorer. The Steam client also provides a built-in backup and restore process that will allow you to select your installed games and save them as backups. This utility splits game data into CSM/CSD files that are the same size as CDs and DVDs. It is also possible to select one large save at once.
To do this, you need to: go to the Steam library > right-click on the game > create a backup copy... > Select games to backup and follow the instructions.
To restore these files as installed Steam games, you need to go to Steam Library > Backup and Restore Games... > Restore Previous Backup > Specify Backup Files > Follow the prompts.
Moving a Single Game Between Discs
- Go to Steam > Settings > Downloads > Steam Library Folders
- Create a new Steam library folder on the new drive (you can right-click on one of these folders to select it as the default installation path, although the next time you install, Steam will ask for the installation path).
- Moving already installed games to a new disk:

Right click on the game in your Steam library > properties > local files > move installation folder... > select path > move folder
Moving a game from an SSD
The most in a simple way will do all of the above by using the built-in Steam function. However this method also works:
- In Windows Explorer, move the game folder from your SSD back to the steamapps\common folder or another library folder that Steam recognizes.
- On Steam, right click on the game and delete its contents, which won't actually delete anything since you've just moved all the game files.
- Install the game again, but specify the installation path to where you moved the files. Steam will check your data and won't download anything.
Moving the entire Steam folder
- Close Steam and navigate to your Steam folder or library through Windows (most likely C:\Program Files\Steam (x86)).
- Copy and paste the Steam folder to a new location (rename the old folder and keep it as a backup or delete it).
- You can run Steam.exe from the new folder, or you can run the Steam installer and specify a new location.
Something went wrong with your Steam installation
- Copy and paste the SteamApps folder into your backup folder
- Uninstall Steam
- Install Steam and copy the SteamApps folder back to your Steam directory
If the game is damaged, Steam can check the integrity of the files:
Right-click on the damaged game in your Steam library > properties > local files > check integrity of game files...
If it's been a while since you did this, make sure the process isn't slowing down Steam.
Old method (no longer needed): using mklink
Around the time SSDs started to take off (over a decade ago!), Steam didn't have a built-in method for moving games between drives. This feature was only added in 2017. Instead, gamers had to use the Windows command line command mklink, which connected one directory to another, so when software accessed location A, it was redirected to location B. In other words, Steam recognized the game as if it were installed in original directory, but launched it from a different drive.

Now this method is outdated, although it still works:
- Create a folder in the desired game installation path (for example D:\Games\Steam)
- Go to SteamApps (C:\Program Files\Steam\steamapps\common) and copy the game you want to move to the new drive (don't leave the game in the old directory)
- Once copying is complete, go to the command line and enter mklink /d “LINK” “TARGET” - (for example: mklink /d “d:\games\steam\steamapps\common\fullmojorampage” “e:\games\steam\steamapps\ common\fullmojorampage”)
Canceling such a connection is as simple as deleting it in C:\Steam\steamapps\common.
Hint: You should be able to see the connection by entering the dir command.
Other old utilities for moving/copying games
Download Steam Mover– Before Valve decided to do this, you could move games using this utility. The program has a simple interface and makes it easy to move games or create links (like the mklink approach described above). Version 0.1 of Steam Mover was released in April 2010, and although it has never been updated, it has been downloaded hundreds of thousands of times and few have complained about the utility's performance.

Download SteamTool Library Manage– It is identical in function to Steam Mover, it has the same interface and methods. The program uses NTFS connections to create a connection between the new and old locations (the utility only works with NTFS partitions).
Download Gamesave Manager – GSM can automatically detect saves for 4764 games and greatly simplifies the processes of copying, restoring and moving. The utility also provides other features, including the ability to move Steam games (it also uses links or NTFS connections).
155
I just bought new computer, and I transferred everything except my Steam games.
I looked in Program Files/Steam/ and found a folder full of games I downloaded, but I don't know if it's possible to simply copy those folders from one computer to another (seeing as how many other apps won't work if you do that). or is there another recommended way?
I really don't want to overload all my games. I don't have the time or bandwidth to download 20GB on a 1.5Mbps connection.
Is it possible to contact Valve and get a disc with games on it?
12
Please note that this question (or any of the current answers) doesn't say anything about your personal game files, such as save games. These files may be located outside of the Steam folder. For example, my Amnesia save games were in my profile folder and had to be transferred separately from the Steam games. The location of these files will probably usually vary depending on the specific game. - Jeroen 02 May. 12 2012-05-02 21:30:50
8 answers
Sorting:
Activity
12
Install Steam, and then simply copy the directories above to a new computer, use the same ones... etc. file paths
And you will need to delete the ClientRegistry.blob file that you copied over from your old computer. Don't worry, Steam will create a new one when you launch it on your new computer.
Or re-download the game after installing Steam
6
You should be safe to just copy the game files - but should worse come to worse, you can always just re-download as many times as you need/want. (This is what I always do.)
4
I've updated my question to include "I really don't feel like reloading all my games. I don't have the time or bandwidth to download 20GB over a 1.5Mbps connection." - – joshhunt Aug 2 09 2009-08-02 00:03:49
101
I'm copying files like you suggested all along and that's fine. Any files that don't match are usually re-downloaded from Steam, so it will still update the bit after a new copy. If you don't want everything to show only sounds and maps (which take up most of the space), you can just grab the .gcf files for each game from Program Files/Steam/SteamApps.
Steam also has a Backup feature that you can use. The created files can be transferred from PC to PC and restored on any of them.
6
Please note that the gcf files only contain all data for Valve games up to Left 4 Dead (which end up in the "shared" folder). All other games are in the shared folder and there is nothing more you need to do than copy them. There is a gcf file for each of the other games, but they are very small, containing only basic information, no data. - Gnoupi 12 Jun 10 2010-06-12 14:48:24
46
Here is Valve's official answer on how to move the location where Steam games are installed. While the article is written as if you were moving from one directory to another on the same computer, the principles would be the same for moving downloaded content from one computer to another:
0
Unfortunately no. When you do the usual Steam installation, it does things like install a service Steam updates, which allows the Steam client to update itself even when launched from restricted user accounts. Trying to move your games to another computer will not force Steam to reinstall the service there (other things may also be missing). The immediate consequence of this move is that Steam refuses to start with non-administrative accounts (complaining about the lack of service), which is unacceptable. - AnT 24 Jan 15 2015-01-24 20:20:11
22
The unofficial one is up copy only your complete steam folder to another computer/hard drive, without the need to reinstall steam.
I've done this many times and it also works on an external hard drive, it's easy if you want to show some games to your friends when you don't have your PC with you.
9
Download Steam Engine from the techmixer website:
You can check the information first.
This was written by a Steam user and posted on the Valve Developer Forum.
It allows for easy transfer between individual folders and/or hard drives and is free and portable.
0
Noticed that you may be a Mac user - Check out the Steam dev forum for Steam_Mover - Lee Oleary Dec 14 10 2010-12-14 18:04:39
3
After reading all the answers, I think I had a unique situation where I had already started downloading the game. Attempts to copy the game still had a couple thinking it should download.
So here is a list of steps that I think includes the other answers and my situation. Having accepted this, I will refer to the material as source and purpose. The target is the computer or files you want to copy games to.
Open steam on the target PC.
First we have to make sure that the game is not on the target PC due to the download being started. Right click on Game/Properties/Local Files and if enabled "Delete local" gaming content", click on it and follow this process. The game should still show up in your library, now just released.
Method 2
- Copy the "shared" folder and "appmanifest_570.acf" from computer 1 to your hard drive or USB. This material is located in the steamapp folder. Most often the address will be C:\Program Files (x86)\Steam\steamapps\
- Now go to PC 2 and install par.
- Once steam is installed on PC 2, close it completely and then paste this copied "shared" folder and "appmanifest_570.acf" into the steamapp folder on PC 2.
- Once this procedure is completed, you will be able to play Dota 2 on PC 2.
Whichever method you choose, I suggest you check the game cache before you start playing. You can do this by going to Dota 2 Properties >> Local Files Tab >> Check the integrity of the game cache.
If you encounter any problem or error, this post contains the complete procedure with images and troubleshooting guide.