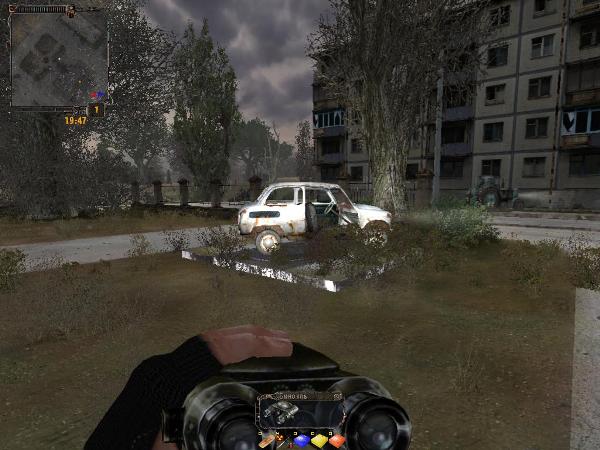
How to increase the maximum carry weight in the stalker. How to increase the maximum carry weight in the stalker Find and kill the swamp creature
Very often, players have to face the problem of how to increase the weight in the stalker shadow of Chernobyl. This problem is being solved. Don't panic.
This article is devoted to this problem. In it, we will reveal in detail and in detail for the stalker the shadow of Chernobyl how to increase the carry weight. After all, the world of S.T.A.L.K.E.R .: Shadow of Chernobyl is very diverse in terms of types of weapons, artifacts and other goodies. I don’t want to miss the opportunity to study each weapon in more detail during the game, test it, criticize it or elevate it to the status of the best. And the choice is great. Therefore, very often the heroes are faced with the choice of dropping something the least expensive from the backpack in order to fit a newly discovered item or artifact into the backpack.
There are several ways to increase the weight in the game stalker shadow of Chernobyl and avoid throwing various usefulness or uselessness out of the backpack (for someone else).
Especially for you, we have made a selection of all the ways for the stalker shadow of Chernobyl how to increase the weight of the backpack.
The first way is not the most convenient for the player. But he does not change the game settings, which then entail constant crashes. Unload everything superfluous from your backpack into the corpse and drag it along with you. Of course, you will have the speed of movement, like that of a snail. To do this, approaching the body of the dead, open his backpack by pressing the "F" key. Throw all the necessary things into his backpack and close the backpack window. Next, hold down the key combination "Shift" + "F" and move in the desired direction. This key combination will allow your hero to drag a corpse with a full inventory anywhere. And to get something you need from the inventory of a corpse, just release the buttons held down and open the inventory.
But why litter the inventory with unnecessary things? Get rid of them. Real stalkers don't carry a mountain of rubbish with them.
The second way to increase the weight of the backpack in the stalker shadow of Chernobyl is to have an exoskeleton. It provides a unique and expensive suit with the greatest physical protection. You won’t be able to run in it, but it will help to increase the maximum tolerable weight. But slowly but surely you will move through the expanses of the exclusion zone.
The third way is cheating. It changes the settings in the game folder. It is necessary to correct the actor.ltx and system.ltx files through the standard Notepad application. We are looking for a folder on our computer with the installation files of the game, and in it a folder called "gamedata". Next, open the "config" folder and find the "creatures" folder. It contains the “actor” file, which must be opened using the standard Notepad application and there already begin to edit the weight as follows: in the max_item_mass line, replace the number 50 with 500, and in the max_walk_weight line, set exactly the same value. Now in the “config” folder we find a file called “system” and also open it through Notepad. In the max_weight line, set the value to 500. This action is necessary to display the number 500 in the inventory during the game, although this is not necessary. In more detail, instructions for changing the mood are revealed in the plot:
The fourth way is to install the mod. You can download and install for the stalker shadow of Chernobyl to increase the carry weight of the mod. To do this, download the stalker shadow of Chernobyl increase the portable weight of the mod and unpack it into the game folder. The modification allows you to increase the carry weight up to 500 kg! But very often it becomes uninteresting to go through the game - you have collected all sorts of good, run and shoot. Boring and monotonous.
Now you know how to increase the weight in the shadow of Chernobyl stalker. We have listed all the ways and we really hope that they will help you with the passage of the legendary and cult game. Enjoy your time in S.T.A.L.K.E.R.: Shadow of Chernobyl!
Complete walkthrough STALKER Secret Paths 2 on the website website
Walk with the Forester to his house in the forest
The forester gets off the bus and looks through binoculars. Later, he starts to run, and you follow him. The first stop is near the green Niva, not far from which, the blood of the stone will fall. After one more observation through the binoculars, the Forester again runs further. Now on the road it is possible to find a twist. The forester stops again, we communicate with him, and a passage to the "Forest" level appears. We leave for the forest, the Forester appears behind you. We enter his house and communicate with him. After the dialogue, the task appears to find his brother, but you won’t find him without a gun and body armor, so you have to work for the Forester.
Find the mandrake root

The forester sends you to look for the root, and gave you a leather jacket and a vertical. On the way it is possible to admire the forest and anomalies. Strelka, who has not come to his senses to the end, will stagger along the road from time to time. On the way you may meet blind dogs or wild boars. Be careful, the stamina and power of some monsters have been increased. We are approaching the ravine, and we are looking for a mandrake, which is located under a stone that you will immediately notice in the ravine. By the way, before picking up the root, make the sound quieter. When you have a root, wild boars run out. We deal with them, and return to the Forester. We communicate with him, the task is completed. We communicate with him again, and we get a new quest.
Find Associate Professor Vasiliev
This time, the old man asked to find a courier from scientists hiding in a cave from mutants. We head to the place marked on the map, and we see a stone, the path to which closes the anomalous field. On the bolts we penetrate to the stone, and we observe a small hole below. We squat and penetrate it deep into the cave, where we observe Vasiliev. Here a surprise awaits you: Vasiliev, saving his own backside, dropped his backpack. And now we have to move together with him to Yantar for medicines for the Forester.

Escort Vasiliev to the camp of scientists on Yantar
We follow Vasiliev. On the way, you turn on the music, which, together with the hallucinations of the protagonist, creates an eerie atmosphere. After a while, the ecologist stops. From the dialogue we learn that we will get to Yantar through a cave with land in a swamp. Again we follow Vasiliev straight to the center of the swamp and again we communicate with him. After the dialogue, we "dive" into the cave and appear on Yantar.
This is where the side quest "Help Vasiliev fight zombies" appears. Defeat the Snorks with the double-barreled shotgun for the first time. It is possible to take away a machine gun from zombies.
After completing this task, he destroys a couple more zombies, and then it will already be possible to talk with him. After the dialogue, we run after him into the bunker. As a result, Vasiliev runs into his "booth", and you go to the head of security Den, who will send Strelok to the already legendary Sakharov. In addition, Kruglov will be in the bunker. We approach Sakharov, talk with him and get 2000 and medicines for the Forester.
Deliver medical supplies to Forester

The way back will have to be found without marks on the map. Sakharov suggested that the exit to the forest is located in the eastern region of Yantar. On the right side of the road there will be a lowland with a broken bus. We enter behind the bus, and a point appears on the map with the road to the Forest. We go to the forest and hand over the Forester medicines, then we get a new quest.
Take a box of provisions

Scientists did not give out the arrow of food, so you have to move to the Dead City and find the cache of the Forester. On the way, you can run into the controller, be careful. Upon arrival in the Dead City, you are met by three stalkers from the Wanderers group. After the dialogue, you are led to some Leila. We arrive at their base, communicate with Leila. And here it turns out that they have already found our grub and just like that they will not return it. To be worked out. The arrow is sent to the head of the security Demon to help him clear the city of mutants. Accordingly, the quest "Find the Demon" arises. Finding which is not difficult, it is marked on the map.
The demon gives the arrow to the abakan and an improved jumpsuit, as well as the quest to clear the five-story building from zombies. The building to be cleared is located near a building with a broken roof. You don’t need to enter the premises in the building, all zombies will be in the stairwell. Just climb up the floors, destroy the zombies, and return to the Demon. We communicate with the Demon, and return to Layla, who gives the box and directs the Strelok to the comrade who brought him here. Only he knows how to return to the forest. It can be seen by going down the stairs. We communicate with him, and he takes you to the transition point into the forest. We go there and communicate with the Forester. Mission completed.
Find Grieg
Guide Grig is marked on the map, so finding him is not difficult. From the dialogue with him, it becomes clear that the traces of brother Strelok must be sought in Pripyat, where Grig does not want to take him, however, he has the opportunity to demonstrate the path from the Dead City to Pripyat. However, not for that.
Find ten dog tails
Look for dogs not in the city, but in the surrounding area. We hand over the tails to Grieg, in exchange we get information about the road to the city of Pripyat. You have not been to the cordon yet, but you are already going to Pripyat. First, you need to get underground in the Dead City. Not far from the house where the conductor is, there is a square with a fountain. Not far from which there is a Cossack, we approach it, and it takes you underground. We head along the tunnel to the end. You are transported to another tunnel. Again we head to the end, and the download begins.
After loading, the Shooter comes to his senses in the bus, and some guy is standing nearby. We communicate with him, and it becomes clear that the Strelok fell into the funnel, and all his items and means were torn apart. And here is the most fascinating: the stalker who found him, a member of the Monolith. And now you are offered to overcome the test to enter the Monolith.
Kill a flock of snorks in the city of Pripyat

Snorks will have to be destroyed without Colt armor. We head to the Ferris wheel. As it turns out, the problem is completely solvable. The Colt of the Monolith is quite powerful, it kills the Snork from the first hit in the head. They are also good to destroy with a knife, with the right mouse button. After the snorks are finished, return to the bus and report back. Monolith reports that the shooter overcame the test, and you appear in Chernobyl, in the Chernobyl sarcophagus.
Chat with Charon
The shooter is now a Monolith. We head to Charon, who reads a sermon to you, after which we receive a quest. Clear the lower floors of the sarcophagus from the burrers and find the stolen decoder. Before the task, it is possible to quietly destroy a couple of non-quest characters who will have a monolith exoskeleton and a good gun. For now, listen closely to find the decoder.
We go down the stairs. Then we head up to the place where there will be a turn to the right and to the left. We head to the left, enter the hall with pipes, and immediately turn to the left. There is a staircase leading down. We go down along it into the hall with pipes. We head forward, and on the left side there will be a “room”, in which there is a decoder behind the barrel. In the same hall with pipes, there is a wooden box with good artifacts. Next, we head and eliminate the burrers, who are still alive until this time, and return to Charon. Burers die from the first hit in the head.
Clear Chernobyl 2 from incorrect
The task is issued by Charon. First, we rise up into the room with the monolith. Later, we jump into the teleport and head forward, go through a hole in the wall and find ourselves in a hall with large windows. We head along it to the end, and there is a transition to the Chernobyl nuclear power plant, where we head to Solomon, which is marked on the map. We communicate with him and run away to destroy the infidels. After it was over with the stalkers, we go to the Sarcophagus, we head to Charon, we report that the task has been completed.
Infiltrate the monolith's control bunker and clear it

Before the mission, Charon gives you an extremely good anomalous Winchester. We go to the Chernobyl nuclear power plant. On the map there will already be a transition point to the bunker, in which we take out everyone in order. There will be zombies, burrer and bloodsuckers. Return to the Chernobyl nuclear power plant, then to the sarcophagus. We communicate with Charon.
Talk to Mervin and complete his tasks

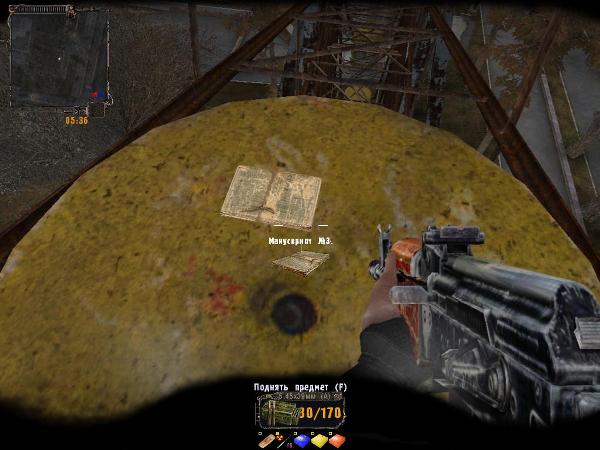
Marvin is located near the Monolith, it is marked with a yellowish dot on the map. He will give you a quest to find the manuscripts in several places and deliver them back. Before searching for each manuscript, he will move you to the part of the level where the manuscript is located. Each time we find the manuscript, and back to Mervin. The first one will be easy to find, it is located behind the column. After raising it, you will be transferred to the highest structure from which you have to jump. The second time Strelka throws a radar on the roof. We go down to the level below. The manuscript is best seen before you go down. Having taken the best of weapons, we save and jump into the teleport. Two people in exoskeletons are already waiting for you at the spawn site. On the third attempt to overcome this place is completely realistic. On this, Mervin's tasks end, because Charon has an important task for the Strelok. Let's go to Charon.
Take medicines for Charon in the city of Pripyat

The task is to take medicines for the Monoliths from the swamp doctor's assistant in the city of Pripyat, because almost all of them are sick. We are heading to the city of Pripyat. To do this, you need to overcome the lower levels of the station, where you destroyed the burrers. At the entrance to the front of the station, you are met by the Monolith Dyak, who needs help clearing the area of warriors. This quest is not required. We are moving to the city of Pripyat. Then we head straight to the stadium building. Climb up the stairs and turn right. There will be a Paramedic, the Doctor's assistant. However, as it turned out, he will not give you medicines just like that, because Charon is extremely indebted. And now the Paramedic needs either two night stars, or ten dog tails. We give him what he wants, and return to Chernobyl to Charon.
Clear Chernobyl 2 from incorrect

A certain Monolithian gets in touch with Charon and reports that the base in the city of Pripyat has been captured. We communicate with Charon and head to the city of Pripyat, to meet Makhon. We communicate with him and go with his guys to destroy the mercenaries. Careful, there may be chimeras. After the mercenaries are finished, we again communicate with Mahon, who will issue a quest to drive the mercenaries out of the square, which is located in the center of the location. We head there, carefully destroy all the mercenaries and return back to Mahon, who will give you an anomaly detector. Now return to the Station to Charon and take another quest from him.
Meet Marvin at the hotel
Now you will have to continue training with Marvin. Charon, at the end of the dialogue with him, moves Strelok to the city of Pripyat to the hotel, where Marvin will be waiting for him. I advise you to immediately remember where the hotel is located on the map. We communicate with him, he hints at some carousels, and here the protagonist is transferred to the Ferris wheel.
Complete Marvin's third mission
The manuscript will lie in front of the Strelok. We raise it and penetrate down the steel supports. I advise you to immediately shoot the snorks that live under the wheel. We return back to the hotel for the subsequent instructions of our teacher.
Complete Marvin's fourth errand

Now Marvin is moving Strelok to the attic of the building. From two sides you will be met by two mercenaries dressed in exoskeletons and with shafts, we open fire on their heads. Next, take the manuscript, it will lie in the corner of the attic room. There are a few more mercenaries under the building, so you just can't get out of there. We climb onto the roof, from there we destroy the mercenaries and go down through the broken roof along the boards. To get to the hotel, you need to go underground, who has passed the original game, he is in the know. After returning back to the hotel and a dialogue with Mervin, you, together with the Monolith, are transferred to the roof, where we will receive the next task.
Complete the fifth task of Marvin

We communicate with Mervin and take the final task from him. Quest for parkour lovers: you need to jump from the roof of the building to the roof of a five-story building, where the fifth manuscript will be lying. Before you take it, it’s better to save, because we immediately transfer to the mercenaries in exoskeletons. You can just run away from them, it's not easy to deal with them. We return back to Charon.
Interrogate and remove the scout

Charon sends you to Diak to interrogate the scout. We move from the sarcophagus to the Station, we observe a diesel locomotive in front of us. We head along the road, which is located on the right side of it to the end. There is a parking lot of the monolith, where the Dyak and the spy will be. We complete the task and return back to Charon.
Talk to the Paramedic
For some reason, the shooter was useful to the Paramedic. We head towards him. It becomes clear that you will see a "dead" character from the Shadow of Chernobyl - the Ghost. The mercenaries are holding him, and you will have to free him.
Release the Ghost

We shoot the mercenaries, approach the Ghost, communicate with him and take him to a safe place, interrogate him, return back to the Paramedic. At the end of the dialogue with him, we return back to the Station, along the way the quest "Return to Charon" will appear. Let's go back to him.
Destroy the Ghost
Charon figured out the Ghost and now gives the order to destroy it. We are heading to the city of Pripyat. On the way, the Paramedic gets in touch with you and demands to go to him. We come to the Paramedic, he demands the Strelka not to destroy the Ghost. After the refusal, he injects Strelka with some nonsense, after which the main character becomes neutral.
Protect the Ghost

We run away to the place where you left the Ghost, it is marked on the map. We destroy all the mercenaries trying to destroy the Ghost and approach him. Because the Radar controls the monolith, it will not work from there to the swamps. Therefore, the Ghost sends Strelok to the control bunker in order for him to get documents with data on the route from the city of Pripyat to the Swamps.
Find the communication diagram of Pripyat and the Station in the Monolith control bunker

On the way to the Station in the city of Pripyat, you will be met by several Monoliths. We move to the Station, later to the sarcophagus, and, in the end, to Chernobyl 2. Here Solomon will take away all your things. At the end of the dialogue with him, he will give Strelok a shotgun with 120 ammunition, with which we destroy three Monoliths nearby and move to the bunker.
In the bunker, you have to wander a little before finding the document. At the exit from the bunker, six Monoliths in exoskeletons with SHAFs will appear. We eliminate them and get out into the street. Solomon will be waiting for you there. We communicate with him and get the task to deliver the parcel to the bartender. However, we will deal with this later, but for now, we return back to the Ghost.
We communicate with the Ghost and the task is completed. He directs you to the Fang, who is on the same floor as the Ghost. We save before communicating with the fang. We communicate with Fang and follow him, he will take the Strelok to the place of transition to the swamps. However, not everything is so simple: on the street there is a duel between the Monoliths, mercenaries and monsters. We try to move not far from the Fang, and with all this we do not allow anyone to destroy it. We go to the place of transition, however, here Fang receives a message from the Ghost on the PDA, asking him to return to him.
Return to Ghost
We return back together with the Fang to the Ghost, who gives you three army first-aid kits and a gravel gun unknown to you. The Ghost will tell you how to use it. We're heading for the swamps.
Meet the Swamp Doctor

We appear in the swamps and head to the Doctor. We enter his house, in no case do not open fire on his "clients", otherwise the Doctor will be offended. From the dialogue with him, a lot of information about the Captain will become clear, but you will read it yourself. This task ends, the next one will probably be taken from the Doctor.
Find and kill the swamp creature

The doctor complains about a certain creature. Shooting at a monster is pointless, after the end of a bullet shot at it, some kind of spiders get out of it. It is possible to destroy it. It is enough to open fire on him with an artifact from a gravity gun. A more powerful anomaly emerges from the gravi artifact. Please note that an anomaly comes out of the artifact a couple of times larger and more powerful than usual. And yet, the monster will not move into the anomaly on its own, you must manage to open fire at it or not far from it. When the lesson is completed, we return brotherly to the Doctor, who hands you 5000.
Chat with Grieg

We communicate with the Doctor, who sends you to the checkpoint of wanderers, to talk with Grieg. Grieg is aware of how to move from swampy places to the forest, but he won’t just say so: instead, he will give you the next task.
Escort to the measurement site and back
Kent will wait at the end of the bridge by the truck. We communicate with him and escort him to the place of measurements, where there will be zombies, destroy them and communicate with Kent, who begins to take measurements and runs back, and you follow him, later we communicate with him and return back to Grieg, who will give out the coordinates of the transition to the forest . The task is completed, we move into the forest.
Help the Forester to shoot monsters

The shooter appears in the cave, and immediately we get the task. We get out of the cave, shoot the cats trying to eat the Forester, and communicate with him. If you have a first-aid kit with you, then we will get a recipe for transmutation. The first aid kit will be lying around in the Forester's house. And if you climb the stairs to the roof of the house, it is possible to find a box there, in which there are overalls and three first-aid kits.
Chat with Sutuly

Stooped is the leader of the group of hunters. We head towards him. Just like that, he will not show the way to the warehouses, for this it will be necessary to shoot a pack of wild boars with two hunters. We head to the Greek, communicate with him and go. The Greek will give ammunition for the Kalashnikov and a shotgun, and a couple of scientific first-aid kits.
Help the hunters shoot the boars

We run after the Greek, later we shoot the boars. We communicate with the Greek and run after Zakhar, who will take you to the path to the warehouses. On the way you will meet two bloodsuckers and several poltergeists. After Zakhar stops, we communicate with him. A transition will appear, and a new quest: Find Sobolev and give him a message from Zakhar. We are moving to warehouses.
Meet with Lukas

The shooter appears in the warehouses in the village, in one of the houses in the lair of bloodsuckers. We quickly go down the stairs to the basement floor, where the cache is located, and from there it is possible to shoot the bloodsuckers. We run to Lukash, who will be waiting for you together with a fairly large group of freedom.
Help Freedom Capture Military Base Warehouses
Lukash demands assistance in capturing a military base. At the sight of a crowd of Svobodovites, one might think that there will be no problems with the military. And here it is not. It is better to save in advance. We destroy two military men sitting on a hillock in front of you and slowly reoccupy the base. See that Lukash and Cap survive, otherwise the task will fail. When we dealt with the military, we head to speak with Lukash, who sends Strelok to capture the barrier. It's better not to capture it with Freedom, as they will trample through radiation and mines. It would be better to go around on the road, and while the military is busy with Freedom, it is possible to quietly kill them. Kep needs to stay alive, so save often. Then we return back to Lukash, who will issue a reward and the next task.
Find the stalker Levsha
Lukasz demands to find him, so that he will help freedom with the base. However, first you need to go to the informant so that he will show you the way from the warehouses to the bar. It is located in the village, where in the Shadow of Chernobyl it was necessary to kill the traitor of freedom Pavlik. We will return to this task later.
Find a folder in the territory of freedom for the Informant

The informer, of course, will not tell you anything just like that, he needs to find documents at the military base. They are under the ruins of a brick structure. We took the documents and return back to the Informant. Here it turns out that the Captain is mentioned in the list of agents, and at the moment he is a conductor at Duty. About this later. At the moment we are heading to the Bar. Do not forget to pick up a new task from him, otherwise you simply will not get on the radar.
And the bar is run by gangsters. You have to pay 2000 at the entrance, there are many exciting things on the bar area. At first we head to Borov, who is now a bartender, and is of course in a bar. We communicate with him, he sends the Strelka to the Count, who will be in the place where it was possible to participate in the battles in the arena. However, first we will take the task from the man standing in the place of the bartender's watchman. In addition, it is possible to pick up the task from the brother, who is standing near one of the tables. Now we are heading to the Count, who rubs you in about mercenaries and helicopters.
Deliver documents and weapons to the Count

We get out of the bar in the direction of the landfill. On your right side there is a steel mesh, at the end it is possible to jump over it. We head forward and observe the path in front of us, we follow it in the direction of Yantar. And here is a surprise flock of snorks (24 individuals). It is better to destroy them with an F1 grenade. After there are no snorks left, it is possible to follow the path ahead and there will be three crates. We take away their contents, turn around, and observe seven bloodsuckers where the snorks were. I do not recommend using the contents of the boxes. We deal with the bloodsuckers and follow the path in the direction of the bar. We get out on the "piece" of wild territory and turn to the right. We go out to the bar, hand the bandit 2000 and head to the Count. Do you think there will be a good reward for eliminating such a number of monsters? The prize is one of the cannons and armor-piercing ammunition, which can be obtained from Borov for four bottles of vodka.
Find the Prince and deliver the barrel to him

This task is learned from the Count. We move to the warehouses and head to the barrier, not far from which a helicopter is marked on the map, under which a box will lie, and in it the Prince's barrel and other things. We take everything and move to the radar. If the transition to the radar is not marked on your map, then you need to pick up the task from the informant.
On the radar, you are met with extremely evil kinks. And a bit further there will be also a controller. Later we will meet a huge pack of dogs. We jump onto the stone and from there we shoot the dogs and head further. Now we meet the trap of the military, who apparently have been waiting for you for a long time. We destroy them and collect their swag. At this checkpoint there is a trailer, the entrance to which is blocked by an electr. It contains beryl in perfect condition.
A few meters later, the second checkpoint of the military. Eliminate them and cleanse their bodies. We go to the crossroads (Look closely at the PDA) and turn in the opposite direction from where you went to X-10 in the Shadow of Chernobyl. In short, we are heading along the road, which is hidden behind the trailer. We head along the road to the end, eliminate the chimera, overcome the electres and observe the Prince. We hand him the trunk, pick up a new quest and save. There will be three mercenaries at the entrance. Now pay attention to their names, and to the content of the fifth scroll. At the moment, let's move on to the task from the Informant.
Deliver food and first aid kits to diggers

Now we are heading to the end of the radar to the military base, where the diggers will be lying around, whom the Informant asked to save. You will see them right away on the PDA. Be careful, there will be three chimeras. Having dealt with the chimeras, we are approaching the main one, which will be lying in the center. At first we communicate with him, and then we hand him a first-aid kit. To complete the task, you need to have five first-aid kits, five cans of stew, five sticks of sausage and five bottles of vodka with you. By the way, nearby trailer with body armor Freedom.
We communicate with Sviblov and take a new task.
Bring the corpse of a super bloodsucker to Sviblov

Bloodsucker is marked on the map. I recommend using the glitch of the game and shoot him from a hill from a distance. The bloodsucker will not react in any way to falling into it. And under no circumstances should you destroy him with a gravity gun, because you still need his body. If you can't drag the body, take off your suit. We carry the body to Sviblov and communicate with him. We pick up the next quest from the same Sviblov.
Catch the traitor

Sviblov has a traitor in his team, and he demands to catch her. To get into the place where he left the cache, you need to bypass the entire radar and go into the forest, where there are many monsters, and there is strong radiation on the radar. We head to the cache and wait. We observe one Chnovets, wait for the command and eliminate him. He has no weapons, so it is possible to simply shoot him in the back. Here you have an amulet with protective qualities in your inventory. We don’t touch the body of the shot pure-bomber, he has nothing. We return back to Sviblov, who will give you a carbine and the task will be completed. Don't forget to talk to the stalker who is near the wall. He will tell you a story about six magical amulets and give you the task to find them.
Find documents and a system unit in the laboratory x-10


We take the task from Sviblov and move to X-10. On the way, we will certainly break all the boxes we come across, in which there will be both armor-piercing ammunition and scientific first-aid kits. We move forward, destroy the mutants. Not far from the place of accumulation of burrers, a system unit will be lying around.
Then we go down the ladder and head to the place where in the Shadow of Chernobyl the Strelok turned off the brain burner. In this room, documents will be lying in the corner. Before picking them up, I recommend saving, because after that a lot of mercenaries will appear. This will make one appear directly behind you. We penetrate to the exit, cleaning the route from opponents along the way. We get out of the laboratory. We hand over what you got to Sviblov. At this point, the tasks from him are over, it is possible to return back to the warehouses, get the second part of the documents for the Count.
Deliver the second part of the documents to the Count

We move to the warehouses and come close to the mark of the transition to the bar. We turn to the right and head straight for the hillock. After a few tens of meters, a box with documents will become visible. A little further there will be two chests with swag, be sure to take all of them. Now it is possible to go to the bar and to the Count. By the way, the two guns that were in the chest can be sold at cost. We communicate with the Count, the task is completed.
Help Sakhatom. Find the Prince's Winchester. Knock out a debt from a stalker or shoot him. Help the duty to repel the attack of bandits.
Now we are looking for the stalker Sakhatoy in the bar area. We communicate with him and get the task "Help Sakhatam release friends from prison" We go to the Prince and communicate with him, we get the task "Find the Prince's hard drive." At the end of the dialogue, we pick up the next quest. We return back to Sakhatom, from whom we learn that the hard drive is in the Dark Valley. We move to the landfill and go to the depot, where exactly Zheka will be, we communicate with him. He gives you a piece of Semetsky's card for repaying the debt to the Prince. We give consent.
Now we are moving to the Dark Valley. At the entrance we get May-Day from Voronin and the task "To help the debt repel the attack of the bandits." We run to help. Destroy gangsters at once with dozens of f-1 grenades. See that Voronin survives. We approach Voronin and communicate. We receive a reward and take the task to talk with the captain. We approach the captain, communicate with him and hand over a message from Zakhar. We continue to chat with him until the end.
Now we are heading to look for the hard drive to the gas station, nearby there will be a two-story building, which will have five gangsters. We eliminate them and look under the stairs, where the hard drive will lie. At least sometimes he ends up with one of the gangsters. Now we can go back to the bar. We hand over the hard drive to the Prince, we hand over two tasks to him. And of course 25,000. We get the artifact "Mom's beads" in exchange. Now we run away to Sakhatom and take the transmutation recipe from him. We take the task from the prince to search for a bag of grass and head to the Dark Valley.
Clear the area adjacent to the x-18 laboratory from monsters

Voronin requires you to clear the area of monsters. There are a lot of all sorts of creatures, but the main goal is to destroy all the snorks. Stock up on ammo and head out to kill them. We clear the area, return back to Voronin and pick up a new task.
Find the hideout of bandits in the Dark Valley and Deliver its contents to Voronin

First you need to find the gangster Zhila. Move in the Dark Valley to the factory. The vein is located northeast of the factory. We communicate with him. We will not immediately learn from him where the cache is located. First you need to run back to Voronin and persuade him to place Zhila under protection. Then we return to Gila and find out the coordinates of the cache, which is located on the roof of the main building, where you need to climb the wooden ladder. There are a lot of mutants in the factory, so be careful there. Do not forget to put your own unnecessary inventory in some kind of cache, as the contents of the bandyugans' cache will weigh somewhere between 45-55 kilograms. We take the contents and return back to Voronin. We give him swag and get a reward. Then we get the path Cordon - Dark Valley.
Destroy landslides

Immediately after receiving the task, we leave for the swamp, located under the bridge. You need to hurry before the landslides run away. We destroy them from optics. We collect their tendons and head to Petrenko, who hands you an extremely powerful shotgun, an analogue of the striker from Call of Pripyat.
Bring help
You need to go to the point marked on the PDA, talk with the stalkers and escort them to the Wolf. While they are moving to the camp, they must be protected from dogs. After that, we communicate with the Wolf.
Help the stalkers recapture the village from the bandits

We receive a task from the Wolf and run after a crowd of people to win back the camp from the bandits. After the village is captured, we communicate with the Wolf. This task is completed, we are heading to the Bartender, who will be located in Sidorovich's bunker. We communicate with him, and we get the task to find the Varangian, who is located at the Agroprom Research Institute. We are heading to Agroprom. At the entrance we get the task.
Chat with Bes
We are heading to the Bes, who will ask you to free Lefty from the mercenaries, which you need. We're heading for Bes. Be careful, there are a lot of monsters in the Agroprom. We go with Bes and Mole to the mercenaries, destroy them. We enter the building, see Lefty and communicate with him. He does not want to enter freedom for no reason, he demands a scientific suit of mercenaries and a new thunderstorm. After we discover all this, let's go back to Lefty. Don't forget to pick up the task from Bes: deliver the changed lr 300 to debt. In the meantime, we go down to the Agroprom dungeon and find the Varangian there.
Talk to the Varangian and overcome four laps

Before talking with the Varangian, we find a cache and put our own items there, otherwise the Varangian will take most of them for himself. We leave only first-aid kits. We approach the Varyag, throw first-aid kits on the floor and communicate with him. We pick up the task “Go four circles” and pick up the first-aid kits. It is necessary to use only a knife to destroy the mutants, while passing four circles through the dungeon from the Varangian to the exit and back. On the first round there will be zombies, on the second - snorks, on the third - bloodsuckers, on the fourth - burrers. The reward is a transmutation recipe and an m-16 with silencer and optics. After the task “Go 4 circles” is completed, we communicate with the Varyag and get a new task.
Chat with the Bartender
We head to the cordon, communicate with the bartender, who will issue a new task.
Find and interrogate Major Yarofeev 
We head to the checkpoint on the left side of the road. At the same time as quickly as possible. We observe three stalkers attacking the checkpoint. We quickly go into the checkpoint through the first door on the left side and go further to the barracks, where you will find it. Just do not shoot right away, at first you need to interrogate him. At the end of the dialogue with him, immediately destroy him, and do not forget to search: he has a fragment of a map of Semetsky's cache. Now we are returning back to the Bartender, who will give you a parcel to Sidorovich and send it to the Peacekeeping Corps.
Deliver a message to Sidorovich
We are moving to the peacekeeping corps. We communicate with the patrol and move on. We are approaching Sidorovich, handing over the parcel.
Deliver cognac to General Smith and find Colonel Brown

Sidorovich asks Strelok to deliver the cognac to General Smith while he is trying to find the location of a man who might know where to find Strelok's brother. We deliver cognac and pick up the task from the peacekeepers.
Rescue Corporal Foster

We head to the place marked on the PDA. We see a yellowish dot, which denotes Corporal Foster, only it is located underground. We climb a hillock and look for a cave there, at the entrance to which a psi-dog is waiting for you. Try to shoot her in such a way that she does not see you. Now we see two steel doors in front of us. We open the one that is located on the left side and head to the left side of the cave. Three snorks and a controller will meet along the way. Now we observe on the left side another metal door, behind which Foster is located. We communicate with him. The corporal breaks down to the base, we follow him. We go to the base and head to Brown for the prize and the next task.
Assist the peacekeepers in regaining control of the base
When taking the task, Brown will give you an lr-300, ammunition for it, f-1 grenades and first-aid kits. We follow Brown to the old base, where five peacekeepers are already waiting for you. At the moment, I recommend taking a more powerful barrel. We communicate with the colonel and the doors to the base open. A lot of monsters run out, we destroy them. After that, the peacekeepers take up positions at the base. If the task is not completed, it means that somewhere on the base there is still a mutant. Now we communicate with Brown and get a reward.
Conduct factory reconnaissance
Brown demands to find traces of the missing team at the factory. We are heading to the factory, where you will be met by a lot of zombies and the controller. We enter the left side of the factory. We rise up the stairs to the very top where we observe the body of the peacemaker. We pick up his PDA and head to General Smith, who will reward you with a unique M4 barrel. Then we return back to Sidorovich. We take two subsequent tasks from him.
Take the letter to the bartender
Well, we bring the Bartender a letter from Sidorovich, what else can I say? Don't forget the APCs.
Meet incognito
I'm going to the bar. To begin with, we speak with Borovoy. We get a quest. Now we are talking with the tracker. If you have not persuaded Lefty to enter freedom, then he will not be there. The Pathfinder will be standing to the left of the bar. We also speak with him, and we get the quest to meet incognito. We go to the Landfill, and then to the Agroprom.
Now we go straight along the road, which is in the center. That is, the central complex will be located to our right. We see in front of us something like a basement, everything is littered with rubble there. I marked it on the map. We go there, and we are offered to move to another location. Let's move on. We appear in the Strelka's cache, and opposite is the Swamp Doctor. There will be swag in the cache, collect it all and talk to the Doctor. He will talk a lot about the cache and that's it. Now let's get out of here.
Find for Borov the information that the courier carried to him (part 1)
We pass into the Dark Valley and go to Voronin. He will give us a tip to the factory. We go there and take out all the bandits. ATTENTION! One of them has a fragment of Semetsky's cache. So don't forget to search. Now we go down, there the Courier Borov will sit in a cage. The PDA was taken from him, but he gives a tip on the top of the X-18 lab. We head to the building through which you can get to the laboratory, go inside and go towards x-18. Halfway through, we hear the sound of an explosion and a task appears to talk to Borovoy. I'll have to go back to the bar.
In the bar we speak with Borovoy. It turns out that the information was obtained by the Ghost, and only he can have a copy. But in order to get to Pripyat, you first need to talk with Lukash. Now we approach the Pathfinder and take the quest from him.
After we take the quest from the count. The quest will continue later.
Meet with Caesar + Find the "liquidator" artifact for the Pathfinder
The count says that you need to find 3 flash drives in three caches. They lie in the outer courtyard behind the bar. To get there, go to the southern checkpoint of the bandits, there will be a fence on the right. At the end, you can jump over it. So we do. Now we go on the other side along the fence and see the bar buildings, but on the other side. This will be the backyard. It's all pretty confusing. Here is a video showing everything in detail:
So, the passage to the Wild Territory is open, so our path lies precisely there. Let's move on. In the passage over which there was an ambush of mercenaries in the original game, in the middle of the path in front and behind the Arrow will appear on the controller. I advise you to quickly knock down the one who is in front of us, and run away from the reach of the second. Now you can shoot him from behind the wall. Go ahead. Now we need to find the railroad workers. To get to them, you need to go all the way along the rail, and then turn right and jump onto the wooden “something”, and you will be transferred to the railroad workers through the teleport. Here is a video for you, you will definitely figure it out with it:
Now we are talking with Lector, the head of the railway workers, and we take a quest from him, for the completion of which he will give us the artifact.
We go through the railway tracks into the woods and look for 3 corpses there. We find them, pick up the antizombin and the device, after which we return to the Lector. Here's a video.
But he says that he does not have an artifact, so we go and talk with St. John's wort. He gives us a quest to kill three superboars and information about the location of the artifacts.
Now we return to the inner part of the Wild Territory. To get there, you need to follow the rails to the southwest, to where they end. There will be a ravine on the left, and a teleport in it. Let's jump. We appear on the roof of one of the houses. Opposite us there will be another house. We jump on its roof. We pass along it a little further, and we see that there is a hole there. We jump into it, but only very carefully. Here in this house there will be 2 "liquidators". It is not difficult to find them, and then we jump out through the window.
To kill the boars, we go to the underground passage with frying. There they will be. Having finished with them, we return to St. John's wort and take the next quest. Now, if desired, you can drive to the bar and give the "liquidator".
We jump into the teleport and go to the end of the location in the direction of Yantar, through the underground passage with "frying". After exiting the passage, run only on the right side of the road. Then in the end there will be a path to the "Yantar". Let's move on.
We appear on Yantar. We move to the Bunker. In the bunker, we approach Caesar and give the flash drives.
Find the third part of the documents + Clear the area adjacent to the X-16 laboratory from Zombies
We take these 2 quests from Dan and Caesar.
For starters, let's take the docks. We put on an ecologist's suit and bypass X-16 along the ravine from the western side. We go into the outer courtyard, we see 3 trash cans. Between them lies a case, in which the documents will be. We take them. Now it's time to party! We climb over the fence and take out everything we see. Having fun, we return to the bunker, we speak with Dan, and then with Caesar.
Put tags on monsters for Sakharov
Let's go to the Wild Territory. There you can easily be found by a pseudo-giant, on which you need to hang a label. In principle, problems should not arise, his speed is not strong, but the slaughter is increased. Now we go to the bar, where we give the "liquidator" to the Pathfinder and take 2 new quests from the Count. We pass to the Dark Valley, where we will look for a chimera. It will be just north of the drainpipe, through which you can get into the factory. Try to get from afar from the first time and run as fast as you can to Cordon. On Cordon, we will look for a bloodsucker who is hiding in a farm. If you have a quest from Skryaga, go to the Peace Corps.
Bring 10 loaves of bread to the Miser + Find a bag of grass for the Prince in the warehouses
The quest from the Miser can be taken after you persuade Lefty to join the "Freedom" and talk with Lukash.
First of all, we go to Sidorovich and find out for FREE!!! Where is Baker located? Let's go to that place. We go through the gate and get into a complete copy of the bar, only the Baker will be in the place of the bartender. He will ask you to bring 5 bags of flour from the village with bloodsuckers, which is located in the Army Warehouses.
Now you can get to the bar directly from the MK along a secret path. To find it, you need to go to the extreme southeastern point of the Peacekeeping Corps, and find a swamp there. It will be next to an abandoned factory. We go around the swamp and see that there is a passage to the bar. Let's move on.
We appear in the bar and go to the Army warehouses. There will be a lot of bloodsuckers in the village, so I advise you to come up with something. Personally, I brought them to the base of freedom. And he got rid of the monsters, and got hold of the swag.
A bag of grass marked Kruglov on the map
Now we return to the bar and give the bag of grass to the prince. We take one more task from him and go from the bar to the Peacekeeping Corps along the path. We go to the Baker, give the bags and get bread in return, which we carry to the Miser at the AU. The quest is over, we take the next one from the Miser.
Find Controller's Heart Artifact + Baker's Toolbox
So, very convincingly I ask you not to forget Kruglov's device. We go to Agroprom and see a mark on the swamp on the map. We go there and walk through the swamp until the message "Artifact found" appears. Now the "heart of the controller" will become visible, and we can pick it up.
When we have an artifact, you can climb into a rusty body, it will be located in the same swamp, and get a box of tools from there. We go to the Peacekeeping Corps and give the box to the Baker.
Bring a case with important information to the Miser
The case for the Miser will be underground. Here is a video showing everything.
We raise the case and the PDA, then go to Amber and go to the scientists' bunker. We approach Kruglov. Now there is a choice: give him the detector and the "controller's heart", and get a reward for it now. Or you can keep the device as a reward, and use it to look for the “heart of the controller” art. But even if you chose a reward instead of a device, you can still buy this device from him for “beads of a grandmother burer”. Now we approach Sakharov, hand over the quest to him and get the transition Yantar - Radar. By the way, you can take a secondary quest from him to find sea urchin art. As a reward for such lame art, he gives "Seva" and 8000. Now we take the next quest from him. He then sends Gunner to Dan for the details of the operation.
Eliminate Associate Professor Dorodin in the Dark Valley
We speak with Dan. He puts a mark on the map and tells the details of the operation. Now it would be nice for us to get a sniper rifle. Dan sells her for 4 "fireballs". If you don't have these artifacts, you can buy SVD-S on DT from Lector for 12 thousand. We pass into the Dark Valley and go to the place indicated on the map. We climb onto the roof. Save. To the left of the three soldiers there will be two scientists. Let's take the one to the right first. This is Dorodin. We return to the bunker of scientists and get the transition from Amber to Agroprom and the recipe for the artifact “Tears of the Chimera” as a reward. For 2 Tears of the Chimera, you can buy the Radar - Dark Valley transition from the Informant.
We take the next quest from Kruglov.
Find out what happened to laboratory assistant Lazarev
We pass to Agroprom and go to the swamp. Fortunately, the transition to Yantar is just near the swamp. The corpse of Lazarev will be in the car. A flock of swamp landslides will hang around it. We shoot landslides, search Lazarev and return to the bunker.
Find 3 protective helmets
Now we move from Yantar to Radar, go to Sviblov and talk to him only about the professor from x-10. Now we return to Yantar again and talk with Kruglov about a pistol that shoots tranquilizers. He sends us to Voronin.
In general, I say right away, bandits will rob you on Rostock, so leaving your inventory in a cache, or taking it with you, is up to you. Let's go to Rostock. We pass the tunnel with frying, we pass a little further and find ourselves in the car. We immediately raise the cartridges from the floor, take out the knife and bring down the bandit in the car. We raise his shotgun, take part of Semetsky's map from him, take out the whole gang and take the case with information for Voronin from one of them. Now we go to the Lector, give him the helmets and take the next quest from the Lector. We go out to Rostock, go to the bar. By the way, in my opinion, now would be a good time to go to the Informant for a passage from the TD to the Radar.
Find 3 disks with information
I'm going to the landfill. I'm going to the Depot. Here's a video for you:
We take the disks and go to the Dark Valley.
Hand over the case to Voronin
We go to Dolgovtsy, we give the case to Voronin. Then we take the quest from Petrenko.
Now back to Kruglov. Transition TD - Radar bought from the Informant, I hope.
We appear on Yantar, we take a colt from Kruglov. We return the disks to Dan and get a carbine. Now I advise you to be well equipped, as we are going to x-10. And by the way, there will be a bone breaker on the way back. Let's go to Radar.
Find the crazy professor and take the diary from him
We pass to the laboratory x-10. We go deep. Along the way, you will come across burrers, a bloodsucker and a jerboa. You can open the door with a combination lock.
We reach the stairs, but we do not go down it, we go into a larger room. The professor will be there. Save. We take out the Colt, and we fall from one cartridge. If it doesn't work, load the save. We speak with him, he gives the diary. We go back. At the very end, a bone breaker will be waiting for you. We kill either from a gravity gun, or 1 clip of an abnormal thunderstorm.
Find a radioactive container
In the forest on the map you can see a helicopter. We go to him. There will be 3 breaks near the helicopter, we take them out. We go around the helicopter, we see a container next to it. We select.
Then I decided to go to the x-10 laboratory. You can go somewhere else if you like. Let's move on to Yantar. And by the way, take the crossing from Sviblov only if you are going to cross it right now, since it is temporary.
Find information about experiments in the x-16 lab
We go to the scientists' bunker and give Sakharov the professor's diary. Let's get better equipped. Now let's head to the lab. Where is the entrance, we, of course, remember the PM. Go to x-16. Now the fun begins. Almost the entire territory is limiting radiation, so you can stop only in some places. In places with radiation, you can’t stand in one place. Along the way, we will meet snorks and zombies, then zombies and burrers, and at the end there will be a controller. The laptop lies at the very top, behind a rack with buttons. See screenshot and video.
In principle, nothing complicated if you have good equipment with you. We get out of the laboratory, going to the very end, then turn right, into the cell with the number 10. There will be a hole in the floor in it, and we jump into it.
Let's move on to Yantar. Directly in front of us will be the corpse of a stalker with a part of the map of Semetsky's cache. We take.
We go to the Army Warehouses to look for Fang.
Help Fang fight off the mercenaries
We go to the village, in which there was a detachment of debtors in the Shadow of Chernobyl. We kill all mercenaries. One of them will have a fragment of Semetsky's map and a light machine gun. Don't forget to pick up a piece of the map. We hand over 2 quests to Fang and take the quest to check the laboratory x-18.
Now we go to Lukash and give the radioactive box. For this we get a permanent transition Radar - Pripyat. We take the next quest from Lukash.
Destroy the kink lair at the abandoned roadblock
We run to an abandoned checkpoint aka a checkpoint of mercenaries in the Shadow of Chernobyl. There will be 5 kinks, and if you're not lucky, a couple of bloodsuckers. We deal with kinks and return to Lukash. As a reward we get SVD-S and a pack of cartridges for it.
Next, I do not recommend going to x-18, as then the task of clearing the bar will follow. So we are going to Pripyat. Do not forget to take a walkie-talkie with you for Zakhar. We find the Ghost (it is marked on the map) and talk to him. It turns out that Borov's infa was in one copy, and only Fang could have kept a copy. Well, okay, we’ll go to him when we return from the Dead City, where we will go after Pripyat. We speak with the Ghost again, and he reports that the Strelka was looking for a man who introduced himself as the Magician and the coordinates of his location.
Meet the Magician
We go to the southeastern part of Pripyat, to the area of garages. I don’t know how it will be with you, but 5 chimeras, 2 burrers and a pseudo-giant attacked me there. So it's better to immediately think about how you will get rid of them.
Now about how to go to the Magician. We jump onto the blocks (see screenshot), from them to the garage. Now we run through them to the end. You will be teleported beyond Pripyat. Now that you are behind Pripyat, you need to run to the place where the transition to the Radar is located. There will be a van with Marvin standing in it. We speak with him, after which he shows us kung fu and takes all our things. Here's the bitch! No, of course you can throw your things away, or hide them in a stash until the conversation. I was just too lazy to do it, I'd rather run around Pripyat in a sweater. We speak with him again, he gives us a Colt with 40 rounds and sends us to kill the Paramedic.
Now the million dollar question: how do we go back to Pripyat? Personally, I did not understand, but I found a way out: we run after Pripyat to the stadium, and we are transferred to the Chernobyl nuclear power plant. We return to Pripyat, and now we are almost next to the Paramedic.
We go to the Paramedic, we say, we get a sawn-off shotgun from which you can kill the sorcerer. Again we go to the garages, teleport to Mervyn. Just walk up and kill him with one bullet to the head. Now we go to the Ghost to find out what is there with our things. When I read that he wants Gunslinger to complete one more task before Ghost gives him his stuff, I wanted to put 3 clips in his head.
Find a box of dynamite in the House of Culture
The House of Culture is the place where the Monoliths settled. It is located opposite the stadium. We go in there, get rid of the Monoliths, take the SHAFT from Mahon with a sight, go for the box. It is located under one of the stairs leading to the balcony. There are 2 in total. Watch the video. We take the box.
On the way back, we select part of the minigun assembly manual. Where it is located is shown here. Also with it will be a medallion. That's it, now back to the Ghost. He gives us all our items + screw cutter. And in my opinion this bastard stole my suit and first-aid kits from me.
We pass to the radar and go to Sviblov. When you appear on the Radar, save just in case with a regular save. If you did not take a walkie-talkie with you for Zakhar, then run after it, and then return to the Radar to Sviblov.
Talk to Sviblov + Talk to Layla + Get to the place where Mohammed has an appointment
If you have spoken to Sviblov, you must immediately go to the Dead City, because the passage may disappear after a while. We take a passage from Sviblov and head to the north-eastern part of the complex. The Monoliths will be waiting for us there. We get rid of them, we pass through a hole in the wall and go to the barbed fence. We are transported outside the location. We pass to the Dead City.
We appear in the Dead City and go to Leila. We speak with her, we get the transition to the Forest. Now we go to the edge of the city to the House, the stalker Fima will sit there. We learn from him that the meeting with Mohammed has already passed and he left. Let's go to the Forest.
Many fans of the game "Stalker" faced the problem of impossibility in the game world carry a lot of weight A: By default, the weight limit is 60 kilograms, which, of course, is not enough and causes a lot of inconvenience. After all, the player would like to gain so much swag! Yes, there is no way to take it.
Of course, even 60 kilos is a considerable burden, and even a huge one, and therefore the developers focused on realism, not allowing them to carry more weight, except perhaps with the help of an exoskeleton. However, we are talking about game reality, and a computer game is a game in that you can always find a way to get away from realism in it, which means - increase the maximum allowable weight, which is allowed to be transferred.
What to do to increase your maximum carry weight
First, find the folder where the game is installed; it has another attachment - the folder "gamedata". Open it. There you will find another folder - "configs", open it and you will see the "creatures" folder. It is in it that you will find the desired file called "actor.ltx". Your path to the required file will eventually look like this: the folder with Stalker Stalker\gamedata\configs\creatures\actor.ltx. You can open a file with the .ltx extension (not only the actor.ltx that we need, but others as well) with an ordinary notepad, which is built into the Windows system by default.
When you open the file you will find the line max_walk_weight = 60 The number 60, as you already understood, means the maximum allowable weight that the protagonist can lift and carry without outside help (if you use the "services" of the exoskeleton, this parameter increases significantly). Of course, you need to replace the value 60 with whatever number you want. You can stick, for example, 100 or more. Then save the text file (press the key combination Ctrl + S) and close it. Hooray! The weight issue has been resolved.
Now you need to deal with the correction of the critical mass, in which the player character begins to lose strength abruptly and quickly when jumping and other movements. Find the file in the following path: gamedata\configs\system.ltx. When you open the system.ltx file with notepad, look for the line max_weight = 50. It is 50 kilograms, by default, that is the critical weight. Having him behind his back, the main character begins to rapidly exhaust himself. You act in a similar way: change the value of 50 to the number that you consider appropriate for yourself, then the document is saved, closed - you are all set.
Works in all versions of the game Stalker - Shadow of Chernobyl, Call of Pripyat and Clear Sky!
Launch the game and make sure all your fixes work. It should be noted that the above manual is applicable to all variants and series of the game "Stalker" - this Shadow of Chernobyl, Clear Sky, Call of Pripyat. In addition, it is also relevant for various mods, in each of which you can adjust the parameters of the critical and maximum allowable weight at your own discretion. Now your possibilities are greatly increased, that is, you can fulfill your needs and collect as much swag as you want or can get. The main thing is to calculate the parameters correctly and do not overdo it. Good luck and good luck!
Introduction
Secret Paths 2 is a new prequel to the original "Shadows of Chernobyl". A new storyline that intertwines with the quests already known from TT, and which reveals more deeply the reason for the appearance of the main character in the Zone. The main goal that stands before him is now quite specific and clear. Quests that were known from HC5 and TT have undergone a lot of changes. Supplemented and adjusted, in order to correct a lot of errors and plot "gags", as well as to more fully reveal the main storyline.
Small tips for passing
From the very beginning, hang up the dosimeter and do not remove it to avoid problems with grenades. The dosimeter should always hang - even during a robbery, when everything can be put in a stash until the robbery itself - leave the dosimeter on your belt, and the sleeping bag always remains with the GG in the inventory. Problems with grenades usually arise after robberies. The dosimeter should be one in the inventory and hang on the belt. The amount of trapped radiation can be viewed by pressing the TAB key (default). If, nevertheless, the grenades are no longer taken in hand, we begin to "shamanize", first we look to see if the second (third, etc.) dosimeter is lying around in the inventory - you should sell it and go to another location, throw out the grenades one by one and at once on the ground and select, remove / lay out / hang the dosimeter on the belt, put the ALL swag up to the underpants together with the dosimeter in a stash, take one dosimeter, hang it on the belt, take one grenade - it should be taken, after we pick up the whole swag NOT IMMEDIATELY but by the piece.
Make saves in key places, before moving to another location, before taking and turning in or after turning in tasks, especially if you are not sure that you have chosen the right road, or you don’t know if there will be an exit from the location you are going to go to. This will help to replay if something went wrong. Carefully read the dialogues with the characters, many hints are contained in the dialogues - you can make screenshots of the dialogues by pressing the F12 key.
Search the corpses of the killed enemies for the presence of quest items in them - amulets, parts of cards. The corpses after the reboot and even more so after the re-enter the location disappear.
With the release of the Update, many items are not only hidden, but can also be in different places for different players and with different passages, look more carefully.
Quest characters must be protected, well, everyone who plays Stalker should know this rule, for fans of shooting there are other wonderful games. If you still killed the quest player, it’s better to replay, and not ask what to do, then you will get into an impenetrable plug, you will have to replay a lot more.
Transitions between locations - they are also Secret Paths, some will have to be searched, some are given for completing tasks, some are temporary, some are permanent, some are opened by found special artifacts - "guides". There will be a separate description for transitions.
By the very passage - you will be robbed several times during the game, if this situation does not suit you, put your property before the robbery, then take it. The robbers take those things from the inventory that can be put into the stash, the rest remain with the GG and do not disappear during the robbery. The dosimeter does not climb and must remain on the belt, problems with taking grenades arise precisely after robberies. Also, some Persians, who, according to the game, need to hand over their property for a while, then when they return, not all things are given away - it is also better to dive before "undressing".
Now, after the robbery, the money taken by the robbers can be returned back - search the corpses of the offenders, in the inventory of the robbers you will see bundles of money - this is your money, also bundles of money may fall out of some corpses (not all).
On the first trip to Pripyat, you will be robbed to the skin, so you can put down especially valuable things either before going to the MG at the Lesnik, or stock up at Mozart and make a cache in the MG. Your money will also be lost. Before the transition itself, we carefully examine the sewers - we select Krol's diary from the floor, we will need it later.
Do not prescribe everything to merchants on your own - they can go for a walk, then you will not find it. Also, when prescribing a large number of items, "emissions" of these items from the inventory of merchants occur, which leads to the game freezing and even to a dead freeze. It is better to prescribe if you know what you are doing and only quest items when they are lost. If you don’t know, don’t take it, it’s better to ask in the topic - maybe you can do without this item, there will be an incentive to go through the mod a second time. If you really want to register something for trade - register in a single copy, to get several items of the same type, it is better to make a save / load next to the merchant - the item will appear again on sale. Before prescribing, make copies of the files that you will edit so that you can return them back in case of unsuccessful editing, you should also return the original files after you have received the items you are looking for and the need for them has disappeared. In case of unsuccessful edits and rollback of corrected files to their original state, load saves made before making edits, otherwise glitches cannot be avoided.
Keep an eye on the level of captured radiation - more details about the levels are written in the description of the mod. Hang arts on your belt in accordance with their properties and make sure that radioactive arts are compensated by arts that remove radiation, it is also desirable to compensate for the harmful properties of some arts with the useful properties of others, cook arts - modifiers usually have more pronounced positive properties, and negative ones decrease.
Quest Character Hints (1)
I will describe the most common problems that may arise with some, I will not describe all the characters.
Do not rush to immediately complete tasks for killing some Persians - they may turn out to be key or they may give something in their life. Killing is not an end in itself Stalker at all.
When we go on a mission to search Vasiliev it is advisable to kill the controller before meeting with Vasiliev. Vasiliev can be stupid in the cave - we go down into the cave and push him in the ass, he should get out, if you run ahead of him, then he can stay there. You can save before going down into the cave and talking with him - the next save - after he leaves the cave, it is better not to save in the cave. We help at Yantar Vasiliev fight off zombies, how the task works, we approach him and talk, we escort him to the camp and talk with Denom, and only after talking with Denom go to the bunker Sakharov.
Many cannot find Grieg in MG, although they see the mark and hear his voice of greeting. Walk around the rooms and find him - he is on the second floor in a dead end room.
Don't refuse to help Dyaku in shooting the military at Chernobyl-1, he will then give a tip on a case with medicines for Solomon. He also has to shoot the spy. If he died at the hands of the military - replay. If he cannot shoot the spy, then he dropped his barrel, sell him a loaded barrel, or throw it next to him, he will pick it up and do his dirty work, otherwise you will have to get your hands dirty by killing a neutral stalker.
When rescued Ghost from mercenaries on assignment Paramedic it is necessary to protect him from injury (and, of course, from death), because during treatment Strelkom consisting in the Monolith, Ghost will also become a Monolith and become an enemy after being brainwashed Paramedic. Ghost sent to kill Charon, a quest character, so we are not in a hurry to finish him off, but respond to the message Paramedic approach him.
Another quest character - Fang, also needs protection when it leads to show the transition from Pripyat to the Swamps. Later Fang will show up at the AC, where he will have to be rescued from the mercenaries once again. On AC Fang will appear after completing all tasks Count and also find documents in X-16 - a laptop.
Some characters change their locations, and if you need to find someone in one place, and you take too long to find him, he may end up in another place, and he may no longer have the necessary dialogues.
The paramedic migrates from the stadium to the house with the grocery store, so we do not delay the search for PDA for Borova and a trip to Pripyat, for a copy of the PDA to Ghost we must go before the assault on Bar, Ghost will send to magician, and the one to Paramedic. Paramedic in the grocery store will not give a task to kill magician, will move to the deli after storming the Long Bar.
Magician stands behind the fence near the transition to the Swamps, you can approach him using the teleport on the garages, we read carefully the dialogue with ghost. Way back from magician is located near the same garages from the outside - the teleport will return the GG to the location's play area.
When you first enter the Bar, find a stalker Sukhatoy and talk to him, then Prince and again with Sukhatym- several branches of the plot begin with a conversation with him - work on Prince, search for a cache Semetsky and then search for PDA Borova. Immediately take from Prince task to deal with the stalker Zheka- the search for the cache will begin with it Semetsky. Don't forget to talk to Borovoye- he will say that Count, the local head of security under the brothers, there is a job for GG. First task Count can be performed immediately on the same location - it won't take much time. You can also go directly to the mechanic Potapov in the Bar and take the task of finding a minigun scheme - a killer thing when sorting out with crowds of evil spirits. To start searching for a PDA Borova you need to complete all the tasks of "Debt" in the TD, get the TD-Kordon transition, when we return to the Bar - we hand over the hard drive Prince and we approach Borov- ask him about work - not to be confused with cyclic quests.
Many die before the task is completed by a stalker named Noodles. I advise you when we go towards the Landfill from the Bar for the first time, last of all, go to the extreme bandit in the Bar in the bar itself and take an order from him for noodles, save after that and run to the Junkyard if a death message is received noodles- can be replayed. This character loves to die in anomalies, get caught by wild boars on fangs and climb under the bullets of bandits, kill him and not necessarily - just talk to him. Further, he is not needed - most likely he will die. Gives guidance on antiquary, you will have to ask about it Borova.
After talking with noodles are looking for Zheku- he is in the depot, you can find and tanker in the Dump behind an abandoned parking lot - he will talk if they picked up a stalker's diary in the sewer of the MG Krola, or approach him after the first descent in X-18 - there will be fewer monsters on the second visit to X-18. Tankman gives a tip to the place where the bioradar was dropped.
Lefty, whom he asks to find and persuade to join Freedom Lukash, asks to bring him a weapon and a suit - they must be fully functional and be in the inventory in a single copy. After you brought him everything that he requires and gave it away, do not go right after him, try to be out of the a-life zone with him, so he will get to the AU without problems, but it’s better to be in other locations, he needs some time to go on AS. In the line of sight, even if you do not see him, he may die. If you go after giving him the equipment immediately to the Dump, you can see him wandering around the Dump, here he can be killed and the mercenaries that meet when we carry rifles from Besa Petrenko, and boars can meet, and the bandits at the checkpoint are also unlikely to let him through. Also in a-life, he can fall into an anomaly. I after talking with Lefty going down to Varangian in the dungeon while running in circles Lefty already quietly gets to the AU. For insurance, you can hang a label on Lefty and watch it move - you can also make sure you don't get too close to it.
A tip on the major Yarofeev at the checkpoint gives Varangian after talking with bartender, but he will only talk after the circles of hell. Myself Yarofeev will appear after talking to bartender when we come to him Varangian.
Petrenko will appear in the TD after the successful defense of the "Debt" from the attack of bandits in the first run into the TD. Gotta talk to Voronin, then with Sobolev and again with Voronin.
After being persuaded Lefty(i.e. they brought him what he asks) and he went to the AS to "Svobodovtsy", and also if they talked with bartender and then with Varangian about the major Yarofeev, will appear in the Bar Pathfinder, I recommend that before the first trip to DT go on assignment Pathfinder to meet with Incognita, after this meeting Pathfinder there will be a task for DT - along the way you can complete it.
Miser With screw immediately take their positions after we take the task of storming the Barrier.
The guard of the "Freedom" at the armory appears a little later.
Quest Character Hints (2)
Miser in one of the quests he asks to bring bread and says that you need to talk to Sidorovich at the location of the peacekeepers - he knows where baker find, you need to have time to talk to Sidorovich while he is at this location, then he moves to Cordon to "his" well-known place, where he leads to baker will not give.
After we bring the flour Baker and take the task for the toolbox in the back room at baker his assistant will appear - wano, he will also have one task for the GG - to bring a box of mines, I advise you to make a save. there will be a "warm" meeting with the Marauders, at the leader of the Marauders Razuvaeva then there will be a fragment of the map with a cache Semetsky, you can complete the task of the Marauders in different ways - further passage through the plot may depend on your passage.
Sviblov with a group of diggers is on the Radar and the first approach to it must be done according to the instructions Whistleblower to help the diggers. Informant gives a parcel to send to him, it contains food, first-aid kits, vodka - in general, everything that Informant gave you need to bring and give intact Sviblov, make sure not to overspend the first-aid kits and not use them up from the parcel, the task will hang. Some go to the Radar from Yantar for the first time and find Sviblova dead - in theory Sviblov seems to need help, so you need to approach him by taking a task from Whistleblower, it is not necessary to enter from the AU, but the parcel should be conveyed. Do not leave monsters and enemy NPCs near the group's parking lot Sviblova. Also do all the quests. Sviblova in the first approach to it - on a superbloodsucker, on a traitor and go down to X-10 for documents and a system manager. First, take the system unit on the upper level, it is often thrown by the burers, it is located in the room in front of the room with a slot through which the exit from the X-10 is visible. After you find everything in the X-10, try to clear all the enemies, so that later there will be less problems in subsequent visits.
When you receive from Count hint that Sviblov can give a transition to the MG, then get ready to immediately follow it and go. Grab the radio for Zahara give along the way. Transfer from Sviblova in MG is temporary and then disappears. If you receive a tip from Count but not yet ready to go to MG and to Sviblov there's still work to be done, just don't start a conversation with him about the transition. Do not forget in this campaign in MG to find a character on the outskirts of MG who will clarify the situation with Mahomet. A trip to the MG should be done before the assault on the Bar "Dolgoy".
Mahomet will find you himself - you just need to finish the dialogue with Sidorovich on Cordon when he will move into his rightful place. Semetsky in the Sarcophagus will appear after talking with Mahomet.
If we took some task and completed it, we don’t delay with its delivery. After the assault on the Bar with the "Debt", some characters from the Bar molt - so try to complete and turn in all the tasks to the questers in the Bar before the assault. After the assault on Bar Dolgom you will not find Borova, Count and Pathfinder. prince will be killed. If there are any tasks for them, complete them before taking the Bar, the last moment is before taking the Bar card from Borova.
Crossings in Secret Paths 2 (1)
In Secret Paths 2, many transitions between locations (they are also secret paths) should be opened during the game. Some must be obtained for certain tasks, some are found on tips, some open special arts - "Guides", they should be found and taken to the Pathfinder - a stalker in the Bar, a specialist in the Secret Paths. Some transitions become permanent, others disappear after a certain time.
Immediately there are only transitions to well-known locations south of Bar - from the Landfill and back - to Cordon, to Agroprom, to the Dark Valley and to Bar.
- Transitions of the initial stage of the game until the first entry into Pripyat
At the beginning of the game, before the first entry into Pripyat, all transitions are temporary and are given for one time - to go to another location, and the transition from a new location must be received / earned. After receiving the transition, the message "New way!" pops up, in the PDA you can see on the map where it is located. The main difficulty is the transition from Amber to the Forest, you need to find it yourself. Sakharov gives a fairly clear tip where to look for him - in the eastern part of the location in the lowland there is a bus, in it in the Original PM we come to our senses after the release when we go to take measurements with Kruglov. It is necessary to walk around the northern part of the bus - where the cabin is, a transition will open at a certain point. Another transition can cause difficulties - from the MG to the Forest, on the instructions of the Forester, bring a box of provisions, after talking with Leila, she says that you need to go to the Guide that brought the GG to the skete, do not forget about this and go to him - he will take the GG to to an already familiar place and the passage from the MG to the Forest will again open for one passage. The transition to Pripyat is given by Grig, we carefully read the dialogue with him and save immediately after it, the transition is one-time and if you managed to dive into the sewers, then there will be no way back - you can climb out through the hatch, but we won’t go back into the sewers. In the sewers, do not forget to look under your feet - we select the diary of the stalker Krol, then you will need it, it does not disappear from the inventory.
- Crossings Chernobyl-Sarcophagus-Control Bunker-Pripyat
The transition to Chernobyl-2 (this is the northern part of the Chernobyl nuclear power plant, we will call the southern part Chernobyl-1) is issued along with the task of Charon to destroy the "infidels". The transition is located in the upper part of the Sarcophagus (the interior of the Chernobyl nuclear power plant) in the room where the Monolith stone itself is located. We climb the reactor, see a stone and a teleport, dive into the teleport and find ourselves on the wall, then go along the inclined beam of the destroyed structure into the hole in the wall and go left all the way, then turn left again and find ourselves at the transition.
The return passage to the Sarcophagus will be located in the central part of Chernobyl-2 near Solomon.
Charon's next task is to clean up the Control Bunker of the Monolith, you need to get into it from Chernobyl-2 where in the Original PM we leave the Bunker at the end - on the western side of Chernobyl-2, the transition is indicated on the map. At the end of the game, this transition will disappear.
After that, Charon will send to Pripyat for medicines to the Paramedic. The passage to Pripyat is located at Chernobyl-1, in order to get to Chernobyl-1 we go down to the basements where the burers were shot on the first assignment. At the end of the corridor in the mine with a broken spiral staircase there will be a transition, in this place in the Original we get into the Sarcophagus from Chernobyl-1. From Chernobyl-1 it is not difficult to find a passage to Pripyat. Who passed the Original PM can easily find all these transitions. These transitions will be permanent until the end of the game except for the transition to the Control Bunker.
In the Swamps we will meet the Doctor, he will help to get out of the Swamps, send the Wanderers to the checkpoint, from them we will get a transition to the Forest, in the Forest the Hunters will help to find the transition - to the Army Warehouses (AS). This path is temporary.
Further in the course of the game, we will have to open or get transitions between the main locations, well known from the Original PM and other mods, most of these transitions will be permanent. Temporary transitions will be specifically noted.
Once on the AU, you can see that there are no transitions from them, so you have to work hard for the inhabitants of the AU.
- Transitions from speakers
The transition to the Bar will be issued by the Informant for a special folder that must be brought from the AS Base, where the "Freedom" is settling in, the Pathfinder will talk about the transition after a tip from Lukash - so you have to bring the "Svobodovites" to the AS Base.
We also get the transition to the Radar from the Informant along with the task to help the diggers led by Sviblov. Here, one should take into account such a moment - the first approach to Sviblov should be exactly on the instructions of the Informant, and the package should be delivered safe and sound. You can not immediately take the task to help the diggers, but combine the trip to the Radar with other tasks at this location, the main thing is not to get carried away with going through other branches of the plot, and not to end up in a situation where you need to go to Sviblov on another task and on another transition without taking tasks for help from the Informant, you can catch the already dead Sviblov or lose him further for "incomprehensible" reasons.
In the passage we run into the need to get to Yantar. The first entry to Yantar must be made through the Wild Territory (DT - it is also the "Rostok" plant adjacent to the Bar).
- Hike to Yantar
To open the transition from Bar to DT, you need to complete the following tasks:
- complete the first two tasks of the Count - one at the Bar location, does not require any transitions, the second - to help the Prince on the Radar, it will require the transition of the AC-Radar, we receive from the Informant, it is convenient to combine with the help of Sviblov's diggers;
- go to the peacekeepers at the location "Waiting Room" or the Peacekeeping Corps (MK) and talk afterward with the Bartender, he will say that the GG was looking for the Count and he has another task, when you go to the location Bar, a message will pop up - go to the Count.
After completing these tasks, the Count will send to Yantar to Caesar to bring him three flash drives, we find the flash drives on the territory of the Bar behind the fence, you can go the same way that we went on the first task of the Count, as soon as we find the message "A new way!" and the transition will be available.
You can also talk and take assignments for DT from the Pathfinder - he will be in the Bar, it is advisable to go to a meeting with Incognito at Agroprom before that - a meeting is possible if you use a temporary transition from Agroprom to the dungeon, it is located on the street in a ruined descent into the dungeon, the transition will then disappear.
On the DT, you can complete tasks from the Pathfinder and go to the Railwaymen, they will also throw in several tasks performed at the same location.
To go to Yantar, you need to find another Secret Path - after the tunnel with "Zharki" we will explore the area to the right of the road, near one of the bushes we will find the Secret Path - now we will have permanent Bar-DT-Yantar crossings.
- Transitions from Amber
On diesel fuel - we get it as soon as we find the transition from diesel fuel to Yantar;
To the Radar and back - after tagging mutants;
To Agroprom and back - after disassembling with Associate Professor Dorodin in TD.
Transitions from Amber and back are constant.
Crossings in Secret Paths 2 (2)
We will receive one of the important transitions from Lukash - the Radar-Pripyat transition, we will receive as a result of a multi-way quest to find a PDA for Borov.
- Crossing Radar-Pripyat
It begins, oddly enough, with the stalker Sukhaty, who asks to help with the rescue of friends from a gangster prison. Without a conversation with Sukhaty, the Prince will be silent, there will be no talk about the hard drive, about the debtor Zhek, which will give the first fragment and the task of collecting all the fragments of the map with Semetsky's cache. After we bring the hard drive to the Prince, we approach Borov and take the task of finding the missing Courier and the PDA with him. After the failure to search for the PDA in the TD, the message "Talk to Borov" pops up, we talk - and he says that the Svobodovites have reconnoitered the road to Pripyat, we talk with Lukash and we undertake to bring some radioactive container from the Radar, in exchange for it, Lukash will give the Radar-Pripyat crossing. The transition is permanent. Container search can also be combined with Diggers and Prince.
- Transitions MK-Bar and Radar-TD
The baker, to help in finding bags of flour at the AC, gives a tip where you can find the MK-Bar crossing, we are looking around the swamp in the south of the MK behind the plant with zombies, we examine the boulders near the swamp.
An informer for a couple of artifacts "Tears of the Chimera" will issue a Radar-TD transition. On the Radar, it starts at a dead end where the Prince stands.
- Transitions obtained using the "Explorer" arts
From Kordon to Agroprom - located on Kordon near the western end of the railway tracks:
From Agroprom to Kordon - located in the south of the location near the gate in barbed wire, there are many anomalies and wild boars nearby;
From DT to AS - located behind a fence at the northwestern end of the railway tracks, there are many anomalies, dogs and pseudo-dogs nearby;
From AS to Yantar - located in a hollow near a fallen helicopter, Svobodovites from the Barrier can pick it up. There is one important note about this transition - do not use it until you have opened a regular passage to Yantar through the DT, there will be no way back. I also do not advise using it without special protection against radiation - we cook art, look for a good suit, when descending on Yantar we pass the radiation barrier and you can grab a lot - up to death ( in the Update, this "guide" opens the path from the AS to the TD - thus getting to Yantar bypassing the standard path through the TD will not work).
- Transition Radar-MG
After completing all the tasks of the Count, he gives a tip to the fact that the Chistopebovites seem to have a transition to the MG, and that they have lost a person, you need to volunteer to help find this person and get a transition to the MG for this. We approach Sviblov on the Radar (I hope they helped him by this moment, brought the package and completed his tasks), he tells how to get to the MG, first you need to find a teleport that will throw the GM through the thorn, then we go to the transition itself. We take a walkie-talkie with us for Zakhar - we will give it back along the way. You should not delay the trip to the MG - the transition will disappear. In MG we speak with Leila - it temporarily opens the path to the Forest, and also do not forget about the meeting with Mohammed or a person who can give him a tip. He will be waiting in one of the houses on the outskirts of the city. Then we go to the Forest, the Forester sends us to the Hunters, we give the walkie-talkie to Zakhar, and the Hunters direct the GG to the place where the lost one can be, we save the lost one - it turns out to be Leila's sister Karina, she takes her to the place where the abductors caught her with the escort, we find the corpse of the escort and his PDA, according to data from the PDA, Karina takes us to the transition to the Swamps. This trail to the Swamps starting from the Radar is temporary.
- Search for "Superconductor"
The Doctor gives a flash drive for the Pathfinder as well as a guide dog, which will show us the path from the Swamps to the MG and further to the AC.
The trail that starts in the Swamps and up to the AU through the MG on the tip of a guide dog is constant. Take care of the dog during the journey from the Doctor to the start of the trail. Next, we take the flash drive to the Pathfinder in the Bar and he tells where to find the "Superconductor" - he will open the reverse path from the AS to the Swamps through the MG. "Superconductor" should be looked for in the dark from one to two in the morning at the speakers along the edges of the location. Art glows and is clearly visible, located in a place where no one walks and picks up. Before starting the search, I recommend saving, if you didn’t manage to find it, then just reboot and run to other places. The trail starts from AS in MG, there we carefully look at the map and look for a transition to the Swamps. The path is permanent.
In the final at the Chernobyl nuclear power plant, we will meet with the legend of the Zone, the stalker Semetsky, with Solomon, with the Pathfinder. The Pathfinder will be at the transition to the Control Bunker, but there will be no transition - the Pathfinder says that now you can get to the Bunker through the Sarcophagus, go to the Sarcophagus and get from there to the Bunker. The transition in the Sarcophagus to the Bunker will be in the same place where in the Original we get into the Bunker - a coded door. Next is the final. The choice of the final is up to you.
Art Mod Recipes
In the Secret Paths, you can change the properties of some artifacts. To do this, you need to find a transmutation recipe, have the right art and find the corresponding anomaly described in the recipe. Artifacts have different properties - positive ones are displayed in green, negative ones in red. When hanging art on the belt, it is advisable to strive for the total sum of the various properties of all the attached art to be in a positive direction, especially for art that induces radiation and removes it.
There are several chains of artifact transformation - from simple to absolute.
Absolutes, as a rule, have mostly only positive properties, maybe one negative one that can be compensated by other arts.
Recipes are found in different ways - some are in the stash, others in the course of completing tasks as a reward. To get an absolute you need to have a complete
chain of recipes, so try not to miss finding them and not neglecting the completion of tasks.
The first recipe that you can get - from Sakharov on the first visit to Yantar for the cyclic quests to find / bring, bring a stack of snork and the recipe for "Tears of Elektra" will be displayed in the PDA in the "Help" - "Recipes" section - a very useful modification to start with. If you missed it - it's not scary, you can get it after the next call to Sakharov. This recipe starts the art modification chain up to Tears of the Chimera.
List of modification recipes (1)
- Recipes for art transformations to "Tears of the Chimera"
Artifact "Drop"- has the following protective properties: -10 radiation and -18 stamina - removes some radiation but increases fatigue.
Recipe for Tears of Elektra:
We throw the "Drop" at the anomaly "Elektra" - we get "Tears of Elektra" with the properties of -10 radiation and +18 stamina - it also removes radiation and increases stamina.Recipe for "Tears of Fire":
"Tears of Elektra" are thrown into the "Frying" anomaly and we get "Tears of Fire" with the properties of -20 radiation.Recipe for Tears of the Chimera:
"Tears of Fire" are thrown into the "Jelly" anomaly and we get "Tears of the Chimera" with protective properties -30 radiation, +40 protection against telepathy and +5 bullet resistance, and also worsens health -150 and increases bleeding +153.Recipes for "Tears of Fire" and "Tears of Chimera" are also given by Sakharov after completing the task to eliminate Associate Professor Dorodin, as well as switching from Agroprom to Yantar and back.
- "Kolobok" transformation chain
Artifact "Kolobok"- has the following protective properties: +5 gap, +5 explosion, +5 bullet resistance, among other things, it is quite strong fonit +15 radiation.
Recipe "Steel Kolobok":
We throw the "Gingerbread Man" into the "Springboard" anomaly - we get the "Steel Gingerbread Man" with the following protective properties +5 gap, +5 bullet resistance and induces radiation +7. Recipe from the saved "infidel".Recipe "Titanium Kolobok":
We throw the "Steel Gingerbread Man" into the "Carousel" anomaly - we get the "Titanium Gingerbread Man" with the following protective properties +20 burn, +7 gap, +20 chemical burn, +7 bullet resistance, radioactive +15. We get the recipe from Sviblov after we bring him the documents and the system unit from the X-10.Recipe "Diamond Kolobok":
We throw the "Titanium Gingerbread Man" into the "Kolodets" anomaly - we get the "Diamond Gingerbread Man" with the following protective properties +20 burn, +8 gap, +15 chemical burn, +8 bullet resistance, radioactive +10. The recipe is in the backpack in the Sarcophagus.Little Brother Giant Recipe:
We throw the "Diamond Gingerbread Man" into the anomaly "Frying" - we get the "Junior Brother Giant" with the following protective properties -15 radiation, +20 burn, +12 gap, +5 explosion, +10 bullet resistance. A side effect is an increased need for food +20000. The recipe will be available after completing the quest for Noodles, either he will give it, or the one who ordered it.
- Chain of recipes "Porcupine"
Artifact "Sea Urchin"- has the following protective properties: -25 radiation, +5 burn, +5 explosion, +3 bullet resistance, and also increases bleeding +200.
Recipe for "Porcupine":
We throw the "Sea Urchin" into the anomaly "Frying" - we get the "Porcupine" - it perfectly removes radiation -65, reduces endurance -18. Recipe from one of Charon's guards.Recipe for "Electric Porcupine":
We throw "Porcupine" into the "Electra" anomaly, we get "Electric Porcupine" - radiation output -63, increases endurance +91, shock protection +5, reduces protection against electricity -10. The recipe is given by the Informant for a folder from the base to the AC along with the transition to the Bar.Recipe for Snot Porcupine:
We throw "Electric Porcupine" at the anomaly "Kholodets", we get "Snotty Porcupine" with the following properties - radiation output -55, endurance +82, reduces bleeding well -444, reduces protection against electricity -7. The recipe is in a well-hidden backpack in X-10.Recipe for "Stone Porcupine":
We throw "Snotty Porcupine" at the "Springboard" anomaly, we get a "Stone Porcupine" with the following properties - radiation output -50, endurance +77, bleeding reduction -389, electricity protection +20, explosion protection +7. The recipe is given by a Fan for two Golden Chunks.
- Recipe chain for artifact "Soul"
"Soul"- has very good indicators for increasing health +1000, reducing bleeding -267 and stamina +36, but the presence of negative properties greatly limits the use of this artifact - gap -20, explosion -20 and decrease in bullet resistance -20.
All further modifications are made in the anomaly "Frying" except for the last one.
The resulting mods have the following characteristics:"Drop of Soul"- health +600, radiation -10, stamina reduction -16.
"Fiery soul"- health +800, radiation -20, bleeding reduction -17, explosion +5, stamina reduction -16.
"Crystal Soul"- health +1000, radiation -30, bleeding reduction -33, explosion +10, stamina reduction -9.
And the last art modification of this chain:
"Crystal Soul Bengal"- brewed in the "Electra" anomaly - has truly miraculous properties:
Health +1500, radiation output - 30, bleeding reduction - 167, endurance +15, electricity protection +20, explosion +10.
- Recipe chain for the "Film" artifact
"Film" has the following properties: - increase bleeding +157, protection against burns +15, against chemical burns +15, good protection against tears +50.
Recipe for "Skins":
We throw the "Film" into the "Springboard" anomaly - we get the "Skin" with the following properties - chemical burn +30, bullet resistance +7, slightly radioactive +3. We get the recipe after we take Solomon's package to the Bartender.Recipe for "Scales":
We throw the "Skin" into the "Carousel" anomaly - we get the "Scale" with the following properties - health +150, chemical burn +35, bullet resistance +7, increases bleeding +111 and radioactive +5. We get the recipe from Prongs for helping to free friends from a gangster prison.Recipe for "Shell":
We throw "Scales" at the anomaly "Kolodets" - we get "Shell" with the following properties - health +50, bleeding reduction -144, protection against chemical burns +40, bullet resistance +10, slightly radioactive +2. the recipe is obtained from Petrenko for a modified grenade launcher.Recipe for "Controller's Scalp":
We throw the "Shell" at the "Frying" anomaly and get the "Scalp Controller" with the following properties - health +100, protection against telepathy +50, protection against chemical burns +30, bullet resistance +10, increases the need for food +2200. The recipe is given by Kruglov after we take the case with the documents to Voronin and come to him for a pistol with sleeping pills for the crazy professor.
List of modification recipes (2)
There is one interesting recipe that is not included in the chain of art modifications - the recipe for "Symbion". This artifact is obtained by boiling four arts at once in the anomaly "Kolodets" - "Jellyfish", "Drops", "Blood of the Stone" and "Thorns". We throw out the arts in turn in the "Holodets" - if all four arts are thrown out and the anomaly accepts them, then there will be a white flash. This artifact has the following data - reduced stamina -18, increased bleeding +56, reduced resistance to rupture -15, from positive telepathy protection +50 and radiation protection +10. It seems not so hot what parameters - but! This recipe can be found in X-18 in a backpack on the first entry into the Dark Valley, when there are few art modifications and recipes, arts for cooking it are not rare and often found, two such arts are on the belt and controllers are not afraid, plus +10 defense against radiation - this parameter does not affect the rate of radiation output, but is added to the protection of the suit, it helps a lot when completing Caesar's task on Yantar.
From the point of view of bullet resistance protection, the following chain of recipes for modifying the "Mom's Buses" art is very interesting.
- Recipes for transformations "Bus"
"Mom's Beads"- reduces hunger +100000, increases stamina +55, reduces bleeding -333, but also weakens defense against impact -20.
Recipe for "Babkin's Beads":
"Mom's Beads" are thrown into the "Electra" anomaly, we get "Babkin's Beads" with the following parameters - endurance +227, bullet resistance +5, reduces protection against electricity - 15, radioactive +5. We get the recipe from the Forester when we help him fight off the cats after leaving Pripyat through the Swamps.Recipe for "Great-grandmother's Bead":
We throw "Babkin's Beads" into the "Kolodets" anomaly, we get "Great-grandmother's Beads" with the following parameters - health +150, bleeding reduction -422, bullet resistance +3, radioactive +7. The recipe is given by the Paramedic after rescuing the Phantom in Pripyat from the mercenaries.
Recipe for "Babka Burer's Bead":
"Great-grandmother's Beads" are thrown into the "Carousel" anomaly, we get "Burer's Grandmother's Beads" with the following parameters - health +200, radiation removal -10, bleeding reduction -500, explosion protection +10, bullet resistance +15, reduces stamina -18. The recipe is given by the Varyag after passing the "circles of hell" in the dungeons of Agroprom.
- Dummy Transformation Recipes
Recipe for "Fire Pacifier":
"Empty" with an explosion protection parameter of +20 is thrown into the "Electra" anomaly, it turns out a "Fiery Empty" with parameters of endurance +33, protection against burns +30, weakening of protection against electricity -10.Recipe for "Bright Dummy":
The "Fiery Empty" in the "Electra" anomaly is converted into a "Bright Empty" with the parameters stamina +66, burn protection +30, weakening of protection against electricity -15.Recipe for "Moon Pacifier":
Then the "Bright Empty" in the "Electra" anomaly is transformed into the "Moon Empty" with the parameters stamina +99, burn protection +30, weakening of protection against electricity -20.Recipe for "Pudding":
"Moon Empty" is converted into an anomaly "Jellied" into "Pudding" with the following properties - stamina +18, burn +40, electricity protection +40, chemical burn protection +15.
Search for Semetsky's cache
In the Secret Paths there are several cross-cutting ones that do not affect the passage of tasks, but are very interesting in terms of the results of the finds. I will describe the search for the cache of the legend of the Stalker Zone Semetsky. It starts with taking the task to deal with one stalker from the Prince in Bar, first you need to go to the stalker Sokhatom in Bar and take the task from him to help in the release of his friends from the prison of bandits, without this the Prince will be silent and we will not see any cache. We find the desired stalker in the Landfill, his name is Zheka, we talk with him and he gives us the first fragment of the map indicating the cache of Semetsky as payment for him to the Prince. From the moment the task is taken, the found fragments will be displayed in the PDA in the "Journal" section, until the task is taken from Zheka, the found fragments are displayed in the inventory.
- This is where the fragments of the map with the cache of Semetsky meet. Described as they are in my walkthrough, your order may differ:
1st fragment- we get from Zheka with the task itself;
2nd fragment- we will find during a search of the corpse of a zombified professor in the X-18 laboratory to search for an anomalous "Thunderstorm" for the Tanker, to talk with the Tanker, we need to pick up the diary of the stalker Krol in the sewers of the Dead City when we look for an exit to Pripyat on a tip from Grieg ( in the Update, this fragment will be with the leader of the Marauders Razuvaev - they will appear at the location of the Peacekeepers when we go for mines for Vano);
8th fragment one of the bandits in the northern complex in the Dark Valley will have it when we go to rescue the Courier on the instructions of Borov to search for the PDA;
4th fragment Major Yarofeev will be at the military checkpoint on Cordon, we search him after talking and killing him, leaving him alive is more expensive for himself, he starts shooting at GG;
3rd fragment we will find another zombie professor when clearing the base for peacekeepers;
6th fragment there will be a bandit named Shilo, this character will meet during a robbery in the Wild Territory, do not avoid a robbery if you want to get a fragment, there will be no fragment without a robbery;
7th fragment will come across from one of the mercenaries when we fight off Fang from an ambush arranged by mercenaries in the Army Warehouses - we also search ALL the corpses;
5th fragment we will find from one of the Monoliths that we will meet in X-18 on the instructions of Fang.
Search for parts of the minigun circuit and amulets
There are a couple more cross-cutting and interesting quests in Secret Paths 2, I will describe them in one post, since they intersect.
At the first (it can be later - it’s just better not to waste time) entering the Bar, the mechanic Potapov will stand in the bar itself, we approach him and get a task from him to search for parts of the minigun circuit, the gun is very downhole and can greatly help with crowds of evil spirits. From the story we learn that there are only seven parts and they were at different stalkers who disappeared at different locations. Therefore, it is necessary to look for the corpses of the missing stalkers or backpacks. I advise you to make a screen of the dialogue in order to avoid misunderstandings and unnecessary questions. I'll describe it in the order in which I found it. The numbering is arbitrary and has no binding to parts of the scheme.
Parts of the minigun schematic:
- in the Garbage, in the southeastern part of the location behind the swamp and the forest there is a nook, it is full of blind dogs and pseudo-dogs, zombies are walking;
in X-18, we examine all the corners on the lower level (in the Update, a corpse with a part of the scheme spawns randomly in several places); - in the dungeons of Agroprom, it is not difficult to find (in the Update, a corpse with a part of the scheme spawns randomly in several places);
- at the checkpoint of the military, located at the checkpoint itself in a backpack in a relatively prominent place (in the Update, the backpack can be in different, but not very hard-to-reach places - we are looking carefully);
- on the Radar, we examine the territory of the scorched forest behind the mesh fence, the corpse lies on the boulders closer to the stone sheer walls, the boulders are available for a normal jump (in the Update, the corpse can randomly appear anywhere in the territory of the scorched forest on the Radar);
- at the exit of X-16, it is easy to find;
- in Pripyat in the hotel we find the corpse of a stalker, look into all the rooms, look out the windows, he will also have an amulet, I’ll unsubscribe about it below (in the Update, the digger’s corpse can also be located in different places of the hotel).
The search for amulets begins with the task of Sviblov - to deal with the traitor. After completing it, we approach and shmon the corpse of Fedi the Robber, we don’t find anything, but there will be one amulet in the inventory, it seems like they removed it from the neck. Then, in a conversation with Sviblov, we ask about him, he sends for clarification to the Stranger, he will appear right there. We talk with him, make a screen of the conversation - for those who are especially forgetful, he tells what kind of amulets they are, where some can be found, the rest are located according to the plot and cannot be passed by. There are six in total.
Search for amulets:
- Chimeron- remove Fedi the Robber from the neck, the search for amulets begins with it, it protects a little from electricity +10 and gap +10, radioactive -10;
- The Dragon- we find on the AU in the village of bloodsuckers in a terrible place of the "ritual" death of stalkers, it has protective properties from burn +10 and chemical burn +10, radioactive -10 ( in the update, this amulet can randomly appear anywhere in the village on the AC );
- Garganon- we will find Semetsky in the cache, it protects a little from telepathy +15, radioactive -10;
- Avalon- will be found in the corpse of a digger in Pripyat in a hotel along with a minigun scheme, has protective properties from an explosion +10 and bullet resistance +10, radioactive -10 ( in the Update, the corpse of a digger can be located in different places of the hotel and near it - we explore all the nooks and crannies );
- Catalan- one of the well-known characters that needs to be killed will have radioactive -10;
- Sarkon- we find it in X-16, it lies on the upper level of the installation, but the burers can also throw it somewhere, reduces protection against electricity -15 and slightly removes radiation +10 ( in the Update, the amulet can be located in different places on the upper level, and not only in X-16 itself, but also after exiting X-16).
- Amulet and its amazing properties
Stamina +182
Burn +20
Hit +40
Electroshock +20
Break +20
Radiation +20
Telepathy +30
Chemical Burn +20
Explosion +20
Bullet Resistance +20
List of quest items
I will not describe the list of items needed for some quests, I will not describe all the items, only those that can be found in advance and brought immediately to the character that they may require, and which can be lost / sold until they are needed, those items that are asked to be carried / brought I hope you yourself will guess not to sell and not to hide in unreliable stash:
- two "Night Stars" or 10 tails of a blind dog- the Paramedic will need it for medicines for Charon, one is immediately in the box at the lower level of the Sarcophagus, the second (and more if you're lucky) can be found at Chernobyl-1 and at the stadium in Pripyat; dog tails can be shot at Chernobyl-1 - as soon as you left the Sarcophagus, I advise you not to approach Dyak, but run around the location and collect art, we will also meet several dogs and jerboas along the road - be careful, there is a radioactive zone nearby, six more tails can be removed from dogs that spawn at the crossing to Pripyat if they received a tip from Diak on a container with medicines for Solomon at Chernobyl-1, if they found this container on their own - these dogs will not be;
- five cans of food- to the guard of Charon for the recipe, we buy - one from Solomon, three from the Paramedic in one approach, from Makhon for the "Golden Fish" you can get four cans, they may end up in the corpses during the search;
- another guard of Charon asks five PDAs- gives a grenade launcher to domestic barrels "Bonfire", and Solomon's guard asks for five bottles of vodka, gives a TT pistol, these items are not particularly important, but finding five PDAs or five bottles of vodka is difficult at this stage of the game, so do not take tasks if in the inventory there are no items you are looking for, if you find it - come up and take the task and hand it in right away, if you don’t find it - it wasn’t really necessary;
- two "Crystals" or two "Films" The bartender for sending Solomon's parcel to the mainland, one will be given out by Caesar on Yantar after completing his task, another one can be caught during the assault on the base at the nuclear power plant, either near a dilapidated tunnel with psi- and radiation zones, or at one of the military, it is advisable to search all the corpses . I start the search while still in the Monolith - in the Sarcophagus and in the Control Bunker there are a couple of boxes in which different artifacts can randomly fall out, I always knock out the "Crystal" from one, there is also a box in Pripyat behind the fence next to the future transition to the Swamps - this box I break into the first run in snorks. the box usually does not survive until a later moment, the "Film" can be obtained from Sakharov through a cyclic quest - but this is a long time and we will only get one "Film" at a time, another "Film" lies in the destroyed tunnel with "Electras" on the diesel engine;
- two golden slices A fan for the recipe, one will be in the Bar in a building with a door supported by boxes, we climb from the roof through a hole, we will find the second in the Garbage when we look for part of the minigun scheme, we meet on DT on Yantar, we just get there later in the game;
- 5 bottles of vodka, 5 cans of canned food, 5 sticks of sausage, 5 first aid kits- a parcel from the Informant to a group of diggers - we need to transfer it safe and sound to Sviblov, when we approach the diggers they are all wounded, we are not fond of treatment - we can overspend the first-aid kits from the parcel, first we give the parcel, then if there are first-aid kits left, we can heal the wounded, they themselves heal each other;
- assault "Abakan"- the Prince asks for weed for the guard of the "Freedom" weaponry, comes across several times, the first time he gives out General Voronin for help in fighting off the attack of bandits on the first entry into the TD, a couple more times can be randomly issued for cleaning up mutants near X-18 and for a hideout of bandits, another one lies in the inspection hole of the garage on the DT, if, after all, not a single one is left by the time the Prince asks him, you can exchange it with Petrenko for two "Sea Urchins", "Sea Urchins" can be randomly exchanged with Kruglov for " Heart of the Controller";
- jar monpasier- one, the Monk will need it at the AS according to the quest for PDA Borov, search the corpses, caches may fall out, also jars with monpasier come across on the corpses of the military, Yarofeev has one;
- mercenary science suit and Grozu for Lefty, the suit and Thunderstorm must be in good condition and in a single copy in the inventory, the extra ones can be thrown into a safe in the barracks where Lefty is standing, the scientific suit of mercenaries first comes across in Pripyat, you can repair it at Mahon and take it with you, it can also fall out (if you're lucky) from the mercenaries during the release of Lefty, the suit and weapons should be repaired by merchants and not used, the slightest wear and Lefty will not accept them, even the mercenary scientist is on sale from Borov;
- "Fiery soul"- He will ask you to bring Lefty for an upgrade of the gravity suit;
- "Mica", "Crystal", "Goldfish", "Soul", "Ruby Spring", "Flash"- Lefty will ask you to bring these six artifacts for repairing the universal detector found in X-18 on the instructions of Fang;
- two "Fireballs"- Kruglov for a tag on a bag of grass, can be found on the DT in the tunnel with "Frying";
- "Crystal Soul Bengal"- To the informant for establishing the location of Semetsky's hiding place using an incomplete set of map fragments;
- two "Tears of the Chimera"- Informant for crossing Radar-TD;
- five "Cobblestones" or five "Crystal Souls of Bengal"- to upgrade a nanosuit from Semetsky's cache, before upgrading, you need to have one set of art, another one needs to be laid out, then we put on the suit and the corresponding artifacts are assimilated by the suit, there are two "Cobblestones" in the cache;
- 3 burer arms, 3 cat tails, 3 poltergeist eyes and a "Ruby Battery"- The doctor in the final will ask to bring, for them he will give a transition from the Swamps to Pripyat.
Artifact "Heart of the Controller"
Interesting according to the results of Kruglov's quest to search for the "Heart of the Controller". The first artifact must be found in the swamp of Agroprom, the detector that gives Kruglov is hung on the belt. We save until entering the psi-zone, go into the psi-zone - the message "Artifact found!" pops up! - we are looking for it, it can be both on the surface of the lake and in the trailer itself, if we haven’t found it, we reboot, the main thing is that the save be done before entering the psi-zone and before the message about its discovery, the artifact can spawn somewhere in the wrong place, easy to search at night - the artifact glows. We take the found artifact to Kruglov and refuse the reward, we take the detector instead of the reward - now you can look for the "Hearts of the Controllers" in other psi-zones. When it is found, a monster will appear, most often a controller, there are bloodsucker and burer. The search for other art can also be done after saving before entering the psi-zone. After finding the psi-zone degenerates and the next time you enter the location, it will no longer be there. For the "Heart of the Controller" Kruglov can give an elite anomaly detector - he will always have this dialogue now, be careful - do not pick up these tasks if you have already received the detector. Also, the "Heart of the Controller" will be needed by the Lecturer on the TD, for which he will give a tip where to look for the "Snake Eye", the artifact with which we will find the "Klondike of Artifacts", should be in the inventory when we go to the TD in search of the Klondike.
Psi-zones on locations:
- Amber- entrance to the plant;
- Wild Territory:
location north on railway tracks;
the middle of the location, next to the previous one - the psi-zone is extended and begins near the house where you need to find the "Liquidator"; - Bar- to the left of the road to the transition to the AC;
- Army Warehouses:
in the north, near the rocks between the farm where the Informant lives and the abandoned mercenary base;
in the south behind the farm where the Skull group lives in the original;
at the base itself in a destroyed railway tunnel, it usually pops up behind barbed wire, you can go around the border from the north near the crossing to the Radar, or from the side of the crossing to the AS, I pulled it up with a gravity gun; - Radar:
on the road after the turn with an ambush of the military before turning to Pripyat;
in a dead end where the Prince will stand; - Dump:
in the hollow between the transitions to the Bar and to the TD, where boars with flesh hang out;
south of the radioactive heap which is opposite the entrance to the depot from the main road; - Agroprom:
in the northeast in a hollow between the transitions to the Garbage and Yantar;
in the south - south of the main gate to the western complex; - Dark Valley:
in the northeast behind the gas station building where we find the Prince's hard drive;
in the southeast where the "daytime bloodsucker" from the Original hangs out; - Cordon:
north of the Bartender's bunker in a barbed anomaly;
in the railway tunnel in the east where there is strong radiation.
Trade and repair
In the Secret Paths there are several merchants who can sell unwanted swag and buy supplies. They will buy from you cheaply and sell dearly - many do not like this situation, but Stalker is not an economic simulator, and money in the Zone is not the main currency. But you can exchange the necessary supplies and weapons from merchants for art and spare parts of mutants. I will describe who, what and for what can be changed. If I missed something or saw an inaccuracy, please write in a personal.
- Mahon- "Monolith" merchant, becomes inaccessible after being brainwashed by the Paramedic:
"Stone Flower" - 3 packs 5.45 ordinary, 1 first aid kit, 1 anti-rad;
"Blood of the stone" - 2 first-aid kits;
"Gravi" - 3 packs of 5.56 ordinary, 2 first aid kits, 4 sausages;
"Night Star" - 5 packs 9x39 SP-6, 2 scientific first-aid kits, 2 antirads;
"Golden Fish" - 5 packs of 5.45 BP, 2 army first-aid kits, 4 canned goods;
"Chunk of Meat" - 3 packs of 5.45 ordinary, 2 first-aid kits, 4 sausages;
"Soul" - 5 packs 5.56 AR, 3 scientific first-aid kits;
"Crystal" - 5 packs 9x39 PAB-9, 2 army first aid kits. - Paramedic- Doctor's assistant, standing at the stadium in Pripyat, at the end he will move to a house with a grocery store behind a Ferris wheel, changing parts of mutants in bulk, 10 pieces each:
eyes of the flesh - 4 scientific first-aid kits;
boar hooves - 4 army first aid kits;
tails of a blind dog - 4 packs of shot;
pseudo-dog tails - 4 F-1 grenades;
bloodsucker tentacles - 4 packs 9x39 SP-6;
burer's hands - 4 packs 5.56 AR;
zombie hands - 5 packs of shot;
Snork's feet - 4 first aid kits;
jerboa heads - 5 packs 9x18 "P";
hands of controllers - 5 antirads;
paws of pseudo-giants - 7 packs of 5.56 ordinary;
chimera claws - 5 packs 5.45 BP. - Miser- Trader "Freedom":
Ammunition:
2 "Drops" - 3 packs 5.56 AR;
2 "Blood of the Stone" - 3 packs 5.56 ordinary;
2 "Sparklers" - 3 F-1 grenades;
3 "Slime" - 2 army first aid kits.Weapon:
"Cobblestone" - SIG SG552 Commando;
"Tears of Fire" - SIG SG551;
"Symbion" - М16А1;
"Ruby Spring - Colt M4A1;
"Golden Hunk" - FA MAS Prototype 3;
"Drop of the Soul" - SIG 550 sniper. - Hog- brother merchant in Bar:
Ammunition:
5 cans of canned food - 3 packs for AK-47;
4 bottles of vodka - 3 packs for AK-47 BP;
5 loaves of bread -3 packs 5.45 ordinary;
4 bottles of vodka - 3 packs 5.45 BP;
5 sticks of sausage - 3 packs 5.56;
4 bottles of vodka - 3 packs 5.56 AR;
"Stone Flower" - 3 packs 7.62x54R 7H1;
"Slug" - 3 packs 9x39 PAB-9.Weapon:
2 "Mica" - AK-47;
2 "Chunks of Meat" - Saiga.In addition to exchanging for art and products, you can get something from Borov for cyclic tasks:
Parts of mutants:
eye of the flesh - 300 rubles and 3 cans of canned food;
hoof of a wild boar - 500 rubles.Artifacts:
"Chunk of Meat" - 2100 rubles and 2 scientific first-aid kits;
"Flash" - 7500 rubles;
"Crystal Thorn" - 1500 rubles and 2 scientific first-aid kits;
"Night Star" - "Beryl"-5M armored suit and 3 F-1 grenades;
"Golden Fish" - LR300 assault rifle, "SUSAT" sight - L9A1, M-203 underbarrel grenade launcher, PBS silencer. - Petrenko- merchant "Debt":
Ammunition:
"Medusa" - 3 packs 5.45 BP;
"Chunk of Meat" - 3 packs 7.62x54R 7H1;
"Flash" - 3 packs 7.62x54R 7H14;
"Gravi" - 3 packs 9x39 SP-5;
2 "Sparklers" - 3 packs 9x39 SP-6;
"Slug" - 3 army first aid kits.Weapon:
2 "Gravi" - Abakan AN-94 sniper;
2 "Sea Urchins" - Abakan AN-94 assault;
2 "Ruby Springs" - silent sniper rifle "Exhaust";
2 "Ruby Batteries" - silent sniper rifle VSS "Vintorez";
2 "Stone Flowers" - RPG-7V grenade launcher. - Bartender- merchant on Cordon:
Ammunition:
6 chimera claws - 3 packs of 5.45 regular;
6 boar hooves - 3 packs of shot;
6 eyes of flesh - 2 first aid kits.Weapon:
40 tails of a blind dog - MP-7a3;
30 pseudo-dog tails - shotgun SPAS-12;
25 bloodsucker tentacles - submachine gun "Bizon" chambered for 9x18.According to cyclic tasks from the Bartender, you can get the following:
Parts of mutants:
tail of a pseudo-dog - 200 rubles and 3 packs of shot;
bloodsucker tentacle - 300 rubles and 3 packs of shot.Artifacts:
"Medusa" - 1500 rubles and a bottle of vodka;
"Stone Flower" - 3000 rubles and a bottle of vodka;
"Chunk of Meat" - 2000 rubles and 3 army first-aid kits;
"Night Star" - overalls of the tourist. - Zakhar
8 tails of a blind dog or
6 boar hooves or
6 Chimera Claws or
2 "Cranks" changes to 5 packs of shot;
6 bloodsucker tentacles or
"Chunk of Meat" or
2 "Jellyfish" changes for 5 packs of 5.45 ordinary;
8 pseudodog tails or
"slug" or
"Stone Flower" or
"Gravy" changes for 3 first aid kits. - Mazay- hunter, lives with other hunters in the Forest, exchanges goods for parts of mutants:
10 heads of jerboas - 3 packs 5.56 ordinary;
10 zombie hands - 3 packs 5.56 BP;
5 paws of a pseudo-giant - 3 packs 7.62x54R 7H14;
5 hands of the controller - 5 army first-aid kits and 5 antirads. - Sviblov- "Clear Sky", gives a couple of cyclical quests, is on the Radar:
Parts of mutants:
jerboa head - 100 rubles and 1 pack 7.62x51 NATO BP;
cat's tail - 100 rubles and 1 pack 7.62x51 NATO BP;
poltergeist eye - 100 rubles and 1 pack 7.62x51 NATO;
chimera claw - 1 pack 7.62x51 NATO;
controller's hand - 200 rubles and 2 packs of 7.62x51 NATO BP;
pseudo-giant hand - 100 rubles and 2 packs of 7.62x51 NATO BP.Artifacts:
"Sliz" - 1000 rubles, 1 scientific first aid kit, 1 F-1 grenade;
"Slug" - 500 rubles, 2 scientific first-aid kits, 1 F-1 grenade;
"Crystal" - 1000 rubles, 2 scientific first-aid kits and a scientific CN overall;
"Battery" - Knights SR-25 rifle. - Sakharov- scientist in the bunker on Yantar:
Ammunition:
3 "Drops" - 2 packs 7.62x51 NATO regular;
2 "Fireballs" - 2 packs 7.62x51 NATO BP;
"Film" - 2 packs 12.7x99 for the WA2000 rifle;
10 cat tails - 3 scientific first aid kits;
10 hands of the burer - 2 antirads.Weapon:
"Soul" - rifle "GALATZ";
"Crystal" - Knights SR-25 rifle;
"Moonlight" - NK-417 rifle;
10 poltergeist eyes - WA2000 rifle.
According to cyclic tasks from Sakharov, you can get the following:Parts of mutants:
snork's foot - 300 rubles and 1 scientific first-aid kit;
flesh eye - 300 rubles and 1 scientific first aid kit;
boar hoof - 300 rubles and 3 scientific first-aid kits;
tail of a pseudo-dog - 300 rubles and 1 scientific first-aid kit;
bloodsucker tentacle - 500 rubles and 1 scientific first aid kit.Artifacts:
"Gravi" - 2500 rubles and 1 scientific first-aid kit;
"Medusa" - 3000 rubles and 1 scientific first aid kit;
"Fireball" - "Film";
"Moonlight" - 4000 rubles and 3 scientific first-aid kits;
"Sea Urchin" - 8000 rubles and "SEVA" overalls.
A few more merchants
There are several other merchants in the Secret Paths who buy and sell some goods only for money:
- Mozart- Drifter merchant, located on the first floor of the Drifter headquarters building in MG in a room with a piano;
- Miser- Drifter merchant, located at the Drifter checkpoint in the Swamps;
- Marvin- the keeper of the Monolith and the teacher of the GG, buys expensively good and unique trunks, some costumes;
- Doctor- located in the Swamps;
- Graph- located in the Bar in the corner in front of the Arena;
- Sidorovich
- Baker- located at the location of the peacekeepers;
- Lecturer- chief of the railroad, buys parts of monsters, artifacts, sells artifacts at very high prices;
- antiquary- trades in rare but working weapons, ammunition, also exchanges for 3 bottles of vodka 1 drum to the Colt "Python", which Noodles gives for refusing to kill him, will appear after talking first with Noodles, then with Borov, located in the Bar where Petrenko is in the Original.
Some merchants and characters can repair equipment. Here is a list of merchants and repairers:
- Mahon- cheap repairs, accumulates a large amount of money that can be used by selling him trunks and other swag;
- Paramedic- expensive repairs, money is also accumulating, you can sell swag for this amount before leaving Pripyat;
- Screw- expensive repairs, money is accumulated, the flamethrower is refueling - you need to have the flamethrower itself (discharged) a cylinder with colloidal gas, a canister of gasoline, two bottles of vodka and 10,000 rubles;
- Hog- repair is somewhat cheaper than that of Screw;
- Petrenko- does not deal with repairs but sells relatively cheap repair kits;
- Bartender
- Sidorovich- repair and sale of repair kits is more expensive than Petrenko's;
- Sakharov- repair;
- Lefty- repair of the universal detector and fine-tuning of the gravity suit.
- Brown- colonel of peacekeepers, after cleaning the base from evil spirits, he gives as a reward a unique repair kit for quick weapon repair, each repair requires the "Medusa" artifact in the inventory. Repairs trunks with any degree of damage.
Frequently asked Questions
- I can't get into the cave (other hard-to-reach places) - use full crouch keys ctrl+shift , if you reassigned the keys - I advise you to reset the default settings and reassign without touching these keys.
- Decreased health, lack of first-aid kits - a large level of captured radiation, to see the level, press the key TAB - in the lower right corner, a counter window appears with the numbers of accumulated radiation, the scale shows whether the GG is in the radioactive zone or left it, the dosimeter must be on the belt, over 600 the health level quickly begins to decrease up to death. We correctly use and hang artifacts from radiation on the belt, with high levels of captured radiation, you can replay from earlier saves and try not to fall into areas of increased radiation. Using a single antirad reduces the level by 20-30 units, slightly reduces the level of health and requires jamming.
- Sees double, but health and radiation levels are normal - GG has not slept for a long time, it is undesirable to lay out a sleeping bag, it does not disappear during robberies, just like a dosimeter, it is sold by many merchants.
- Where is the decoder in the Sarcophagus on the assignment to shoot the burers - the decoder can also lie in an arbitrary place but not further than two rooms located one above the other on the lower level of the Sarcophagus.
- Can't find Solomon's canned food crate - a box with canned food in the Update can be located in any of the two grocery stores in an arbitrary place, look carefully, look into all nooks and crannies.
- Where to find the Informant folder - the folder for the Informant at the "Freedom" base in the Update can be located in various places, the places found so far are located along the railway tracks, we look into all secluded places, wagons, under beams and destroyed buildings.
- Where is the bag of grass for the Prince on AS - also in various places, Kruglov can put a mark on the bag with the exact location for two "Fireballs".
- Can't find three helmets for St. John's Wort - look into all the concrete rings, including the broken ones, if you still haven’t found them, then most likely they were picked up by the Phantoms that are standing there in ambush, search the corpses right away - then they will disappear.
- How to get to the courtyard of the factory on Yantar on the instructions of Caesar - Caesar gives a suit with good protection against radiation, put it on and hang art on the belt that removes radiation, inducing radiation is better to remove, be sure to remove ruby art - they are not just radioactive - but also accelerate the accumulation of radiation. The "Symbions" will be especially useful here - they add protection to the suit from radiation. We leave the swamp and the helicopter, we approach the border of the slope and the wall of the plant - here there will be a radiation barrier that must be overcome without stopping, save in case of a replay with a high level of captured radiation, then we go along the outer part of the location and go around the plant building from the north side, we go into the courtyard - poltergeists fly there, look for what we are looking for for Caesar and return back the same way, we also need to overcome the radiation barrier back.
- Can't get to the magician - we carefully read the dialogue with the Ghost, the teleport beyond the boundaries of the game part of the location is located on the garages, the reverse teleport is located near the garages from the outside.
- Weapon does not fire - a fuse is introduced in the Update - we switch with the "0" and "9" keys.
Actor setup. Written by Rekongstor.
Path to the required file: /userdata/savedgames/user_quicksave.dds/user_quicksave.sav
Open in Notepad++ in the top menu, click "Syntax" - "L" - "Lua"
max_item_mass = 50.0
And change the entire block ten lines below:
max_item_mass = 999 ; It is worth specifying values less than the max_walk_weight parameter (see above).
jump_speed = 60 ; Jump height. Do not include astronomical values. Ch. the hero will not fly into space anyway))
crouch_coef = 1 ; Crawl speed "very sitting" (Ctrl + Shift by default)
climb_coef = 2 ; Like crouching (Ctrl)
run_coef = 3 ; Normal run with console parameter "g_always_run" set to 1
sprint_coef = 4 ; sprint
run_back_coef = 3 ; run back
walk_back_coef = 2 ; walking backward with shift key
air_control_param = 1 ; flight control. Beneficial for high jump_speed values, as you can quickly move around the map
walk_accel = 17 ; unknown parameter
pickup_info_radius = 5 ;radius in which items' names are displayed when pressing the "F" key.
camera_height_factor = 0.85 ; defines the view height. Zoom in and the player will become visually taller
(already edited)
disp_base = 0 ;angle (in degrees) of bullet spread when the actor is standing still
disp_aim = 0
disp_vel_factor = 0 ;how much will the dispersion increase at a speed of 10 m/s (not necessarily when running)
disp_accel_factor = 0 ;another increase if the actor is running (+ speed)
disp_crouch_factor = 0 ;decrease if the actor is sitting
disp_crouch_no_acc_factor = 0 ;decrease if actor is sitting + no acceleration
To reduce the size of the sight, you can do this.
To increase survivability - change the value below.
burn_immunity = 0.0
strike_immunity = 0.0
shock_immunity = 0.0
wound_immunity = 0.0
radiation_immunity = 0.0
telepathic immunity = 0.0
chemical_burn_immunity = 0.0
explosion_immunity = 0.0
fire_wound_immunity = 0.0
And the setup for the better is like this:
satiety_v = 0 ; rate of decrease in satiety over time
radiation_v = 1 ;radiation decay rate
satiety_power_v = 1 ;Increasing strength as satiety decreases
satiety_health_v = 1 ;health increases as satiety decreases
satiety_critical = 0 ;Critical satiety value (as a percentage of 0..1) when health starts to decrease
radiation_health_v = 0 ;health reduction when exposed to radiation
morale_v = 1 ;morale recovery speed
psy_health_v = 1 ;psy health recovery rate
alcohol_v = -1
health_hit_part = 0 ;Percentage of hit spent on health drain
power_hit_part = 0 ;percentage of hit that goes into power drain
max_power_leak_speed = 0 ;accumulation of fatigue (max limit to which power is restored) per second of game time
max_walk_weight = 1000 ; The weight at which the player cannot move. You can specify any value.
bleeding_v = 0 ;blood loss at nominal wound per second
wound_incarnation_v = 1 ; wound healing rate
min_wound_size = 0 ;Minimum wound size after which it is considered healed
min_wound_size,satiety_v,satiety_power,satiety_health,satiety_critical,alcohol_v could be omitted if you need immortality
Let's build endurance...
Name the string "jump_power"
We change so that the player never gets tired, unless he puts 5 fireballs on himself))
jump_power = 0 ;decreased power with jump without regard to weight
jump_weight_power = 0 ;decreased jump power based on load weight, for max allowed weight
overweight_jump_k = 1 ;weight jump overload factor (multiplied by jump_weight_power)
stand_power = 0
walk_power = 0 ; power loss per second while walking without taking into account the weight of the burden
walk_weight_power = 0 ; power reduction per second while walking, taking into account the weight of the burden, for the maximum allowed weight
overweight_walk_k = 1 ; burden overload factor (multiplied by walk_weight_power)
accel_k = 1; running coefficient (multiplies walk_power, walk_weight_power)
sprint_k = 1 ;coefficient for "sprint" run (multiplies walk_power, walk_weight_power)
Values with the comment "coefficient" and values more than 1 (optional) are recommended to be changed to 1.
limping_health_begin = 0 ;health threshold below which the actor begins to limp
limping_health_end = 0;health threshold above which the actor stops limping
limping_power_begin = 0 ;threshold of power below which an actor begins to limp
limping_power_end = 0 ; power threshold above which an actor stops limping
cant_walk_power_begin = 0 ;power threshold below which an actor cannot move
cant_walk_power_end = 0 ; power threshold above which the actor will be able to move
cant_sprint_power_begin = 0 ;power threshold below which an actor cannot sprint
cant_sprint_power_end = 0 ; power threshold above which an actor can sprint