Crafts souvenirs from coins. DIY coin crafts
According to the ancient Chinese teachings of Feng Shui, a person's luck and well-being are positively influenced by the use of various signs of wealth. The money tree is called one of the most powerful symbols of attracting material wealth. At the same time, it is not at all necessary to buy a living plant and grow it for a long time. You can create a tree in the form of a painting from coins with your own hands. Such a wonderful craft will fill your home with positive energy of well-being and happiness, as well as bring prosperity.

Canvas for good luck
To make the painting you will need the following materials:
- photo frame, size is selected depending on the size of the tree;
- fabric for the main background, it is better to choose a denser one;
- paper napkins;
- glue;
- coins, all of the same denomination is selected, or they can be of different denominations;
- heat gun;
- acrylic paint, it is recommended to choose black and bronze;
- scissors;
- brush;
- marker or pencil;
- a small piece of foam rubber or sponge.
The master class consists of the following stages. First stage. First you need to carefully remove the glass from the frame and put it aside for a while. Place the cardboard base on the fabric and trace with a pencil. Cut out the fabric and apply a thick layer of glue onto the cardboard. Glue the fabric onto the cardboard and dry thoroughly. Now you can draw a sketch of the future tree.
While the fabric is drying, we don’t waste time, but prepare the coins for work. They need to be cleaned and degreased to make it easier to apply paint.

Second stage. Each napkin needs to be folded in half and cut to get long flats. Depending on the texture of the future tree, the strips are made from one to one and a half centimeters in size.
You can start twisting the bundles. Place a strip of napkin over a cup of cold water. She should be completely wet. Remove carefully so that the strip does not tear or lose its shape.
We hold the strip in the palm of one hand, and with the other we begin to slowly twist it into a tourniquet. The process is similar to creating “sausages” from plasticine. In this case, you should try to twist the tourniquet at approximately an angle of 45 degrees. You need to twist it as tightly as possible and, laying it out on a short distance from each other, let them dry well.


Third stage. To make it easier to work with flagella, you need to moisten them a little with water. You can use a flower sprayer. Next, take one flagellum, lubricate it well with glue and place it on a prepared base made of cardboard and fabric. A sketch of the tree will help you distribute the strands in the right direction. But it is worth remembering that you do not need to apply too much glue. Excess glue can degrade the appearance of the wood once it dries.

Fourth stage. To create thin branches of the tree crown, you can use a glue gun. Hot glue is applied along the contour of the branches of the sketch in thin strips. And while it has not yet hardened, we glue the coins. To create a more three-dimensional image, you can paste several layers of coins, placing them in random order. The number of layers and coins depends only on the wishes of the master. The “cobwebs” left on the tree after using a glue gun can be easily removed with a stiff brush. After this, the painting must be given time to dry completely.

The final stage. Now the elements of the picture, namely the trunk and crown, need to be primed. Using a piece of foam rubber, apply a layer of black acrylic paint to the entire tree. And again we leave it to dry. The tree trunk will have to be coated with black paint one or two more times. When dry, napkins can almost completely absorb the color.

Next, take bronze-colored acrylic paint and pour a little into a shallow container. We dip the sponge very slightly into the paint and easily, with the same effort, we go over the entire tree and background. If you are not sure that it will turn out well, it is better to first practice on a sheet of paper or a piece of fabric.

Instead of bronze acrylic paint, you can use silver or gold paint. You can try paint combinations on a different surface, this will help you choose the final option.
You can also choose spray paint rather than acrylic paint for your work. When painting with such paint, you should remember that when applying you need to hold the can at a distance of about 50 cm, and spray with smooth movements. If desired, the frame can be painted or decorated with coins. Then turn our picture frame over front side down, carefully place the glass. Secure the resulting picture with clamps to the frame.
The picture with the image of the money tree is ready!

Coins are a good material for making various DIY crafts. Strength and absolutely correct shape ensures this material is widely popular among real homemade ones. In addition, coins can have different sizes and shapes, which also provides opportunities for flight of fancy.
1) Probably the first thing that comes to mind when you hear the phrase “Crafts from coins” is coin tree. Making it yourself is not as difficult as it might seem at first glance. The main thing is to be sure that everything will work out for you. As they say: “The eyes fear, but the hands do.” First you need to choose the most brilliant coins from your wallet. Then you should drill small holes in the center of the round timber so that the wire can be threaded through them. The money tree fruits are ready. Now you need to weave a trunk and branches from ordinary (it’s better to take copper) wire. The trunk is thicker, the branches are thinner - everything is simple. Now you should hang fruits in the form of coins on the improvised branches. Such a tree is said to bring good luck and profit to the home.
2) To do box of coins You will need a lot of little things that will serve as a frame and a decorative element at the same time. There are two ways to make such a homemade product with your own hands. First, you can use a ready-made box as a frame, which you can simply cover with coins. But we will go the other way - we will completely make the craft from coins. You need to lay out the coins in towers, gluing them together. This way you will line the walls of the box. To lay out the bottom, you should glue one coin to another in the form of scales. I forgot to say that you can use regular super glue to attach coins to each other.
Glue the bottom to the walls and the frame is ready. Now all that remains is to make a lid for our box. Here you will still need a base - you can take an unnecessary lid from any box that is suitable in size, and simply cover it with coins. The craft is almost ready, now it needs to be lightly coated with gold paint and varnish. Brilliant work!
3) Frame of coins much easier to make than a shiny box. You need to cut out a rectangle with wide walls from durable cardboard. Only the dimensions of these walls (in thickness) should not be much larger than the dimensions of the coins, so that the frame does not turn out to be too heavy. Glue one coin to another like scales. The photo should be placed at the back of the frame. But if you want the photo to be able to be changed, you will have to make simple mechanism. For example, you can glue guide strips from the same cardboard.
4) And to make such a homemade product - coin ring, you need to be a true master of your craft. This is a real work of art (by the way, quite a worthwhile one). I can’t tell you HOW you can do this with your own hands because I’m unlikely to succeed even in something similar. But there is always something to strive for.))
According to the ancient Chinese teachings of Feng Shui, a person's luck and well-being are positively influenced by the use of various signs of wealth. The money tree is called one of the most powerful symbols of attracting material wealth. At the same time, it is not at all necessary to buy a living plant and grow it for a long time. You can create a tree in the form of a painting from coins with your own hands. Such a wonderful craft will fill your home with positive energy of well-being and happiness, as well as bring prosperity.
Canvas for good luck
To make the painting you will need the following materials:
- photo frame, size is selected depending on the size of the tree;
- fabric for the main background, it is better to choose a denser one;
- paper napkins;
- glue;
- coins, all of the same denomination is selected, or they can be of different denominations;
- heat gun;
- acrylic paint, it is recommended to choose black and bronze;
- scissors;
- brush;
- marker or pencil;
- a small piece of foam rubber or sponge.
The master class consists of the following stages. First stage. First you need to carefully remove the glass from the frame and put it aside for a while. Place the cardboard base on the fabric and trace with a pencil. Cut out the fabric and apply a thick layer of glue onto the cardboard. Glue the fabric onto the cardboard and dry thoroughly. Now you can draw a sketch of the future tree.
While the fabric is drying, we don’t waste time, but prepare the coins for work. They need to be cleaned and degreased to make it easier to apply paint.

Second stage. Each napkin needs to be folded in half and cut to get long flats. Depending on the texture of the future tree, the strips are made from one to one and a half centimeters in size.
You can start twisting the bundles. Place a strip of napkin over a cup of cold water. She should be completely wet. Remove carefully so that the strip does not tear or lose its shape.
We hold the strip in the palm of one hand, and with the other we begin to slowly twist it into a tourniquet. The process is similar to creating “sausages” from plasticine. In this case, you should try to twist the tourniquet at approximately an angle of 45 degrees. You need to twist it as tightly as possible and, placing it at a short distance from each other, let them dry well.


Third stage. To make it easier to work with flagella, you need to moisten them a little with water. You can use a flower sprayer. Next, take one flagellum, lubricate it well with glue and place it on a prepared base made of cardboard and fabric. A sketch of the tree will help you distribute the strands in the right direction. But it is worth remembering that you do not need to apply too much glue. Excess glue can degrade the appearance of the wood once it dries.

Fourth stage. To create thin branches of the tree crown, you can use a glue gun. Hot glue is applied along the contour of the branches of the sketch in thin strips. And while it has not yet hardened, we glue the coins. To create a more three-dimensional image, you can paste several layers of coins, placing them in random order. The number of layers and coins depends only on the wishes of the master. The “cobwebs” left on the tree after using a glue gun can be easily removed with a stiff brush. After this, the painting must be given time to dry completely.

The final stage. Now the elements of the picture, namely the trunk and crown, need to be primed. Using a piece of foam rubber, apply a layer of black acrylic paint to the entire tree. And again we leave it to dry. The tree trunk will have to be coated with black paint one or two more times. When dry, napkins can almost completely absorb the color.

Next, take bronze-colored acrylic paint and pour a little into a shallow container. We dip the sponge very slightly into the paint and easily, with the same effort, we go over the entire tree and background. If you are not sure that it will turn out well, it is better to first practice on a sheet of paper or a piece of fabric.

Instead of bronze acrylic paint, you can use silver or gold paint. You can try paint combinations on a different surface, this will help you choose the final option.
You can also choose spray paint rather than acrylic paint for your work. When painting with such paint, you should remember that when applying you need to hold the can at a distance of about 50 cm, and spray with smooth movements. If desired, the frame can be painted or decorated with coins. Then turn our picture frame face down and carefully place the glass. Secure the resulting picture with clamps to the frame.
The picture with the image of the money tree is ready!

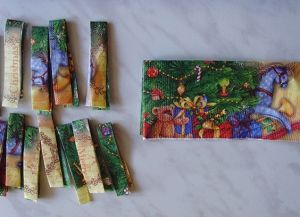
Below are several photos of tree options made from coins.
A thing made with your own hands radiates special energy, because the soul of the master is invested in it, his joy from creative work, and crafts made from coins also have the magical property of attracting money. However, this is not the only reason why pennies often become part of hand-made compositions.

Advantages of coins as a material for crafts:
- Availability (every home has little things);
- Durability of metal products (labor will not be in vain);
- The correct rounded shape makes it easier to make crafts with your own hands;
- The presence of several diameters expands the possibilities of use (fulfillment of plans);
- Variety of designs (embossing) and choice of colors (yellow and white).
The proposed ideas for “coin creativity” are easy to implement. You just need to stock up required quantity little things.


What can you make from pennies?
The simplest crafts require a glue gun, a base item and a sufficient amount of small items. The manufacturing method is simple: a clean surface is sequentially covered with coins.
By choosing coins of different denominations, you can achieve filling the entire area without gaps. The finishing elements can be placed flat or at an angle (that is, glue the coin with an edge).
Such crafts are good because you don’t need to drill or bend anything or cut metal.


Beautiful DIY coin crafts:
- Vase or flowerpot;
- Photo frame;
- Souvenir “money bottle”;
- Floating cup, money tap;
- Furniture decor;
- Topiary (horseshoe of happiness, hearts, balls).
The imagination of craftsmen is not limited to simply pasting finished objects. A trifle becomes full-fledged " building material"! The coins are stacked one on top of the other, forming cylinders. Walls are then built from coin columns. Crafts in the form of a ship, a castle, or a box are made using this method.


What can be done to ensure that the craft does not lose its spectacular appearance over time?
Experienced craftsmen cover coins with spray paint (silver or gold) and then with acrylic varnish in several layers. This item is easy to care for. It can be wiped with a damp cloth.
How to achieve a smooth surface? If the gaps between the pennies bother you, you can fill them with silicone. Moreover, it is not necessary to use a transparent composition.


Photo frame
We choose thicker cardboard and cut out a frame of the desired shape from it. The width of the frame should not be too large (a little larger than the diameter of the coins is enough) so that the product does not turn out to be too heavy.
Then we glue the pennies. Here everyone acts as their fantasy dictates. You can glue only a few coins in the corners or fill the entire surface with coins, choose coins that are absolutely identical in size and color, or create patterns from different elements.
We post the photo with reverse side framework. To make it easier to change photos, you can glue cardboard guides for the photo card.

Decorations
Coins have long been used to decorate clothes, make jewelry and talismans from them. Moreover, the money in the product did not lose its purchasing power. A bracelet or monisto could be exchanged for food.
Modern craftsmen drill holes in coins and connect them together with wires, forming chains (sometimes in several tiers). You can make a pendant, earrings, or bracelet from coins with a hole. In the latter case, pennies can be attached to a chain with small rings made of thin wire or connected by braided cord.
Making a ring is a little more difficult, but the craftsman is afraid, so nothing is impossible for a handy man.

money tree
Money trees have long been popular crafts made from coins. This symbol of prosperity makes a good gift or a good interior decoration.
To work you will need:
- Kopecks (it is better to use elements with a minimum diameter, in denominations of 1 or 10 kopecks);
- Thin wire;
- Stand;
- Thick wire or real tree branches;
- Acrylic paints;
- Plasticine or putty;
- Tools.

Manufacturing method:
- We make holes in the coins.
- We attach a tree formed from thick wire or branches to the stand.
- We cut the thin wire into pieces 10-20 centimeters long.
- We thread the wire into the hole of the coin, bend it in half and twist the free ends. It turns out to be a circle on a flexible stick.
- We connect individual blanks together in 3-5 pieces. We twist the wires. We form branches.
- We twist the resulting branches around the tree branches on the stand.
- We mask all flaws with putty. Let it dry.
- We paint the trunk and base with acrylic paints. Let it dry.
- Cover with varnish. It is better to use matte varnish for the barrel, and glossy for coins.
The money tree can not only stand on a stand, but also hang on the wall as a picture. To do this, glue the trunk and branches from any suitable material onto the selected base. These could be sticks and twigs found on a walk, rope or twine, plasticine or clay. We take whatever is at hand. We arrange coins artistically around the branches. You may have to cover the creation with a thin layer of acrylic paint (to even out the color) and apply shadows and add various decorative elements.

Panel
The basis for the panel can be a rectangular sheet of plywood or fiberboard. This method of storing travel souvenirs is much more convenient and effective than keeping “trophies” in bulk.
Designing a panel in the form of three-dimensional letters is as easy as shelling pears. We cut out symbols from plywood or cardboard (you can use thick foam or other convenient material) and glue coins of various denominations and sizes (currencies of different countries) onto droplets of hot glue.
 aluminum fork;

Manufacturing method:
- We bend the fork so that its teeth can catch on the edge of the saucer, and glue the cup to the handle in a horizontal position.
- We weigh down the base (glue a handful of coins one after another).
- We attach a fork to the saucer, and glue a cup to its end.
- We cover the fork with coins so that it is not visible.
- We cover the “stream” with several layers of varnish (the more, the better) to create the appearance of a water sheen.
Instead of a cup, you can glue a tap or a horn, the meaning of the original coin craft will not change.

Such gifts will have magical powers. They attract financial well-being. Money to money, penny to penny - the truth of these expressions has been confirmed by many years of practice. The shining object serves as a magnet for banknotes of different denominations. The symbol of an inexhaustible cash flow will be useful for both businessmen and housewives.
The post Crafts from coins: metal creativity (20 photos) appeared for the first time.
Is your piggy bank about to burst with coins? And there’s nowhere to put it, and it’s a pity to throw it away? Well, it's time to put your coins to work and make beautiful crafts from them. We have put together a selection of great ideas and step-by-step master classes for you. Today you will understand that it was not in vain that you saved coins all this time.
Can be used for crafts current coins, and those that have long gone out of use. Most often, craftsmen use 1, 5 or 10 kopecks. For jewelry (bracelets, necklaces, brooches, etc.) it is better to choose foreign coins, if you have them, they look more impressive with accessories.
How to drill a hole in a coin?
Let's answer this question at the very beginning, because it will be useful for many crafts. To make everything clear, we have found two short training videos for you.
If you have a drill, make a hole in the coin according to these instructions.
If you don’t have a drill, we will make a hole in the coin using a regular sewing needle.
You won't always need holes, but some of you will find them useful.
How to connect coins?
There are two options here. If you made holes in the coins, you will need wire or special jewelry rings. All this can be easily found in the creativity departments.
If you want to make a three-dimensional craft out of coins or paste them over any object, you need to glue them together. To do this, it is best to use a glue gun. It's convenient and reliable. If you don't have one, choose superglue that can hold metals in place.
Now let's get to the fun part. Take advantage of the master classes and get to work!
Bowl
Wash the coins in soapy water. It is best to keep them in liquid for several hours. Coins are quite dirty, and this craft will be used often. Next, dry the coins well.

We will need:
- plastic bowl;
- polyethylene;
- glue;
- coins.
Instead of a plate you can take balloon. True, in this case the craft may turn out a little askew and not entirely stable. The plate will most likely have to be thrown away, so take the unnecessary one. However, if you are very careful, it will survive.
Wrap the plate in plastic wrap. For reliability, you can secure it with tape. Start gluing the coins. Important point– glue them by the side edges. Don't worry if the glue bleeds a little; We'll sand it down later.
Leave the structure to dry for 4-5 hours. Then carefully remove it from the bowl and plastic. Take some fine sandpaper and carefully remove any excess glue. Cover the coins with ornamental varnish on top - for reliability.
3D star
You can place any other figure. The main thing is to have a stencil or draw the outline yourself. If you are making a star, you can put the number 23 with coins and use the panel as a gift for Defender of the Fatherland Day. You can make a gift for Valentine's Day in exactly the same way - just choose a heart as a stencil.

We will need:
- photo frame;
- velvet paper;
- stencil.
Insert velvet paper into the photo frame. Remove the glass - we won't need it. Draw a star. Lay out its outline in one layer. Then add another layer of coins. Gradually reduce their number, increase the volume.

In the same way you can lay out a flower or, for example, a Christmas tree. Imagine!
Mirror or frame
You can use coins to decorate a mirror or make a photo frame. This will add zest to the interior.

We will need:
- wooden or cardboard frame;
- ornamental varnish;
- sandpaper;
- acrylic (optional).
If you are making a frame from scratch, you will need to make a thick backing. To do this, use plywood. If you are decorating a finished one, then perhaps it should be sanded and painted so that the spaces between the coins look beautiful.
Simply lay the entire surface of the frame in an even layer or pattern. You can add a second layer to hide any gaps that occurred when you laid down the first batch of coins.
If desired, you can decorate the coins with metallic spray paint.
Feeder
Worried about birds? This means your coins can be used to decorate a bird feeder. The result will be a beautiful and useful craft.

We will need:
- finished house;
- plywood.
If you don't have a ready-made house, you'll have to make it from scratch. You can take a cardboard box and line it with plywood. The most important thing is that the roof is strong enough, otherwise it will not withstand the load of coins. Glue the coins in rows from bottom to top. It is better to lay the last row additionally.
We would not advise you to cover the roof with an ornamental varnish, as this may harm the birds. Only do this if you have a special non-toxic varnish.
Bracelet
If you have interesting coins from different countries, which you brought for good luck, it’s time to get them. Why keep such beauty in a piggy bank where no one can see it? And carrying them in your wallet is somehow boring. If you really want to attract luck and money, always keep coins with you - make a bracelet with your own hands.

We will need:
- metal rings;
- accessories for a bracelet.
Drill two holes on each side of the coin. If the rings are thin, do this with a needle. Fasten the rings and connect them to each other. Add a clip.
Now yours lucky coins will always be with you!
Vase
Coins are a great way to transform old home decor. Take a look at the vase decorating tutorial. Perhaps it will inspire you to redo something else.

We will need:
- vase;
- acrylic paints;
- ornamental varnish.
It is best to paint the vase in one tone. Acrylic fits perfectly on glass, so it is better to choose it. Next, we cover the entire surface of the product with coins. The gaps won't look unsightly if you painted the craft in advance.
An inexpensive set of acrylic paints can be ordered on AliExpress (check this link). Bright colors, excellent quality, high durability - a universal option for a wide variety of crafts.

Many people like to give money trees made from coins to their friends. Why not give a vase in which you can put beautiful twigs or flowers? The same money tree, only more interesting.
Letters
Typically, decor in the form of large letters is very popular with teenagers. So if you have a child school age, offer him this idea. Or decorate your entryway. And letters made from coins can also be a good gift.

We will need:
- letter stencils;
- cardboard or plywood;
- paints.
If you want to make letters on cardboard, choose the thickest one (the kind usually used for boxes). Letters can also be cut out of plywood, if you have such an opportunity.
You can take letter stencils from our selection - this way you will save your time. Next, simply paint the letters cut out from the template to hide the spaces between the coins. Fix the coins in one layer. If the material allows, you can lay out the second and third layers.
You can use this tutorial to make your own anniversary gift. Lay out the numbers from the coins, give the hero of the occasion such a “medal” - let it attract wealth.
Tray
Not sure how to decorate your homemade tray? Or do you need to hide a worn surface? Coins will come to the rescue again.

We will need:
- ready tray;
- coins;
- glass;
- dye.
If you are making the tray from scratch, you will need to sand and paint it. If this is a remake of a finished item, you can skip this step. Glue the coins to the bottom in any order. Or post a pattern.
Then the surface must be covered with glass that matches the size of the craft. If you don’t have glass, coat the craft with several layers of varnish. Do not leave coins just like that - the contact with food will be too close, and this should not be allowed.
Necklace
Here's another great way to keep coins for good luck and wealth with you. With just a little effort you can make a beautiful fashionable necklace. Massive accessories are now in trend, so it makes sense to master this craft.

We will need:
- accessories for necklace;
- hammer;
- rings.
Using a hammer, all the coins need to be slightly flattened. This will help remove the pattern from them, polish and thin them. Still, it’s not very nice to wear ten-kopeck coins around your neck, right?
Now make small holes in each coin. Insert metal rings and attach them to the fittings.
If you work well with a hammer, no one will even guess that you made your decoration from regular coins.
Table
Coins are used to lay out ceilings, floors and a wide variety of furniture. If you have a few thousand extra coins, you can do this. If your supplies are more modest, make a decorative table for the country house.

We will need:
- table;
- glass;
- coins.
We glue the coins with superglue or a glue gun. To make the process go faster, you can apply it not to the coins, but to the table surface itself. Move in small sections so that it does not have time to dry out.
It is best to choose a table that can be covered with glass. If you don't plan to put food on it, this is not at all necessary. You can also use varnish or coat the coins with spray paint - that is, use them only to create a beautiful relief.
If you liked these coin crafts, try to repeat any of them - it's not difficult. Bookmark this page or save the pictures for reference so you don't get confused in your steps. You can also create your own works, inspired by these ideas and guided by the attached instructions. We wish you good luck in your creativity!
Views: 10,170