Fallout 4 is a timidly strange device. Walkthrough DLC Automatron
Contrary to expectations, the first addition for Fallout 4 entitled Automatron turned out to be a waste of time and money. To be honest, this conclusion surprised us ourselves, given the initial submission of information about the package DLC For Fallout 4. What did we see there Automatron? Tales of mechanized companions and an advanced crafting system? Well, I beg you! And when, after the announcement of the add-on package Bethesda Softworks announced an imminent increase in prices for a season pass for Fallout, the situation began to look like a gamble.
All this reduced the degree of expectation, and in such a situation, many things can surprise. That's Automatron For Fallout 4 totally surprised. But let's talk about everything in order. Let's start with a little guide to Fallout 4 Automatron.
Start
The plot addition is tied to the mysterious Mechanist, who sends hostile robots to the Commonwealth. This character has previously appeared in Fallout 3. Also, the action of the first plot add-on is connected with the Robobrain, which is familiar to fans of the Fallout universe from almost every game in the series.
Quest "Mechanical Enemy"
So, the passage of the quest chain Automatron starts with the task "Mechanical Enemy", which automatically appears in the list. Listen to the radio signal on the pipboy and head to Watts Electronics ( Watt Electronics), north of the ruins of the Institute. There you will meet a new companion - the robot Adu, which activates the quest. Fulfill her first order, and she will give you access to a workbench, behind which you can create new robots. We will not prescribe the sequence of quests here, since this is not a walkthrough. Automatron For Fallout 4, however, we note that some tasks could be more serious and more significant.
The biggest disadvantage of the add-on is its length. Basically, this is a small update with several new missions. Some even compare it to nothing more than good side quest capable of diversifying the passage Fallout 4 by assembling a companion robot. The plot and ending are a little under-twisted, however, you can get pleasure from this DLC. After all, judging by the announcements, everyone expected only the appearance of new content without continuing the story. Yes, we got an addition for 2-3 hours of play, but the game is fun.
Exit Fallout 4 Automatron marked the beginning of the release of add-ons for your favorite game. Already in April, we will have new opportunities for the development of settlements in Wasteland Workshop, and in May in addition Far Harbor players will be able to travel from the Commonwealth to Maine, where the developers promise to provide more open spaces for research. Also very soon as free add-on Fallout 4 will add a Survival mode, plus we are waiting for new announcements DLC For Fallout 4 in 2016.
As soon as you enter the game after installing the Automatron add-on for Fallout 4, you will immediately activate the first quest of the Mechanical Enemy add-on.
Listen to the caravan's distress signal
Your Pip-Boy has received a distress call. Listen to the message. To do this, you need to: select the "Radio" tab in your Pip-Boy, and then activate the "Caravan Emergency Frequency".
The message says that the caravan was attacked by hostile robots just east of Watts Electronics. If you want to help them, then hurry up there.

Find a caravan
Watts Electronics is located north of the junction of Cambridge and Charlestown. When you arrive at the place, there will already be a fierce battle.
Destroy hostile robots
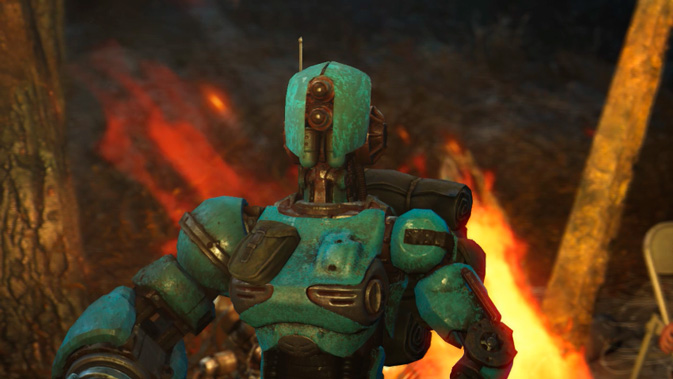
Meet new types of robots: cybernetic robotic eyes, flybots and that's just the beginning.

Reference
Examine the killed robots for modifications And repair kits for robots. The former will add new modification options to the robot workbench, while the latter is needed to repair robots that have been damaged in combat, similar to stimulants for human companions.
Talk to the robot
Of the entire caravan, only one robot, Ada, survived. You can ask her about the attack, oh hostile robots and about their Mechanist leader, she'll tell you all she knows.
Ada asks you to join her in the fight against the Mechanist, and in return she will give you blueprints for a workbench for robots, which allows you to create a huge number of modifications for them. The last time Ada and her friends from the caravan saw the Mechanist's robots was at the General Atomics plant, perhaps there you can get information that will lead you to him. From that moment on, the next quest "A New Threat" will become active.
Before setting out, collect what little remains of the caravan. Do not waste good.
Do not be too lazy to look into Watts Electronics, to the east of which you found a caravan. There you can get hold of some supplies, but you should beware of radroaches. The robots are not active, but if you accidentally turn on the demo mode in the basement terminal, you will have to fight with them too.

Classically, there is a first aid kit in the toilet. In the office on the second floor there is a chest with ammunition and weapons, as well as a safe that can be opened using the terminal. Climbing another ladder to the second level, you will find a small vault (the level of the castle is difficult) with a nuclear mini-charge in the safe for the "Fat Man" and a stealth-boy on the rack.
Now get down to the basement, you can through the gap in the floor or the stairs located behind one of the blue doors on the first floor. The door in the only room of the basement is opened using the terminal hanging nearby. In the corner of this room you will find a floor safe (the level of the lock is difficult).
Clue
In the basement, on a table near the terminal, you will find magazine "Total Hack" issue 2. It does not provide a magazine perk, but gives you a bonus as source code programs for cracking the protectron. You can read about all magazines.

Climb the stairs up and you can go in search of the Mechanist.
Locations to explore:
- Plant "General Atomics"
Explore the General Atomics plant
Ada said she saw Mechanist robots at General Atomics. Perhaps there you will find something that will lead you to the Mechanist.
Reach the General Atomics plant in South Boston. When you enter, do not relax, as you will be immediately greeted as an unwanted guest.

Look in the toilets in the reception area of General Atomics, located on the right side. There, you will find some medicaments and a Cherry Yader-Cola in one of the booths. Then go up to the second floor. Break open the door to the principal's office (the lock level is hard) if you wish. Inside you will find a General Atomics director's ID, which can be useful for completing the quest from the Miscellaneous section in the General Atomics Galleria shopping center.
Clue
Do not miss the office next to the director's office, as there is a magazine "Tesla Science" issue 8. With it, you will open a new perk, in which energy weapons deal 5% more critical damage, or, if this is not the first issue of this magazine, it will strengthen the existing perk. Full list magazines and their perks, see .

Now you need to get into another wing of the second floor. It can be done:
- After walking along the broken balcony from the director's office to the next door, but it's not so easy;
- Hacking the terminal (level - easy) on the first floor in the workshop adjacent to the reception, and going to the stairs at the opposite wall;
- Using a ladder in the same workshop. By the way, climbing this ladder to the upper level, you can find some ammunition.
One way or another, a locked cell with hostile robots awaits you on the second floor. Unfortunately, killing them through the bars will not work, so use the terminal to unlock the door.

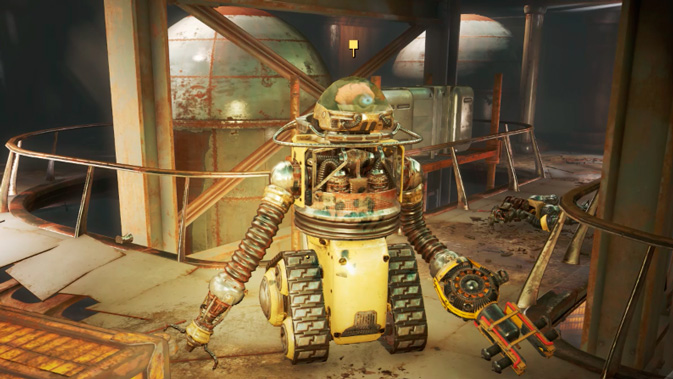
After opening the door, rush into battle. The most dangerous and powerful robot is the robotic brain, but that's exactly what you need. Destroy all robots.
Search the robot brain
After the fight is over, search the robin's brain for anything that will help you find the Mechanist. You will find a certain device of the Mechanist - for sure it will come in handy. Discuss it with Ada.
Talk to Ada
The Mechanist's device is a specially tuned direction finder with which he monitors robotic brains. Ada suggests installing this direction finder in her, using it in reverse side and thus determine the location of the Mechanist. But to install the direction finder, you will need a workbench for robots and, of course, Ada. Therefore, it is in your own interest not to part with it yet.

Look around here to the end if you're interested. In the chamber where the robots were locked, you will find a chest with ammunition and weapons. In the locked room on the second floor (the castle level is medium), you can stock up on medicines from the first-aid kit on the shelf and medicines from the nightstand, as well as get hold of a small amount of caps from the cache on the desk. And don't miss the wall safe (lock level is easy) between the bedside table and the desk.
Let's go out the other way. Go down the stairs to the first floor and open the door to the Quality Control Department using the QC Department terminal.

With the opening of the doors, you will hear an announcer, she mistook you for a robot of the Miss Nanny model and wants to check you on the quality of the services provided - this is a quest from the Miscellaneous section "Quality Assurance". How to open a General Atomics safe that requires a terminal? It will open only after completing this mini-quest as a reward. Use the terminal again and open the door next to the safe. Here you are at the exit, or rather near the toilets in the waiting room.
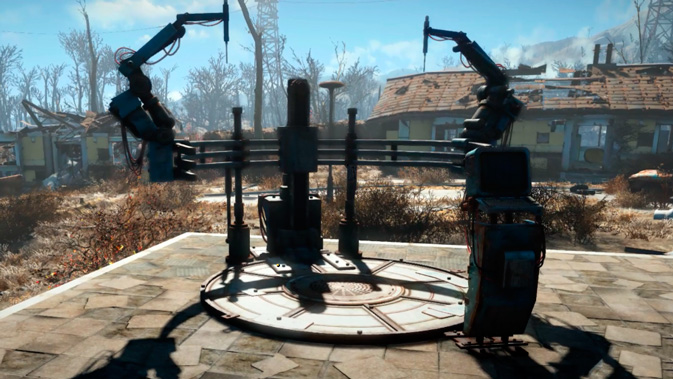
Build a workbench for robots
You will have one of your settlements marked on the Pip-Boy map, where you can build a workbench for robots using a workshop. You can see the basics of using the workshop.
The Robot Workbench is a very powerful tool for both building your own robots and modifying them. With its help, even the most inexperienced "engineer" will be able to create the most complex robots.
To create a workbench for robots, you need to select the "Special" group in the workshop menu.
Reference
To build a workbench for robots, you will need:
- Gears: 6
- Oil: 4
- Bolt: 4
- Plastic: 4
- Aluminum: 12
- Fiberglass: 6
- Wiring: 3
- Nuclear material: 4
Talk to Ada
Tell Ada that you are ready to install the direction finder.
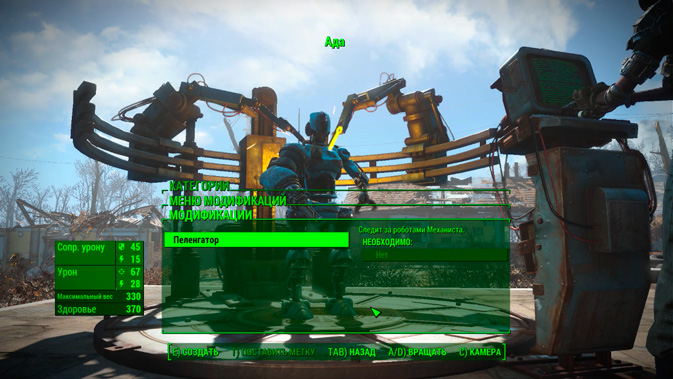
Set direction finder on Ada
To install a direction finder on Ada you need:
- Go to the workbench terminal and press [E] to use it;
- Select the robot you will work with. In this case it is Ada;
- In the "Categories" menu, select "Special Modifications";
- In the "Special Modifications" category, select "Direction Finder" and click to create it.
After the deed is done, talk to Ada again.
Talk to Ada
The equipment was successfully installed and Ada was able to pick up the encrypted signal, but she is unable to trace the source. If you find two more direction finders, then Ada will be able to decipher the signal. Luckily, she discovered the whereabouts of a couple more robo-brains. So the hunting season for robotic brains is open.
Locations to explore:
- Fort Hagen base satellite dish
This article provides console commands to unlock robot parts Automatron And Nuka World in Fallout 4.
Below we have listed the console command lines that will help you unlock the various parts for creating a robot in Fallout 4. The list shows the commands for both Automatron and Nuka-World. These commands should not cause any problems in your game, but we cannot give 100% guarantees.
How to unlock robot parts
The easiest way to unlock robot parts is to edit .bat in Fallout 4, what you need to do to do this:Create a plain text file .txt in the main Fallout 4 folder (where the .exe is, not the data folder where the mods are.) After that, name the file something so as not to lose it.
Copy all the lines you want to unblock into a text file.
After that, you will need to go into the game, open the console and type bat, and then, after a space, the name of the file that we created before. This way you call your text file.
Details of the robot Automatron
Below are the console commands to unlock parts robot Automatron in Fallout 4:
set co_DLC01Bot_Arm_Assaultron_Global to 1
set co_DLC01Bot_Arm_Protectron_Global to 1
set co_DLC01Bot_Arm_RoboBrain_Global to 1
set co_DLC01Bot_Arm_Sentry_Global to 1
set co_DLC01Bot_Hand_LightningGun_Global to 1
set co_DLC01Bot_Head_Assaultron_Global to 1
set co_DLC01Bot_Head_Protectron_Global to 1
set co_DLC01Bot_Head_RoboBrain_Global to 1
set co_DLC01Bot_Head_Sentry_Global to 1
set co_DLC01Bot_Legs_Assaultron_Global to 1
set co_DLC01Bot_Legs_Protectron_Global to 1
set co_DLC01Bot_Legs_RoboBrain_Global to 1
set co_DLC01Bot_Legs_Sentry_Global to 1
set co_DLC01Bot_Torso_Assaultron_Armor_Construction_Global to 1
set co_DLC01Bot_Torso_Assaultron_Armor_Wasteland_Global to 1
set co_DLC01Bot_Torso_Assaultron_Global to 1
set co_DLC01Bot_Torso_MrHandy_Armor_Construction_Global to 1
set co_DLC01Bot_Torso_MrHandy_Armor_Wasteland_Global to 1
set co_DLC01Bot_Torso_Protectron_Armor_Construction_Global to 1
set co_DLC01Bot_Torso_Protectron_Armor_Wasteland_Global to 1
set co_DLC01Bot_Torso_Protectron_Global to 1
set co_DLC01Bot_Torso_Robobrain_Armor_Construction_Global to 1
set co_DLC01Bot_Torso_Robobrain_Armor_Wasteland_Global to 1
set co_DLC01Bot_Torso_RoboBrain_Global to 1
set co_DLC01Bot_Torso_Sentry_Armor_Construction_Global to 1
set co_DLC01Bot_Torso_Sentry_Armor_Wasteland_Global to 1
set co_DLC01Bot_Torso_Sentry_Global to 1
Robot Parts Nuka-World Parts
Below are the console commands to unlock Nuka-World Parts in Fallout 4:Set co_DLC04Bot_Hand_Sentry_Autolaser_Global to 1
set co_DLC04Bot_Torso_Nukatron_Global to 1
set co_DLC04Bot_Torso_Nira_Global to 1
set co_DLC04Bot_Torso_MisterHandy_Armor_Global to 1
set co_DLC04Bot_Legs_Sentrybot_Global to 1
set co_DLC04Bot_Hand_Protectron_Weap_Lasergun01_Global to 1
set co_DLC04Bot_Hand_MrGutsy_Weap_Laser_Global to 1
Well, that's all, now you know how you can quickly assemble a robot in Fallout 4 If you know any other secrets, write about it in the comments.
The first addition for Fallout 4 called Automatron brought to the game several side quests and the ability to create and customize cool robots for your partners. Together with the complete walkthrough published on our website, detailed tips for Automatron will make up the most complete guide to date. Fallout 4.
Mechanical Enemy
To start passing Automatron Requires a character of at least level 15. In this case, you will immediately be able to take the Mechanical Enemy quest. This task is available in the pipboy menu. First of all, listen to the caravan's distress signal and go to the indicated place. Closest to this point is the Watts Electronics building. It was there that the caravan was attacked by robots, we will see the modification of individual representatives here for the first time. Deal with this issue locally. Alternatively, you can immediately upgrade the Robotics Expert ability and start using this skill. Use VATS and watch the beautiful destruction of aggressive pieces of iron.
Having dealt with the enemies, collect all the useful items and spare parts left during the battle at the collision site, after which you can chat with the Assaultron named Ada in a calm mode. She will offer the blueprints for the workbench for help in the fight against the Mechanist. Agree and go to the General Atomics plant. The Mechanical Enemy quest will be completed and you will receive a new task. In parallel with this, you can set up a workbench for robots and start by modifying the same Ada.
New threat
On the approaches to the General Atomics plant and directly on the spot, several aggressive opponents. Use a powerful cannon or melee weapon. At the factory, you will also encounter a large Quantum Robobrain robot. Defeating him is not so easy, he moves quickly and skillfully resists attacks. Remove the Mechanist Device from this defeated enemy.
Read also: Bobbleheads in Fallout 4 (guide)
Head hunter
Now you need to go to the Fort Hagen base station, clear the area there and pick up the first direction finder. The second is located in the area where the satellite dish is located. In the hangar, you need to go down and turn right. Be careful, there are traps and ambushes along the way.

Now you need to find Jezebel, who will ask for help. Talk to her, but be careful. As soon as you take Jezebel's head, a huge robot behind her will come to life and start moving. Use the grenade launcher.
In the same rooms you can find a Tesla rifle and power armor. You can get this by dealing with Ivy and his accomplices. Next, return to the workbench, create a body for Jezebel and use the brought head. When the robot is created, ask him about the Mechanist.
Putting things in order
Install the satellite module on Ada and go to the RobCo office. Get through Big hall with robots and get down to the level below. There, disable the turret using the terminal. Go further, fighting off the robots, exit to the tunnel with trolleys. Turn right there and go up the stairs. Look for the platform and move on it to the other end of the hall. Don't miss the weapon room with a lot of ammo.
After a short conversation with the Mechanist, his defenders will be set on you. Get ready, you have to repel several waves of robots in a row, and then confront the non-trivial Duelebot and again deal with ordinary robots. In the end, it will be possible to once again talk with the Mechanist. A well-pumped charisma can come in handy here. After obtaining the password from the central control, you can go upstairs and turn off the alarm, and then get the armor and helmet of the Mechanist.
Our companion Ada managed to decipher the signal of the last direction finder, the source is being tracked at the Robko sales and service center. It is possible that this center is just a screen for some big project. With the help of a workbench for robots, we equip Ada with a satellite module and go to the lair of the Mechanist - to the office of the Robko company.
Note
Before you go to the lair of the main DLC, you need to take care of your equipment, arm yourself with worthy weapons, replenish your ammunition and put on power armor to be sure.

We look at the coordinates of the center on our Pip-boy and go to the designated goal. Going inside a seemingly inconspicuous building, the Survivor discovers a strange device on the wall, which can be activated with the help of our companion.

A secret entrance with powerful bolts opens, and we find ourselves in the "holy of holies" - in the lair of the Mechanist. But we still need to get to it, ahead of us is the main door, which the supercomputer opens - thinking that the robot has arrived.
Note
If there is no desire to go through a corridor littered with traps, note that on the left in the room with a nuclear generator (do not forget about nuclear block) there is a secret passage that will help you bypass the traps.

Meanwhile, the Mechanist sends his mechanical offspring to us - robo-eyes, utility bots, tank bots, junk bots, fly bots and robotic brains.


We make our way deep into the shelter, activate the next access ports, simultaneously fighting off new waves of robotic destroyers.


Having reached the control room with a supercomputer, the Mechanist himself will meet us and ... call us a villain. Conversations will lead to nothing, and according to the head guard, righteous robots will be thrown at the Survivor in order to put an end to our tyrannical regime once and for all.

The main opponents in this battle will be servo-driven robotic eyes, they are poorly armored and do not do much damage, but they take a lot. Among other mechanical opponents there will be utilitybots and flybots, from which you should not expect any special troubles; cybernetic flybots are quite strong and armored opponents; turretbots that have a high armor rate and will pour lead on us; weak garbage robots; and the most serious opponent will be the duelebot, a well-armored and armed robot, which should not be allowed to get very close to you if you do not want to be fried with a flamethrower.


At the end of the fight, it will become clear that the power supply will be cut off, all the robots will turn off and this will be a good moment to try to have a heart-to-heart talk with the Mechanist, he will come down from his shelter ready to talk. We ask him to take off his helmet and in front of us is a girl named Isabel Cruz.
In a conversation, you can choose two options for the development of events: 1) open the eyes of the creator of robots; 2) destroy it. If you follow the first path, you can convince Isabel that a system failure has occurred among her creations, in which case she will give us her armor and Mechanist helmet and the password from the central control terminal, with which you can turn off the alarm.


According to the second option, you will have to deal with the girl and the robotic eye - Sparks. After the fight starts, Cruz will use the stealth fight and will scatter impulse mines everywhere. The best option, immediately after the end of the dialogue, will use V.A.T.S.om and inflict a critical shot on her, removing most of her health and finishing her off, and then deal with her mechanical assistant. We take away from the body the armor and helmet of the Mechanist, the password from the terminal and unique weapon"The Protectron's View". We approach the central control terminal and turn off the alarm.

Note
If Isabel survives, she decides to atone for her guilt by staying in the shelter, and from time to time gives us a job, reporting on the remaining distraught robots. When Isabel is killed, Ada will indicate the location of the crazy robots.
Note
Isabel will give the code to the ammunition depot, which is located in one of the premises of the building, and is closed to a very complex terminal. There is also one of the collectible models of robots.