Tips for playing Stalker Call of Pripyat. Secrets of Stalker
Amendments for those who want to complete the game in .
In the configs\creatures\actor.ltx file we change the values:
Max_item_mass = 1000
jump_speed = 20.
max_walk_weight = 1000
In the configs\system.ltx file we change the values:
Max_weight = 1000
Where can I find the tools?
There are 6 tool boxes in total, two of each type, that is, 3 for each master. On Zaton, one is at the sawmill (rough), the second is at the substation with mercenaries (precise). There they ask you to eat - if you don’t want to kill anyone for nothing, then take a couple of loaves of bread, a couple of sausages and canned food. Jupiter. On the territory of the plant, from the southwestern entrance, there is a small building (accurate), a train that stands under the bridge, in which electra flies along the cars (rough).
Pripyat. Two calibration kits. The first is the old KBO building on the second floor, where a little man will show you where the tools are. And the second one is in a department store, or rather, under the department store.
A couple of tips for the stalker. In Skadovsk we take the task from the bartender to disrupt the deal between the debtors and the bandits (to do this, we had to play against the bandits before). Having found Morgan's PDA, keep it with you until the second location. There you can sell it for 4000 to the leader of the debt + access to a warehouse with weapons. And when the Svoboda people go to recapture the warehouse, the stalker in the yellow exoskeleton will have a Veles detector. On the bridge, in the east of Zaton, there is a bunch of weapons in the equipment, and in the box in the Gazik there is documentation that can be sold. Found some cool hiding places in the second location. 1st near "Jupiter". There is a bunker in the southwest of the plant. Near it there are several brick “walls”. The top of one of them was destroyed. It contains a "Thunder" with cartridges. 2nd – opposite the entrance to Yanov’s building there is a house. Near its side wall there is a booth, inside of which there is a brand new box with optics and cartridges.
If you want cool weapon at the beginning of the game, that means you go to the “Burnt Farm” location. There are two partially burnt houses on the farm. There is a burnt bed inside one of the houses. It is on this house, on the roof, that Vintorez lies. Good luck!
At the "Ashes" Anomaly location you can find an unmanned reconnaissance aircraft. To do this, go to the location as you came - go further north, and you will see the same scout. From it you can pull out a reconnaissance module, which can be decrypted by a technician at Yanov Station, it will cost you a pretty penny, but after decryption, several caches will be marked on your PDA.
How to climb onto the plateau to search the fallen helicopter?
- Only through the anomaly in the burnt village. It is possible to do this through a cave filled with snorks, but through the village it is easier.
Vintorez in the first minutes of the game.
- Burnt village - on the second floor of the building.
What to do with the compasses taken from Noah?
- One compass will be needed for the quest. Upon completion of "Tempting Business" for Beard.
Where can I get the Veles detector?
- 1)Given for completing a task about bloodsuckers.
2) You can find it at the Pripyat location, namely, remove a zombie from a cold corpse (it depends on your luck).
Where to look for OASIS?
- You can get to the Oasis this way: If you walk along the railway road south towards the tunnel, on the left there will be a room with zombies, through which you will get to the Oasis. More details - location Jupiter, ventilation complex. To get there, you need to solve a puzzle with columns, go through them in a certain order - it’s easy, I think anyone can do it (to the west of the ventilation shafts like a railway station. That’s where the entrance to the mines is).
Quest "Bloodsuckers".
-We take it from Capercaillie in Skadovsk. We follow him according to the sign, after which, having discovered a dead bloodsucker, we go down with Capercaillie to the basement, where we can find a cloud of sleeping bloodsuckers, and also collect a decent amount of swag - first behind the bars, right along the corridor, look at the killed stalker - IL-86, artifact Night Star - 4800 rubles, "Bear", then a bunch of grenades under the bars, as well as a funny sausage warehouse right next to one of the sleeping flukes; and if you don’t jump over the pit at the very end of the dungeon, you can find a bottle of Hercules. Next, we report everything to Beard, he sends us to Sych, who gives us information for 2000 that on the bridge there is a lost convoy of military men with an abundance of swag, among which there are important documents, as well as a cylinder with poisonous gas. We go to the Preobrazhensky Bridge, but in order to avoid the tedious work of walking around the anomalies, we climb up the stairs from under the bridge. We take the key and documents from the UAZ, go up and carefully through the pipe we pass the rest of the anomalies. We search all the cars and find that we need 2 more keys. It is located in a fallen UAZ under the bridge, along with the remaining documents. We take all this, open the box, scoop up the cylinder and move towards the lair, or rather, towards the ventilation system. We install the cylinder, turn the valve and enjoy the dying squeals of the suckers for 2 seconds. After which you have to kill/run away from 2 angry creatures. Now we run and report everything to Beard, we get “Veles” and 5 pieces of wooden rubles. Don't forget to stop by Sych's to sell your documents. After that - attention! - we wait a couple of days or immediately go to the Port Cranes, where in a small utility room we find Comrade. Tremor, who, it turns out, killed stalkers in order to drink their blood. After a heartbreaking story, he shoots himself in the skull, and we go to report everything to Beard, receive our well-deserved 10 pieces and the “Detective” award.
Listen, how to find Snag? Search background. For those who have not played, DO NOT READ!
-In general, I helped Koryaga get his swag from the fallen Zaporozhets. They divided and went their separate ways. Then after a while I went to Shustrom and ordered assault rifle. Brought it, took it away. As I was about to leave Skadovsk, this Koryaga began to claim that this was his trunk. Well, he was sent on a soft erotic journey on foot. Well, he pulled me back to Shustrom to find out. But it turned out that Koryaga is still a yap. Well, a quest appeared - talk to him. I went down, but his trace was gone, so I pulled him to ask Beard, and he said that Snag had disappeared to the Port Cranes. Well, I'm going there. And there are bandits. And let’s pour it in, as if Koryaga promised swag from me. It didn't work out. Everyone died (I didn’t complete the Sultan’s quests). Well, I removed the PDA from the leader, and that was the end of it.
Where else can you find calibration tools?
-Another set can be found in the Department Store on the central avenue of Pripyat.
Where can I find the Svarog detector?
- “Svarog” is given for completing a quest with Sych with three Veles detectors. To be honest, I didn’t see anything special in it, except that it showed anomalies.
What is the order of passage of columns in "Oasis"?
-I finally understood the passage algorithm (at least that’s how I went through it).
1: we pass the anomaly 1 time;
2: we hear a strange sound and see rain - we walk into it either from one side or the other;
3: we see 2 rains, we do exactly the same as in the first point;
4: we see 3 rains - this is where I guessed - the rains are located, as it were, in opposite directions, i.e. they are like clones of the first two rains. We go through the first two rains, and then we stand at the end of the room, as if it were the beginning of the room, and remember how we went through the first rain.
5: 4 rains will appear, now: we pass the first 2 rains, as before, then we stand at the end of the room and pass the new 2 rains, like the old 2 rains (along the same trajectory), then we blow to
An anomaly, and it will no longer exist (I tested this method 3 times - all the time the rains were in different places, but they were always opposite to each other, which gave me an idea).
How to pass a minefield in front of a fallen helicopter?
-Throw the bolts. If the bolt hits a mine, there will be a click (there will be no explosion, but you will know exactly where not to go). And on the way back, all the mutants will destroy them!
Where are the calibration tools?
-In Pripyat, in the basement of a department store and in the old KBO upstairs.
Where are the tools for rough work?
-One of the places is in the basement of a gas station, in a broken Zaporozhets.
Where are the tools for fine work?
-In the attic of the warehouse (there's a lot of Electra there) next to the Jupiter plant. You need to go past the Concrete Bath anomaly.
How to get into the trailer with an electrical anomaly near Yanov?
-You need to jump from the bridge onto the locomotive and go to the end of the second car. There will be an open hatch there. Jump there. The tools are in the far left corner of the first car. The exit is in the far vestibule on the left.
Where and from whom can I repair a Gaus cannon?
-You pick it up on a quest from the Monoliths. And you carry it to Zaton to Cardan. Go to Skladovsk and chat with the mechanic. He'll pass out, you can wander around the neighborhood for a couple of hours until he sobers up. Then he will take the gun from you and give you the key card to the testing workshop, it is near the helicopter that fell on the power plant. There will be zombies and a pseudo-giant inside. You can take a machine gun from zombie corpses, and there is also a cache at the entrance to the workshop. Inside the workshop you will need to crawl through the ventilation into a closed room and from there take documents on the gun. Then you need to go back to the mechanic and talk to him. If you return the key card to him, he will give you 3 first aid kits. After talking with him, you need to wait a couple of hours until he fixes the gun, then gives it to you, completely intact.
How to find the Joker?
-Next to the Sosnodub anomaly there will be a skeleton, next to it you will find a PDA and a Gas Mask - this is all that remains of the Joker.
How to help Monolithians?
-In the bar on Yanov there is a stalker nicknamed Flint (he tells stories that were not made by him, but by other people), so, in the first location there is a hunter, he gives the task to find Soroka (well, something like that), well
so Flint is that Magpie. You must complete St. John's wort's quests, the scientists' quests (more precisely, find the Oasis). After this, Flint will start telling stories again, we approach him and say that he is blabbering. After the conversation, we go to Loki (the leader of the Svoboda people), he says that he will check (the quest is considered completed, and Svoboda is friendly to you), after that we tell Loki about the Monoliths - and that’s it, the quest with the Monoliths is completed.
From the very beginning of the game, go to the Zharka anomaly, help the free stalker there (give a first aid kit), and he will give you a level 2 “Bear” detector. At the beginning of the game it helps a lot with artifacts, and you’ll have money in your pocket.
3 "Veles" can be found in the village, next to the Cooling Tower (in an excavator).
Many kill Noah to remove 2 compasses. For what? It's better to take one, take it to Beard and come for the second one. I came, hiding from the ejection, and he, shouting that “he won’t save you from the ejection,” gave away the artifact.
There is a hiding place in the rocks near the gas station. It's easy to get in there, but the butt doesn't fit back. I recommend taking a pistol and firing a couple of volleys while still trying to get out. Sometimes you can get out. But it’s better not to go there at all.
At the barge at the very beginning, where you pick up the steering wheel, you can collect several pieces of art. To do this, you need to save the fool from the frying and scour the water with a new detector. Then, leaving the ship along the normal road, do not fall into the water between the ladder and some kind of box. There is the same bug as with stones. You can get out of it.
If you run around the map for a long time with a detector in your hand (no worse than Vales), you can find an “eye” or some other art in an open field. It is not clear where they come from, but they are common.
When helping Uncle Yar escape from the mercenaries, do not touch the zombies. They are great for diverting the fire when it gets hot.
Speaking of Snag. This wonderful person will fall into your hands after a while. The snag will arrive at the Yanov station, and then we will grab it. After a short skirmish, the reputation quest is considered completed. We, like real stalkers, go down to the basement to our personal box... and bang... and the box is empty, we ask the people “WHERE?”... the search leads us to a local doctor, and he, in turn, indicates where he went the thief, and moreover, says that the thief is our old friend Koryaga. Well, then we find Snag, and with it ours and his swag.
From the very beginning of the game you can find a good gun (Desert Eagle). Go to the Iron Forest anomaly, go to the Scat 2 helicopter, turn LEFT, there is a small building in the corner. We go into the room, and under the table there is a pistol and cartridges.
You can find a stalker named BARGE in the dungeons under a burnt out farm, near Skadovsk on Zaton. It is located in a large Hall, behind the stones, in which there are 2 wandering anomalies, in addition, you can jump directly into this Hall through the crevice on top of the cliff. Along with the Barge, you can grab his PDA, armor and Kalash.
When leaving the lair of the bloodsuckers, when you jump into the tunnel, go not where the Capercaillie is going, but in the other direction - there is a cache in which there are medicines and 2 drugs to survive the release.
If you give the PDA you got from Morgan to freedom leader Loki, you will also gain access to the warehouse, but if you then give Loki and the documents from the Jupiter plant, then the Hawaiian merchant will have unique items.
I recommend that when you first visit the Ark, you immediately kill Noah. You will still get to the plateau to the helicopter by taking its PDA, and plus, you can remove 2 “Compass” artifacts from the corpse (50,000 rubles from each when sold).
Tool locations:
Backwater
Tools for rough work are located in the attic of a residential building in the Sawmill area.
Tools for fine work are located on the territory of the "Substation Workshops".
Jupiter
Tools for rough work are located in the last car of the train, which is in the center of the Jupiter location.
Tools for fine work are located on the second floor of the western building of the Jupiter plant.
Pripyat
Calibration tools are located in two places:
1. In the basement of the Department Store.
2. In the Old KBO, 2nd floor.
Remember the mission where you are offered to pick up a chest of things from Zaporozhets? If you want to keep all its contents, you need to take it from the car and take the equipment to Skadovsk, and for only 500 rubles he will break the lock on the chest. It contains first aid kits, an improved pistol, a Kalash and a steel helmet.
Go through a minefield on a helipad without getting hit by a mine: hug the net and walk slowly.
In order not to waste huge clips on destroying the burer, get close to him so that he cannot do anything to you, and cut with a knife (five blows was enough for me).
You can kill a chimera easily; stab it in the head and it will collapse.
When approaching the helipad, you can bypass the minefield - press against the net (on the right) and slowly walk forward; when the wild boars run, jump on the UAZ, and they will not cause you any harm.
In the tunnel leading to Pripyat, in the place where the door is de-energized, if you explore the area, you can find a second “SEVA” in a box.
Enormous responsibility lies on the shoulders of an SBU officer and the protagonist of the game, a major who by chance became a stalker in the vastness of the Zone. He is given a clear task: to find the missing helicopters and find out the reasons for their crash.
His first steps with an old AKM and a small supply of food lead him to the outskirts of Zaton, where he immediately meets a lone stalker. From a conversation with him, the major learns about the nearest camp, where he can find out at least something about the missing helicopters.
Get to Skadovsk
In fact, it’s difficult to call this quest a task. Rather, it is a hint on where to go for information and where you can top up your food supplies and ammunition, fortunately in the game “Stalker: Call of Pripyat” weapons are not such a rare case. After Degtyarev gets to Skadovsk, you will need to find a bartender who will give you a key task.
Glow source on the Dredger
A group of stalkers came across a strange glow for the Zone on the Dredge, and you, as a new and impartial person, are asked to understand the situation and give your assessment of what is happening. The bartender warns in advance that a strong source of radiation has been spotted at the facility.
After the bartender’s warning that later in the game “Stalker: Call of Pripyat”, passing the Dredge will expose us to severe radiation, you should stock up on “Rad Anti-Rad” and first aid kits. Once you reach the glow, you will see several ways to get to the Dredge: through a pipe that is located behind the object, or along bridges located directly in front of the glow.

After you get to the captain's bridge, you will see that an artifact is hanging on the helm (this is the source strange glow). When leaving the Dredge, you will be met by a group of stalkers, and one of them will ask you to give him an artifact in order to heal a wounded comrade (in fact, this is a trick that he uses to lure out the item, so the only correct solution is to shoot him between the eyes and further brawl with the rest of the group).
Near the glow you can find Stalker's secrets. “Call of Pripyat” suggests that, in addition to deadly anomalies, there may be very useful things there. By moving circles on the water you can determine the location of a valuable artifact (the location changes with each release).
The reward for completing it is as follows: coordinates of the cache and 3,000 rubles.
Inaccessible container and stalker Snag
A stalker nicknamed Koryaga found some good swag, but an earthquake prevented him from taking it, which hid the artifact underground along with the Cossack, where it was kept. And on top of that, snork mutants have appeared in the area. The task is to pick up the swag and share it with Koryaga, but only the stalker himself decides whether to talk about the find to his employer or not.
“Call of Pripyat”: mission walkthrough
In order to get to the Zaporozhets, you need to penetrate the fissure indicated on the map and then get out. Along the way, you will meet a few, but extremely dangerous and unpleasant snork creatures, which are best dealt with with a shotgun.
Once the container and you are in a safe place, you are faced with a dilemma: share the swag with Snag or keep it all for yourself. The artifacts in the container and your decision about what to do with the Snag will not affect the further passage of the game “Stalker: Call of Pripyat”, so you can do as you please.
If you decide to keep everything for yourself, then you need to take the container to the repairman, and for 500 rubles he will open it for you, otherwise, by sharing it with the stalker, you will receive options to choose from: a medical kit, a helmet or an artifact.
After you exit the rift near the “Claw” anomaly, you can find the secrets of the Stalker (“Call of Pripyat”) by combing the area with a detector in search of interesting and useful artifacts.
SKAT-5 crash site
One of your priority tasks is to search for fallen helicopters. SKAT-5 lies near the exit from the Krug VNZ tunnels, approximately in the middle of the Slough anomaly.

In order to safely get to the helicopter, it is better to use bolts (button 6), otherwise you will encounter unpleasant and dangerous anomalies. After you search the helicopter and the nearby crate, you will receive supplies and a key cutscene will also play.
On the way back in the game “Stalker: Call of Pripyat”, caches can be found on the Burnt Farm, in the main building. Where there are many anomalies, you need to climb the stairs, and in the far corner of the attic lies a rare “Vintar”.
SKAT-2 crash site
This is another priority target for the major in the Iron Forest location. Once you have reached the place, the only serious obstacle you will encounter is the local poltergeist.
The game “Stalker: Call of Pripyat” sent the major a very strong opponent, and in order to cope with the mutant poltergeist, it is necessary to aim not at flying objects, but at the monster itself - a bluish sphere, a little like an electric charge. It is better to fire closely: poltergeist touches do not affect health. The ideal weapon, as in the case of snorks, would be a shotgun.
Based on the information read from the on-board computer, we obtain maps of the area that can be deciphered by the local guide. With their help, he will create a new route and give you a significant discount on further “excursions” around the Zone.
Not far from the poltergeist’s habitat, you can find the secrets of the Stalker (“Call of Pripyat”) among numerous anomalies, where with the help of a detector it will be easy to detect very useful artifacts.
SKAT-3 crash site
The helicopter is located at the “Southern Plateau” location, where it is not so easy to get there on your own, so we need to find a guide in the person of the stalker Noah, who lives on the Old Barge.

The game "Stalker: Call of Pripyat" suggests several ways to complete this mission. In the first case, you need to find old man Noah, who will take you to the plateau. In the second case, you can use the dangerous passage near the Southern Plateau in the “Circus” anomaly, where there is a small passage into the snork caves, bypassing which you will find yourself in place.
After inspecting the helicopter, you will receive evacuation coordinates that need to be checked for further successful developments.
In the game "Stalker: Call of Pripyat" artifacts can be found by going deep inside the plateau and carefully working with the detector, after which you will find unique item, restoring health and reducing background radiation.
Tools for rough work
Technician Cardan needs tools to work; with them he can improve armor, weapons and other equipment.
So, where are the tools in Stalker (Call of Pripyat)? We stock up on weapons, ammunition, first aid kits and move to the Sawmill location. Along the way you will meet crowds of enemies, and before you get to the main building, you will have to spend a good part of the ammunition. Then you need to climb the stairs to the second floor, where large supplies of first aid kits, bandages, rare cartridges and a set of tools for rough work await you.
Tools for fine work
For the same master Cardan, you need to find a set of tools for fine work. The set is located in the “Substation Workshop” location. In order to get to the workshops, you need to go through a group of mercenaries. There are two options for the development of events: you give them six or seven cans of stew, and they let you through, or you walk over their corpses. The tools are at the end of a very long room on boxes.
In the game "Stalker: Call of Pripyat" caches can be found on the way to the workshops, and to other locations. In this place you will come across a long pipe that runs through almost the entire Zaton. To get the cache, you need to find a fallen pillar next to the pipe, and climb along it to the ledges, where the valuable prize is located on a concrete support.
"Jupiter"
Once you have reached Jupiter, you can replenish your supplies from a technician or seller “behind bars” and begin your mission.
Crash of SKAT-1
It is necessary to explore the surroundings of the Jupiter plant and look for the fallen SKAT-1 helicopter.
The entrance to the site with the helicopter is mined, and access to the facility is only possible along the fence. After you get to the helicopter, you need to pick up a black box near it, the information from which will need to be decrypted from a local technician.
After the master decodes the message from the black box, you will find out that all the military headed to evacuation point B28, that is, the option with B208 automatically disappears.
The secrets of Stalker (“Call of Pripyat”) cannot be discovered using a detector. He will help you find extremely useful artifacts and ammunition. In order to minimize health losses, it is best to move carefully and use bolts to probe the area.
Check point B205
You need to visit the location of the Volkhov air defense system to check the evacuation point for further developments in the game “Stalker: Call of Pripyat”.
The special forces that used to guard the facility now consist solely of zombies. Having broken through to the main building, you need to find a lighted table with a note from Lieutenant Sokolov, which indicates the combination to the locked door (you will need it in order to get to Pripyat).
In the game “Stalker: Call of Pripyat”, money can be found by going down to the Volkhov basement, where you will meet a serious opponent - the Burer, who is located in the large hall. After killing him, you can climb the stairs to the weapons room, where cabinets with ammunition and boxes with money are located.
SKAT-2 crash site
One of the SKAT helicopters fell on the territory of the Jupiter plant. The road to the site will be long and difficult.

You need to start from the northern entrance to the plant, gradually moving inward to the southern buildings. The map shows all the key locations and points of passage of the plant. Finding most of the necessary documents will not be difficult, but administrative documentation may pose problems.
In the main building of the plant you need to climb the concrete stairs and get through the tunnel into big hall, where SKAT-2 is located along with the watchman - Psi-Dog. After killing her and searching the helicopter, we go deeper into the building and find the control room, where the administrative documents necessary to enter Pripyat are located.
In the game "Stalker: Call of Pripyat" weapons can be found behind the garages, on the territory of the plant. This will be a very powerful rifle and ammunition for it. The garages are guarded by bandits, after killing whom you can get a bunch of first aid kits and ammunition in a secret place.
Point B28
The evacuation point will be available on the map only after you find the way to Pripyat at the Jupiter plant, where the documents make it clear that you can reach the goal through secret tunnels under the building.
If you have not yet found all the necessary documents, then Azoth will send you to search for them, but when you have the entire set, he will inform you that at least three soldiers with a closed respiratory protection system are needed for the trip.
It happens that Stalker “Call of Pripyat” version 1.0 does not show the location of the gathering of fighters near the station, so feel free to go to the nearby tower and talk to Zulu there, who will help you gather like-minded people into one team.
The ideal travel companion would be Wano, who would need to pay 5,000 for the suit and then send it to the Zulu. Lieutenant Sokolov can be found in the scientists' bunker. There is also a suit for him, which you will receive after completing the quest from Ozersky. We complete the task and also send Sokolov along with the suit to the Zulu.
A surviving Monolith named Tramp, who can be found north of the container warehouse, will agree to your adventure without any questions, since he has nothing much to lose, and the opportunity to get out of this place will not be superfluous for him. We talk to him, send him to Zulu, and the team is ready.
After you and your fellow travelers get into the tunnels, you will need to overcome a lot of anomalies and go through the barrier of the Monoliths. After clearing the area and entering the next zone through a reinforced concrete door, you will be met by a group of zombies, which also need to be eliminated (a shotgun will help) and get to the treasured stairs leading to Pripyat.
Sometimes the installed “Overlord” add-on for “Stalker: Call of Pripyat” may “not allow” you to go to the next location, so before going to the next area it is better to disable the mod, and then you can turn it on again.
Pripyat
After you come out into the daylight, you will be greeted by Commander Kowalski. After talking with him, go to the laundry, where the military camp is located.
Calibration Tools
The sooner you modify your weapons, the easier it will be to complete further quests.
After installing the add-ons, the game “Stalker: Call of Pripyat” (mods for weapons or ammunition will definitely come in handy) goes through much faster, but interest in the quests themselves is significantly lost, so it’s better to modify your arsenal yourself.
There are only two places in Pripyat where you can find calibration tools - a department store and an old KBO. Inside the department store, a flock of dogs and jerboas awaits you, past which you can find a room with yellow glass, where the necessary tools lie on a box behind the door.

In the old KBO, you will need to overcome a number of anomalies and, going up to the second floor, kill the burer, who is guarding the calibration kit. To modify weapons, you can give tools to Azoth or Cardan in Jupiter. Using special cheats for “Stalker: Call of Pripyat”, you can, as a result of modifications, get a powerful gauss cannon that kills opponents from a great distance, leaving them no chance of survival.
After completing the “Radio Interference” quest, where you need to get rid of the anomalous antenna, you can begin your main task.
Cause of helicopter crashes
A technician at a military camp detected a strange signal near the laundry, it is necessary to check it and find out its origin.
Once you arrive at the point, it becomes clear that the signal is dynamic, and its source is constantly moving. Further, upon returning to the base and after repelling the attack of the “unknowns”, it will become clear that the signal was transmitted by the legendary stalker Strelok, from whom you can find out the reasons for the helicopter crashes.
Evacuation
This last quest in the game "Stalker". After you have received all the necessary information from Strelok, the military has the opportunity to evacuate you.
When the release is over, you need to talk with Kowalski so that he can assemble a detachment that will help the remaining military evacuate. The major's goal is to protect Kowalski and Strelok, and in addition, it is desirable to protect the entire group.
The road to the evacuation point will be swarming with crowds of enemies: Monoliths, zombies, mutants and other evil spirits. In the last minutes of the game, you or the medic will be attacked by a controller, after fighting with whom you will find yourself on the roof next to the rescue evacuation helicopters.
Codes for "Stalker: Call of Pripyat"
The developers did not provide any codes in the game, and any combination you type will not give you “omnipotence.” In order to survive in the world of Pripyat, you need a slightly different, cunning approach to passing. Therefore, you can use the following cheats for “Stalker: Call of Pripyat”.
- If you want to earn a lot of money, then you can use next advice. In the process of passing you need to get the achievement “Mutant Hunter”. It gives a daily increase in ammo in your personal box. Sleep for two to three hours, then take the ammunition from the box and sell it. This action can be performed indefinitely, or until the threshold of your greed is reached.
The following codes for “Stalker: Call of Pripyat” will allow you to strengthen your weapon. But you need to be careful with these combinations, because they have a mirror property - what has strengthened for you will also strengthen for your opponent. But in any case, it makes sense to try, and then everyone will decide for themselves whether this is an acceptable option or not.
You need to find a file in the game folders with the name of the weapon you are interested in and open it with a simple text editor. The meanings of each item are quite clear, and if difficulties arise, you can use any English translator.
- For example, the cam_relax_speed = 4 item changes the speed at which the sight returns to its original shooting position after a shot. You can set the value to 0 and enjoy high-precision shooting.
- Next, another useful cheat regarding the distance to the target is fire_distance = 200. Set it to 1000 - and the distance is no longer a problem.
- Inv_weight = 1.5 changes the weight of your weapon, which is also very convenient when running and other situations. Just don’t set the value to zero, otherwise the weapon will simply disappear from the inventory.
Such simple cheats, although they do not give “omnipotence,” do allow you to cope with some difficult situations that arise during the game.
The game "Stalker: Call of Pripyat" was, is and will be one of the best. After all, it has everything a gamer needs: an excellent plot, many interesting quests, an indescribable atmosphere, a huge number of opponents and weapons to destroy them. So it’s not surprising that this game has been occupying a top position in the rankings for almost ten years. A lot has been written about the passage of the adventure, but in this review we will reveal all the secrets of “Stalker: Call of Pripyat”: about hiding places, rare weapons and much more.
Unmarked places on Zaton
Quite often, when passing the game, gamers receive tasks to find this or that item without a mark on the map. And the journey begins from one border of the map to another in search of a quest artifact or the right person. We have collected all the secrets of “Stalker: Call of Pripyat” so that you can avoid such problems.
The first mystery you will encounter as you progress through the game is the search for Cardan's comrades. This talented technician, who lives on Skadovsk, after a couple of bottles of vodka, will talk about his missing friends: Barge and Joker. And of course, you will need to find them. You will find the first missing one, the Barge, in a cave under the burnt village. You can find the corpse of the Joker in the area of the Sosnodub anomaly, in its northwestern part. For completing this quest, not much awaits you. a worthwhile reward in the game "Stalker: Call of Pripyat": armor and improved detector. But if you want a good ending in which Cardan survives, then be sure to take on this quest.

Backwater. Where to find tools in Stalker: Call of Pripyat
Of course, Cardan is a genius technician, capable of repairing or improving your weapons or armor. But his possibilities are not limitless, and to work he will need to obtain several sets of tools for rough and fine work. To search for the first item, you need to visit the “Sawmill”, located in the north-west of the map of the game “Stalker: Call of Pripyat”. Zaton is not the best safe place, so be careful. This location is infested with zombies and although they are not particularly “smart” opponents, their number (more than 20) can be a serious problem, especially for beginners. If you want to make the task easier, hire a group of stalkers that hangs around nearby. You will find a set of tools in the attic of one of the houses in the location. To do this, you are looking for a building with a staircase - there is only one of those here.

Backwater. Tools for fine work
We continue to explore the secret places of the game “Stalker: Call of Pripyat”. You will find tools for fine work in the “Substation Workshop” location. But getting into this area will not be so easy - these ruins have been chosen by a small group of mercenaries. And you can get here in two ways:
- Breakthrough with a fight. In this case, you will have to shoot the entire group of mercenaries, but keep in mind that the opponents are well armed and dangerous.
- Completing the task. The commander of the fighters will tell you about the lack of food, and if you bring him six units of any food, for example canned food, you will be able to easily enter the workshop territory.
Quest items on Jupiter
The next technician who will need tools for fine and rough work is Nitrogen. You will find this character on half of the Yanov station, owned by the Dolga group. Where can I find tools in Stalker: Call of Pripyat for this character? First of all, you should head southwest along railway. Near the bridge there is an abandoned train, inside of which the first set is hidden. It won't be difficult to get there - jump from the bridge onto the roof of the train and go into the outer carriage. But getting to the object will be much more difficult, because an electrical anomaly is raging inside, meeting which will not bring joy. So run from one passage to another and hide in the vestibules to wait out the “storm”.

Where can I find tools for fine work in Stalker: Call of Pripyat? To find them, you need to go to the southeast of the location, to the Jupiter plant. But what you need is not the building itself, but outbuildings. To get to them, go past the Concrete Bath anomaly and straight to the south gate. Next you are interested in the left building, going around which you will find a staircase. Climb up - inside there is a small room with a large number of electrical anomalies, and this place is one of the most dangerous in the Stalker: Pripyat Zone project. The tools are located near the opposite window, so use the detector to get to them.
Sets in Pripyat
The following similar secrets of the game “Stalker: Call of Pripyat” are hidden in the final location of the adventure. You will find the first set of tools in the building of the central department store. Be extremely careful: a fairly large flock of jerboas has settled inside, so before you go on a search, replenish your ammunition well. The item you need lies on the table in front of the basement entrance. Having picked it up, you can start looking for the next quest set in the game “Stalker: Call of Pripyat”.

Calibration tools are hidden on the territory of the old plant (KBO location). The first floor is quite safe, of course, if you avoid electrical anomalies, of which there are plenty here. You shouldn’t relax on the second floor, because the burer lives here. And this, as you know, is the most dangerous opponent in the game "Stalker: Call of Pripyat". Versions about how to deal with it are divided. Some people prefer to kill such an enemy with a knife, while others wait until the monster drops the kinetic barrier and shoot him with a firearms. And to unlock the next secrets of “Stalker: Call of Pripyat” you will have to defeat this enemy.
After the massacre, go into a small room located behind the central hall. This is where you will find the latest available set of tools. But these are not all the secrets of the game “Stalker: Call of Pripyat”, a walkthrough whose secrets we are analyzing.
How to destroy the lair of bloodsuckers
Completing this quest will bring you a lot of positive reputation among stalkers. In addition, for getting rid of bloodsuckers, you will receive more ammunition every day, which can be exchanged for money. Overall quite useful and interesting quest, which can be passed in two ways. The first is to go to the lair and try to shoot all the mutants. To complete this quest you will need a lot of ammunition and a more powerful shotgun. First, destroy the couple living near the entrance to the lair. After that, carefully go inside and quietly go to the first left corner. This place will become your point of defense. After this, wait until the Capercaillie leaves the room and start shooting monsters. The bloodsuckers will rush from side to side, but will not be able to get to you. After clearing the area, you can return to Beard for your reward.
The second method of destroying a lair takes longer, but is much more interesting. First of all, go to Sych and buy information about military gas from him. This purchase will cost two thousand, but thanks to the finds you will pay for it. After this, your path lies to the destroyed Preobrazhensky Bridge. You can find this location in the south of the map. This is where the abandoned convoy stands. In the back of one of the trucks you will find a locked box with gas, and to open it you will need to find two keys.
To search for them, you need to go to the bridge from the Lesnichestvo side, but this will not be so easy to do - there are many gravitational anomalies in this area. Arm yourself with a detector and bolts and carefully go through the danger zone, remembering to save. In the first free-standing car you will find a key and a couple of documents that you can sell to Sych and thereby recoup the costs of the “tip.” Carefully move along the right side of the bridge to the break. Below you will see an overturned car, and you need to carefully go down to it. Inside, in the hiding place, you will find the second key and documents.
Now you can pick up the gas and go with it to the lair of the bloodsuckers. On the right side of the building you will find ventilation equipment to which you need to screw the resulting cylinder. After this, a couple of monsters will run out of the building. After killing them, you can go to Beard for a reward - the quest is completed.
Strelok's Notes
This quest is one of the most interesting in the game “Stalker: Call of Pripyat”. Strelok's caches are not only well hidden, but also contain many useful things: weapons, armor, ammunition and artifacts. In addition, each cache has one of the notes that must be collected and given to this character in Pripyat. This will not only earn you the “Keeper of Secrets” achievement, but will also make the subsequent evacuation from this dangerous place much easier.
In total, there are three Strelka caches in the game, and all these secrets of the game “Stalker: Call of Pripyat” are located within the “Vicinities of Jupiter” location. So, before heading to Pripyat, it is better to search these secret places. You will find the first cache in an excavator standing near a sand pit. You can climb inside only by following the branches of a tree growing near it. Inside there are several acid anomalies and a treasured backpack, and in it there is a note to Fang, weapons and cartridges - all this will be useful in a further adventure in the game “Stalker: Call of Pripyat”, the passage (secrets) of which we are studying.
Strelok's next caches
To solve the next mystery you need to go to Cement plant. Going around the building on the left side and going down to the water, you will find a small niche with three ventilation passages. You can only get inside the open opening by bending down completely. There you will find a chest in which Strelok left his second cache.

The third cache is located on the territory of the Jupiter plant. In the northwest of the passage to the fallen helicopter there is a building with three tanks on the roof. Go to him and go down the stairs to the lower room. In the central part of the room, on the right wall, a small piece of pipe sticks out - it was this place that became the cache for the iconic character of the game “Stalker: Call of Pripyat”. The caches have been found, but not all the secrets have been discovered in this location, so let’s continue to study them.
Finding the Oasis
Most players have some difficulty completing this task. Finding the entrance to the Oasis is not that difficult, but what to do inside? After all, incorrectly passing sections with portals will endlessly chase you in circles. Everything is not as complicated as it seems, and with our tips you can discover these secrets of Stalker: Call of Pripyat. Having reached the room with columns, run around the room several times, trying not to fall under already active portals. This will allow you to activate the missing passages. After the four arches light up, run between them - and you will see the entrance to the Oasis, in which the desired artifact is located. After which all that remains is to deliver it to Ozersky and receive his reward.
How to get an exoskeleton
This type of enhanced armor can only be purchased in the official version of the game. So don’t expect to find an exoskeleton in the caches and caches of the game “Stalker: Call of Pripyat”. The armor can only be purchased and will be available only after your character earns more than 100 thousand rubles and receives the “Wealthy Client” achievement. Until this moment, you will not find an exoskeleton from any seller. Considering that this is a rather expensive purchase, which also requires expensive repairs, you will need a lot of money to maintain this suit.
There is one rather interesting way that allows you to get rich quickly. To do this, you must first complete the “Tempting Business” task. You will take this quest from Sych at Skadovsk. After this, you need to complete the tasks from Beard “Compass” and “Dark Business”. Moreover, regardless of whether you sided with the bandits or the stalkers, approximately a thousand rubles will be credited to your account every day. After that, go to the second floor of the ship and sleep until the amount you need accumulates. In addition, completing the quest to clear out the lair of bloodsuckers will bring you several packs of cartridges every day, which can be profitably sold to any merchant and thus collect the missing amount.
The best mods for "Stalker: Call of Pripyat"
It's no secret that the games in the S.T.A.L.K.E.R series have long become cult, and many players familiar with the basics of programming have created many add-ons and mods that bring novelty to the gameplay. The final part of the game series called “Stalker: Call of Pripyat” was no exception. Weapon mods, for example, Weapon Pack 2.0, will allow you to use a huge variety of weapons that are not available in the official version of the game. Here you can find:
- 15 types of pistols;
- 33 different assault rifles;
- 3 types of light machine gun;
- Several new improvements to standard weapons.
In this modification, nothing has been changed except the arsenal of the game “Stalker: Call of Pripyat”. Weapon mods most often allow you to explore the exclusion zone with new killer “guns” without changing the environment or the plot of the adventure. But there are also addons that radically change everything around. And we will talk about them further.

"Black Stalker"
The best mods for Stalker: Call of Pripyat are based on this addon, released in 2011. It's no secret that the first games in the S.T.A.L.K.E.R series were much more difficult and dangerous than the last part. And many hardcore fans considered “Call of Pripyat” a simple and safe “kindergarten”. But with the release of this modification, everything has changed, because now dangerous mutants and deadly anomalies await you at every step. In addition, the modification also increases the number of “two-legged” opponents, so now Zaton, Yanov and Pripyat are quite dangerous places. Although the plot of the game has remained virtually unchanged, the adventure in “Black Stalker” has sparkled with new colors. Playing at night is especially difficult, because with the onset of darkness, visibility decreases to almost zero. In general, if you are tired of playing the regular version and want something more difficult, but without changing the quests, then this modification will add some “thrill” to you.
Visual modifications
The game “Call of Pripyat” was released back in 2009, and of course, its graphics lag far behind current realities. But the interest in adventure in Chernobyl zone does not fade away, and many modifications are created that improve appearance games without affecting the main plot. One of these addons is “Stalker: Call of Pripyat - Spetsnaz”. In this modification you will practically not recognize the game, because now it includes the best graphics and gameplay packs, thanks to which the picture is no longer “square” and has become much more realistic. In addition, this modification contains many additional improvements in the form of new weapons and armor. The realism of using the detector is also impressive. These devices now have animation, which undoubtedly benefits the entire game.

Spawner mods
If you want to try yourself as a developer of the game “Stalker: Call of Pripyat”, the “Lord of the Zone” mod will give you this opportunity. This addon cannot be perceived as a full-fledged version of the adventure, but it is extremely useful for those who want to introduce something new into the passage or test the “strength” of the created modification. "Overlord" capabilities:
- acceleration or slowdown of game time;
- adding any amount of money;
- ejection call;
- weather change;
- moving to any point or location on the map;
- the main character receives any type of weapon, ammunition, or quest items;
- adding anomalies;
- construction of warehouses or buildings.
In general, thanks to this cheat addon, you can create new mod and check its functionality.
New story
Today there are many different modifications that radically change the whole storyline game "Stalker: Call of Pripyat". “Winter - Deserter” is one of these. In this atmospheric add-on, your hero will have to experience many new adventures. Moreover, as the name implies, all actions will take place in winter, and this will make even the most studied places and locations unrecognizable. Main addon changes:
- change in the main storyline;
- new weather: storms, blizzards, snowfalls;
- 46 additional quests;
- a huge number of new characters;
- visibility in the dark is zero;
- new HUD;
- new types of weapons, armor, medicines, devices, etc.;
- the ability to install a silencer on any weapon;
- changing the descriptions of all items;
- a new natural phenomenon - an eclipse;
- new secrets and hiding places;
- modernization of artifacts.
And this is far from full list all the updates and improvements that you can try in the “Winter” modification. In general, if you are a fan of the game “Call of Pripyat”, but want something new, then be sure to try this addon - your pleasure is guaranteed.

At the same time, remember that you should install such content only from trusted sources, because third-party programs often contain viruses and can cause irreparable harm to the entire system. So if you want to avoid unnecessary problems, then study the information about the modification, and also read the reviews of other gamers who downloaded this addon. This will significantly reduce the risk. Also, if you are installing a modification to a weapon or armor, see if it is compatible with your version of the game.
Be sure to take instructions on searching for artifacts
Elements of the on-screen HUD interface (mini-map, Geiger counter, health and armor scales) off/on. using the "-"/"+" keys respectively on the right numeric block of the keyboard. Note: do not forget about the "Num Look" key - on/off. digital block
In case of serious injury, first use bandages (1 - 3 pieces), treat after bleeding stops
Quests have no time limit for completion and receipt of payment - act as you wish
It is better to sell the products to a bartender rather than to a merchant - the profit will be higher
Maximum discounts - from the merchant and the guide of your group
The enemy, alas, does not react to the light of your flashlight
Be calm - your colleagues will not accidentally “catch” you in a busy firefight
Blue flash drives allow NPC mechanics to get acquainted with new technologies for improving weapons
Probably the longest company in the faction war awaits you when you join the Clear Sky faction - at the start it is the smallest
To join a clan, complete the task of its head
Console
(list of commands with description of functional meaning, recommendations for use)
Opening/closing the console is performed using the tilde (~) key, located under the Esc key.
Command input:[tilde][command][space][possible value]
The possible value can be on/off or a numeric value. In this case, fractional numbers when entered are separated by a period, not a comma!
Screenshot with an example of using the rs_stats on command (statistics display is enabled). 1st line - number of FPS
View a list of all available commands- help command
When entering a part console command you can use the key to scroll through similar commands and find the one you need
Screenshots
(Creating screenshots, storing them and possible topics)
Taking a screenshot - "F12" key
Screenshots are saved to the following addresses
For XP: C:\Documents and Settings\All Users\Documents\STALKER-STCS\screenshots
For Vista: C:\Users\Public\Documents\STALKER-STCS\screenshots
Knife
An effective melee weapon. Quietly (in a full crouch) you approach the victim from the back as close as possible (you won’t be able to get close to him - they will hear you) and make a throw, delivering a continuous series of blows upon contact. When performing a series, stay close to the victim all the time, do not allow the distance between you to break.
Note: Use to open boxes.
Pistol (submachine gun) with silencer
An effective short-range combat weapon. Allows you to single-handedly eliminate scattered small groups of opponents with maximum delay of general alarm in the enemy camp
Note: reloading your main weapon takes longer than abandoning it in favor of a pistol, which makes the pistol an important secondary weapon for non-stop fire
Shotgun
A universal weapon for short-range combat against people and monsters. Maximum efficiency is achieved at minimum distances. This requires the shooter to have “nerves of steel”, but guarantees the elimination of the target with one accurate hit
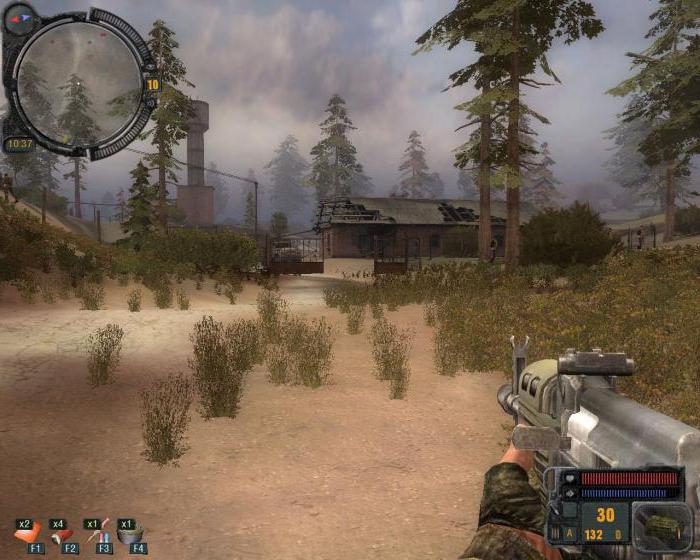
Automatic (assault rifle)
The most balanced type of weapon (together with an optical sight and an under-barrel grenade launcher) for any task
Note: for aimed fire at short distances, remove the optical sight
Sniper rifle
Maximum combat accuracy. Not effective at short distances. Lead is required when shooting at long distances at a moving target. The ideal use case is to remotely eliminate targets while maintaining the “anonymity” of the shooter
Note: if in a group of targets only one is facing you, eliminate it. With sufficient distance there is a high probability of remaining unnoticed
Machine gun
Unprecedented firepower. The ideal use case is to repel massive attacks. Not suitable for constant use - heavy and bulky
Important: recharge whenever possible